Build and access an RDS DB Server
Project Overview
This project is designed to reinforce the concept of leveraging an
AWS-managed database instance for solving relational database needs.
Amazon Relational Database Service (Amazon RDS) makes
it easy to set up, operate, and scale a relational database in the
cloud. It provides cost-efficient and resizable capacity while managing
time-consuming database administration tasks, which allows you to focus
on your applications and business. Amazon RDS provides you with six
familiar database engines to choose from: Amazon Aurora, Oracle,
Microsoft SQL Server, PostgreSQL, MySQL and MariaDB.
After completion, I was able to:
- Create an RDS instance
- Use the Amazon RDS Query Editor to query data.
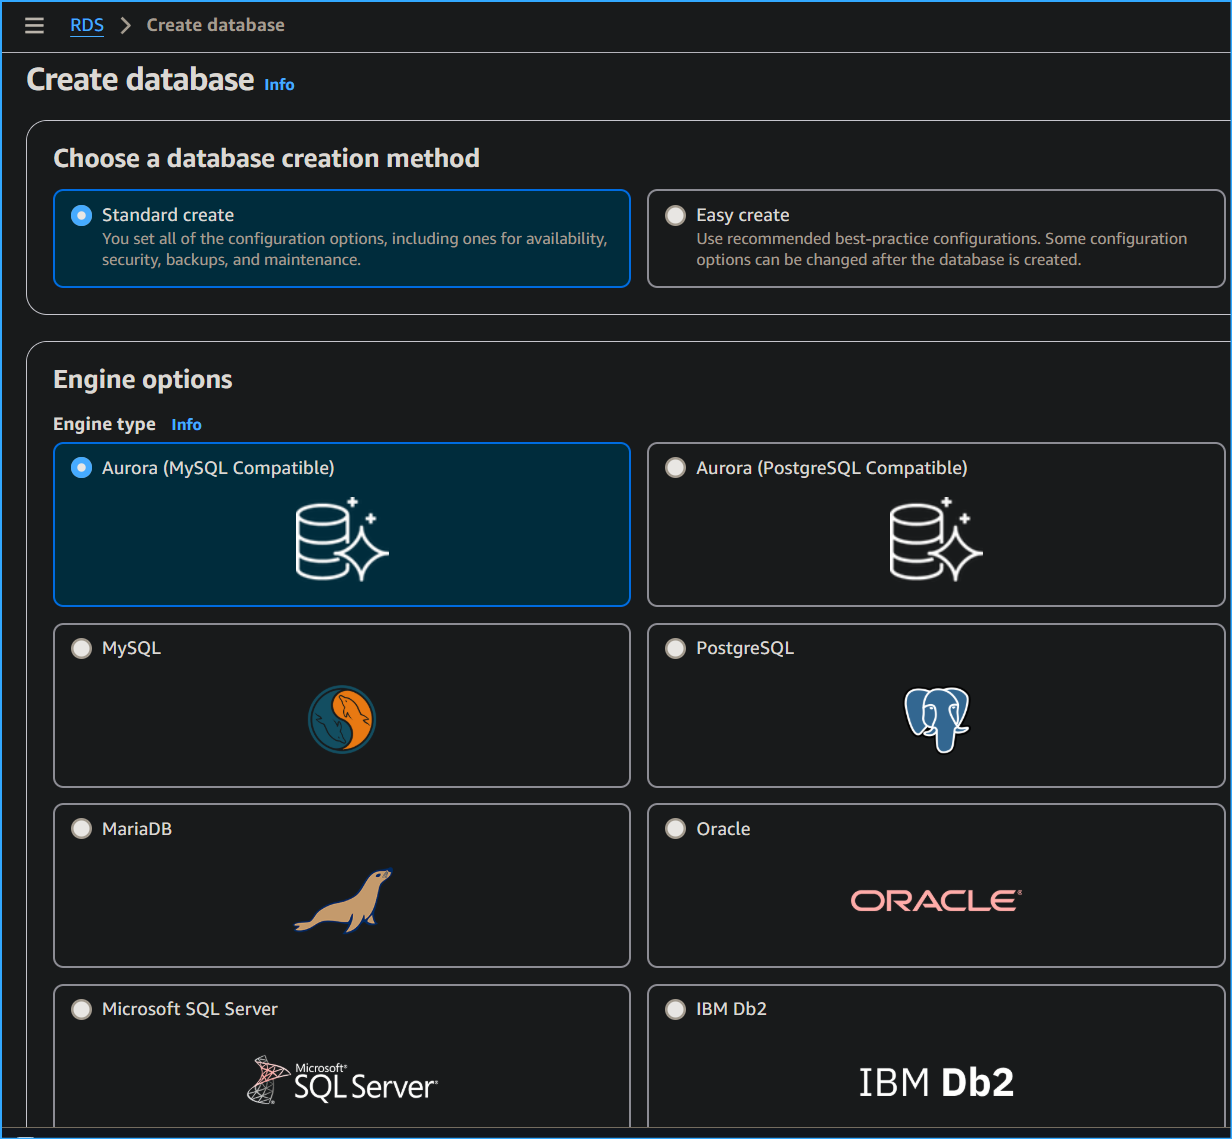
Step 1: Launching an Amazon RDS DB Instance
I logged into the AWS Management Console and navigated to the RDS
service. From there, I clicked on "Create database" to begin the setup
process.
I chose to use MySQL as the database engine since it was simpler for the
required tasks. I made sure to follow these requirements:
-
Database Engine: MySQL (Amazon Aurora could also be
used, but Aurora serverless was not available)
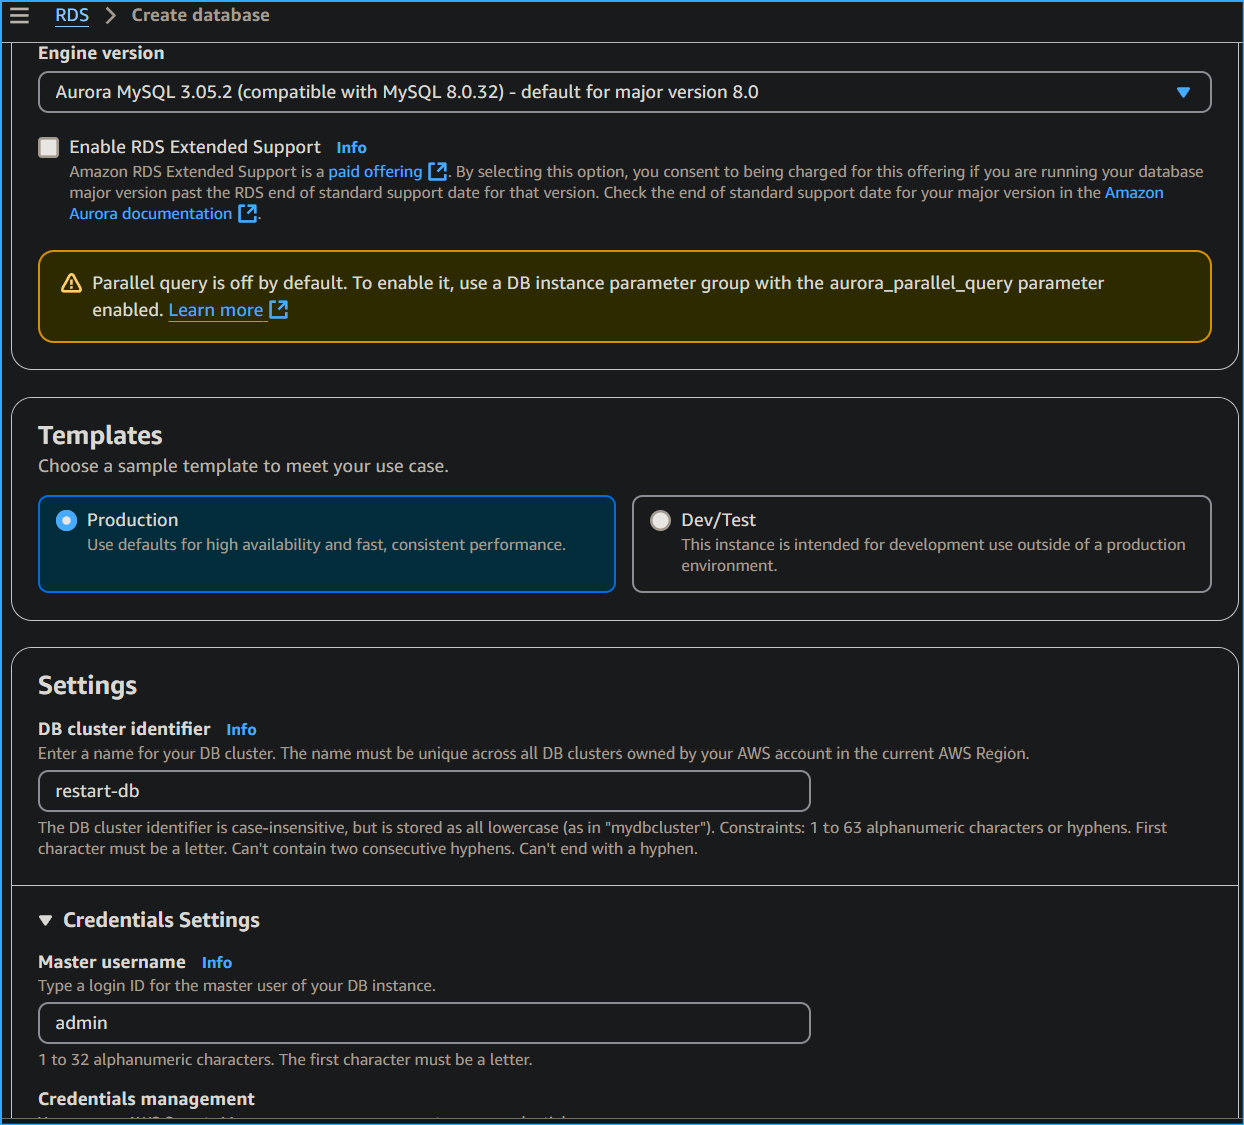
-
Template: I selected "Free tier" to minimize costs
-
DB instance identifier: I named it "restart-db" for
easy identification
-
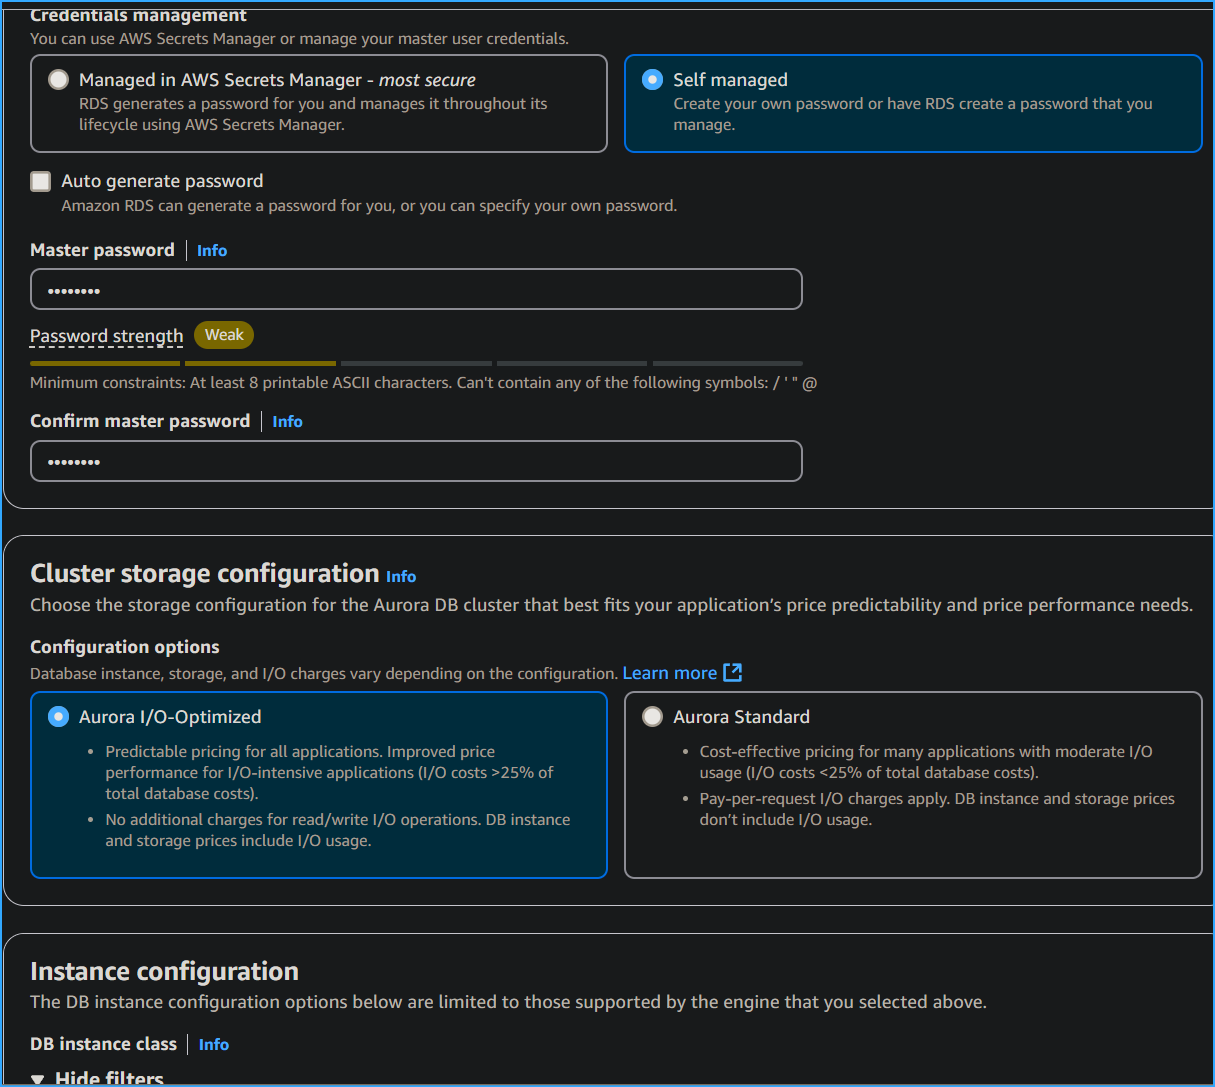
Credentials: Created and noted down master username
and password
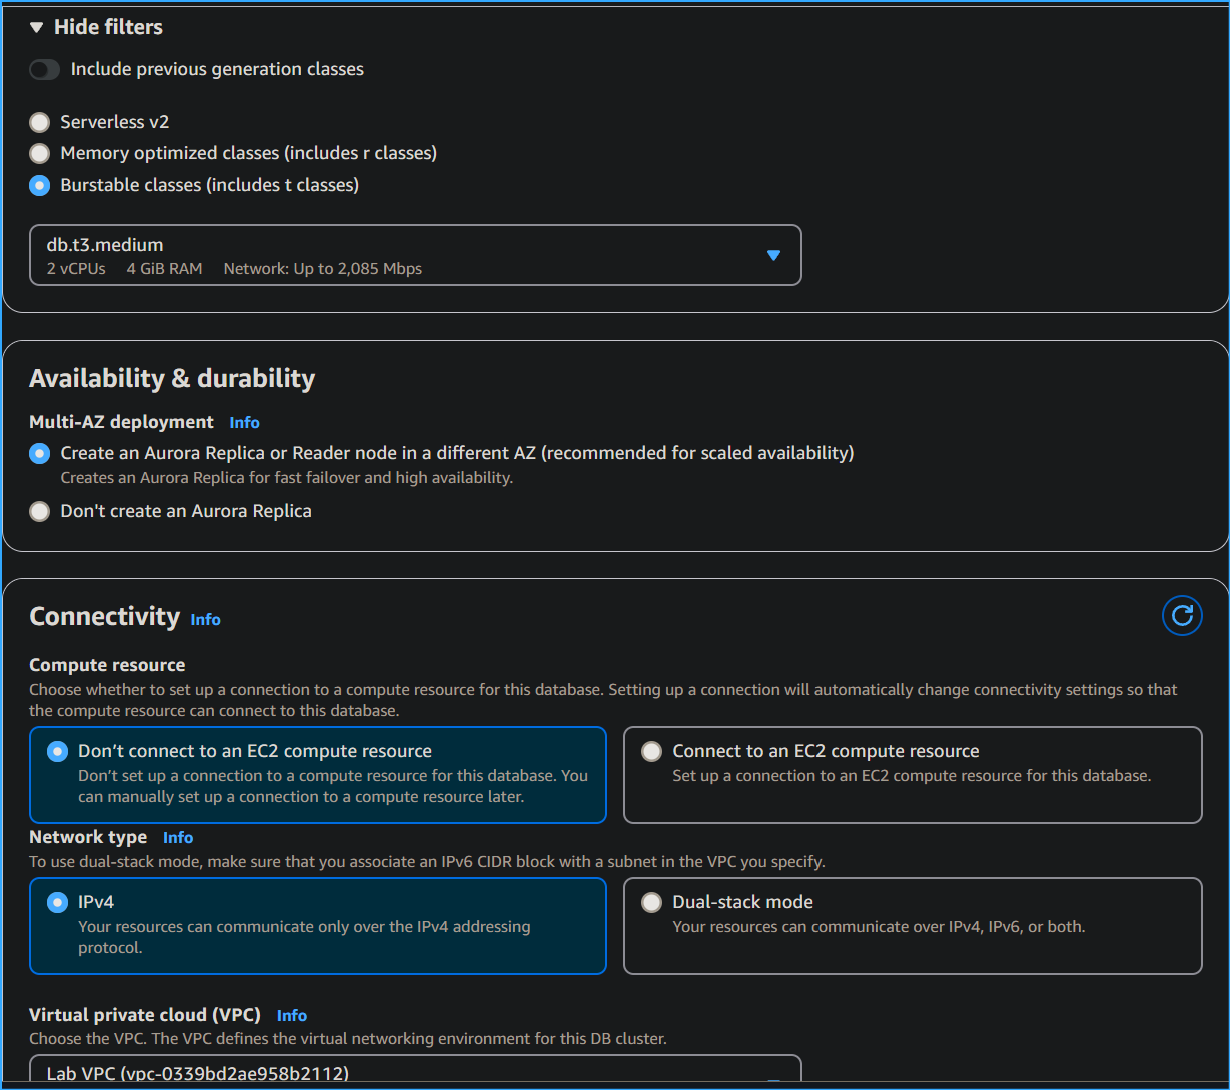
-
DB instance size: Selected db.t3.micro (a burstable
class within the allowed range)
-
Storage: General Purpose SSD (gp2), set to 20GB (well
under the 100GB limit)
-
Availability and durability: Didn't create a standby
instance as per environment restrictions
-
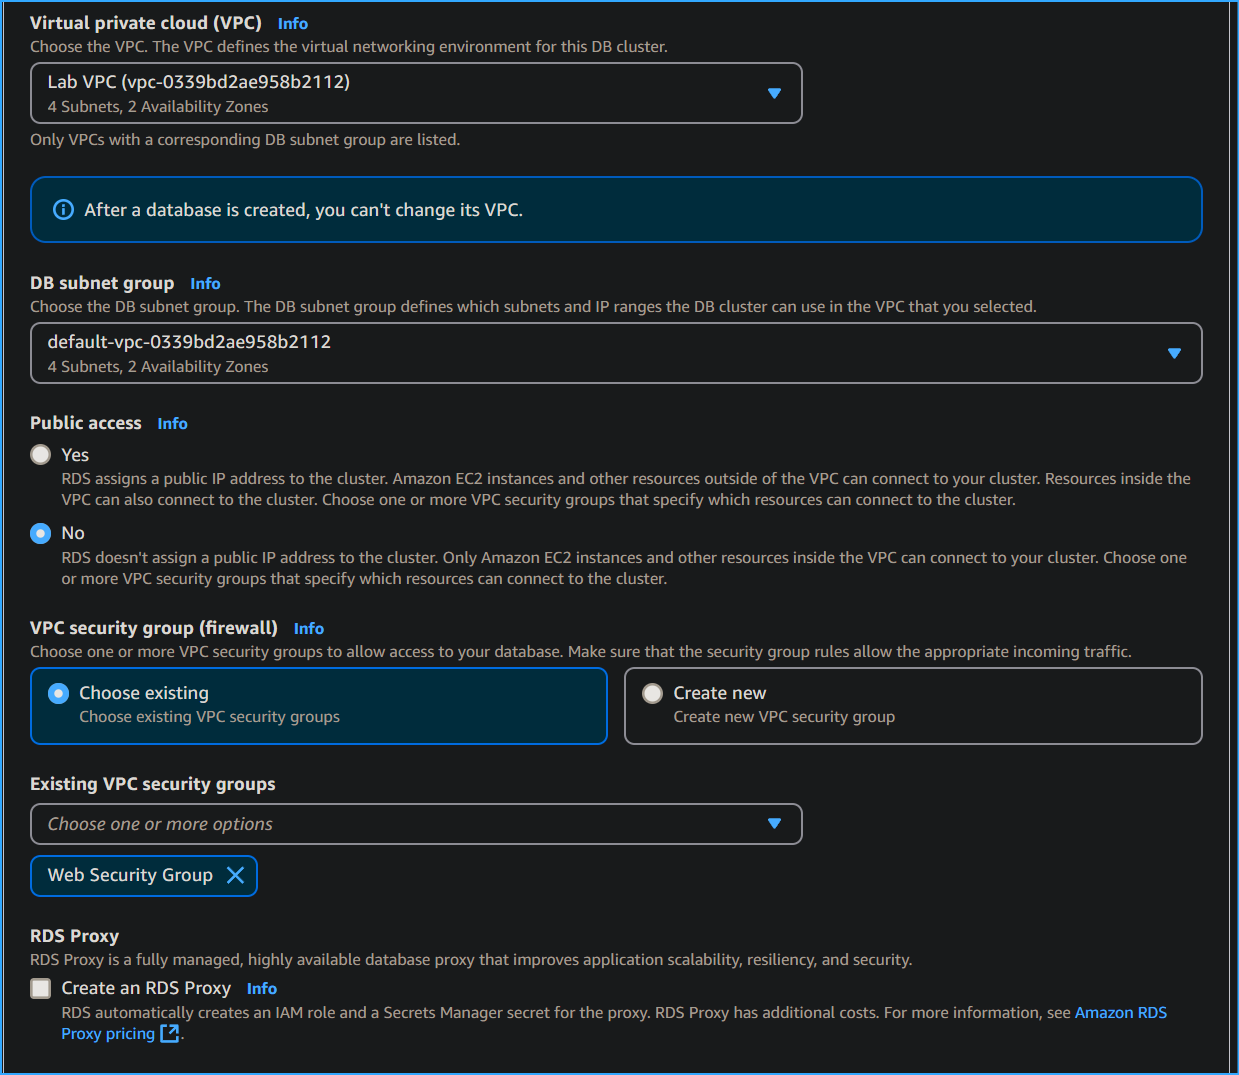
VPC: Selected "Lab VPC" from the dropdown as required
-
Security Group: Created a new security group allowing
inbound connection from the LinuxServer
-
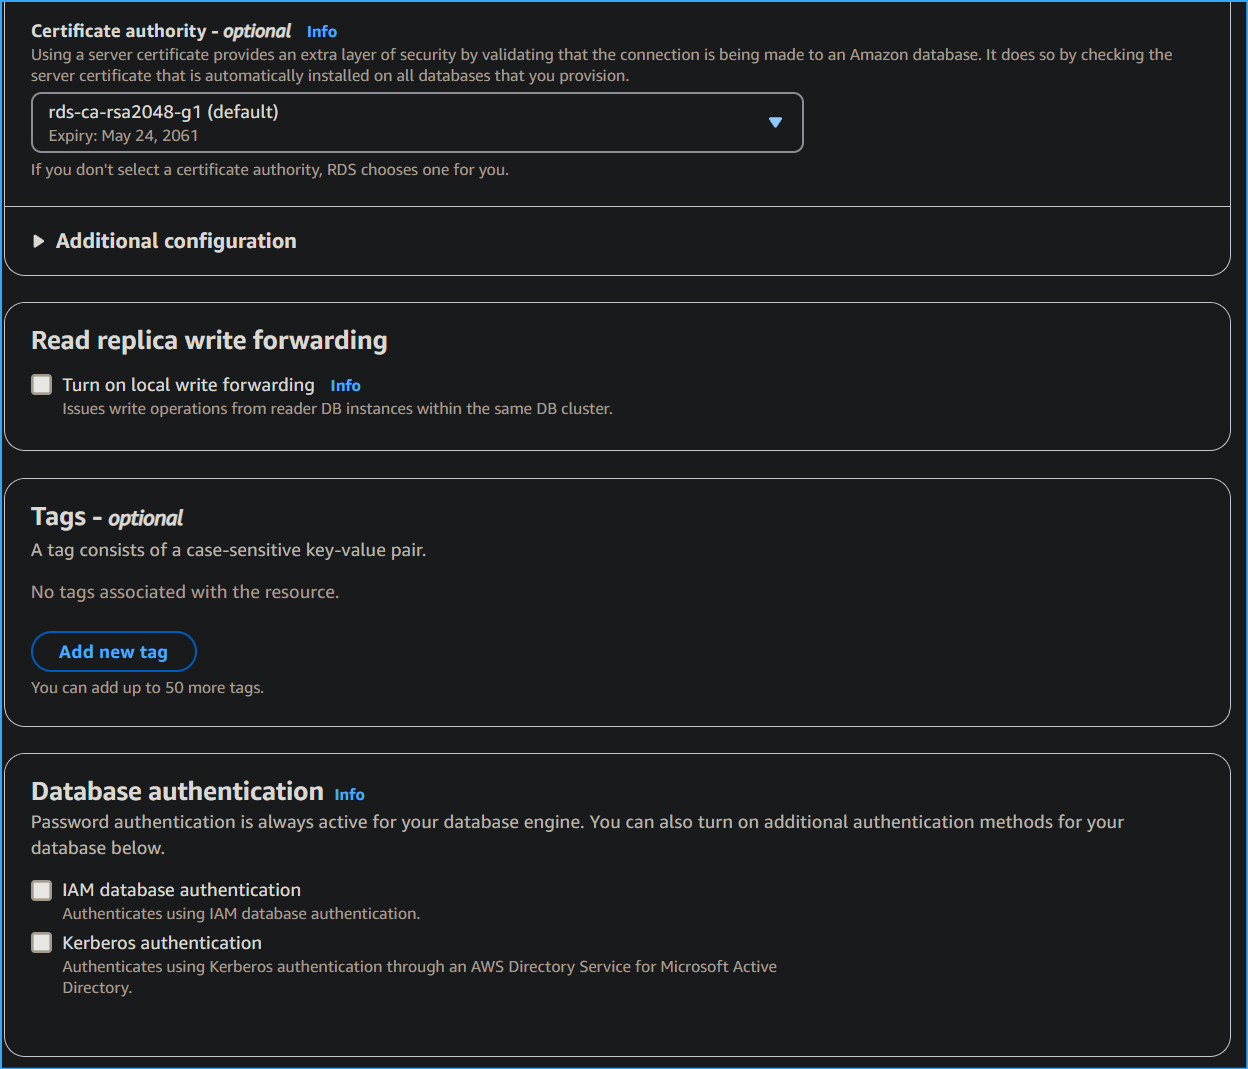
Enhanced monitoring: Disabled this option as
specified in the requirements
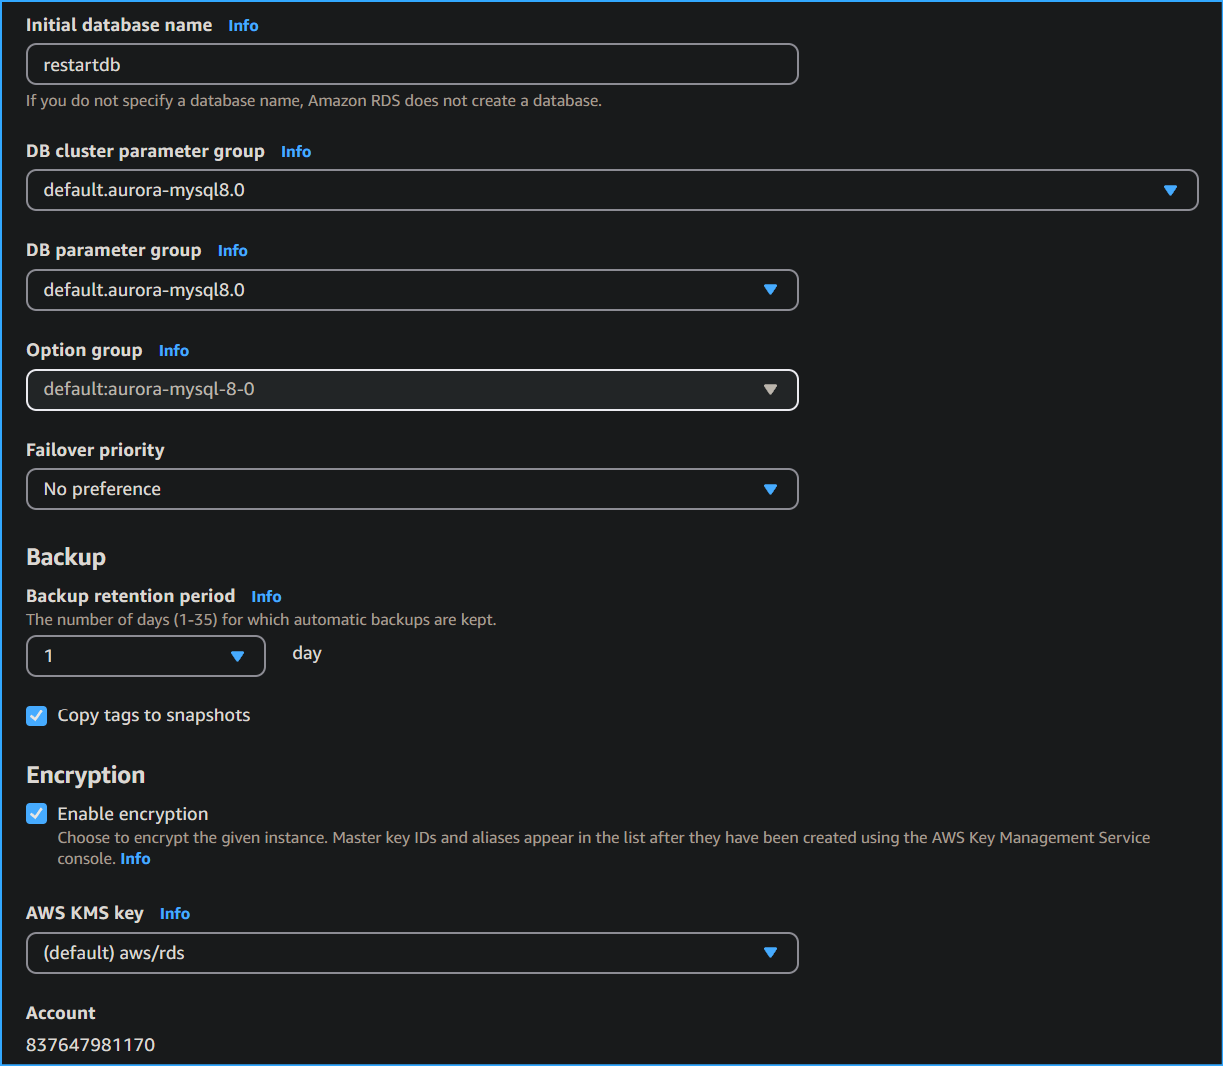
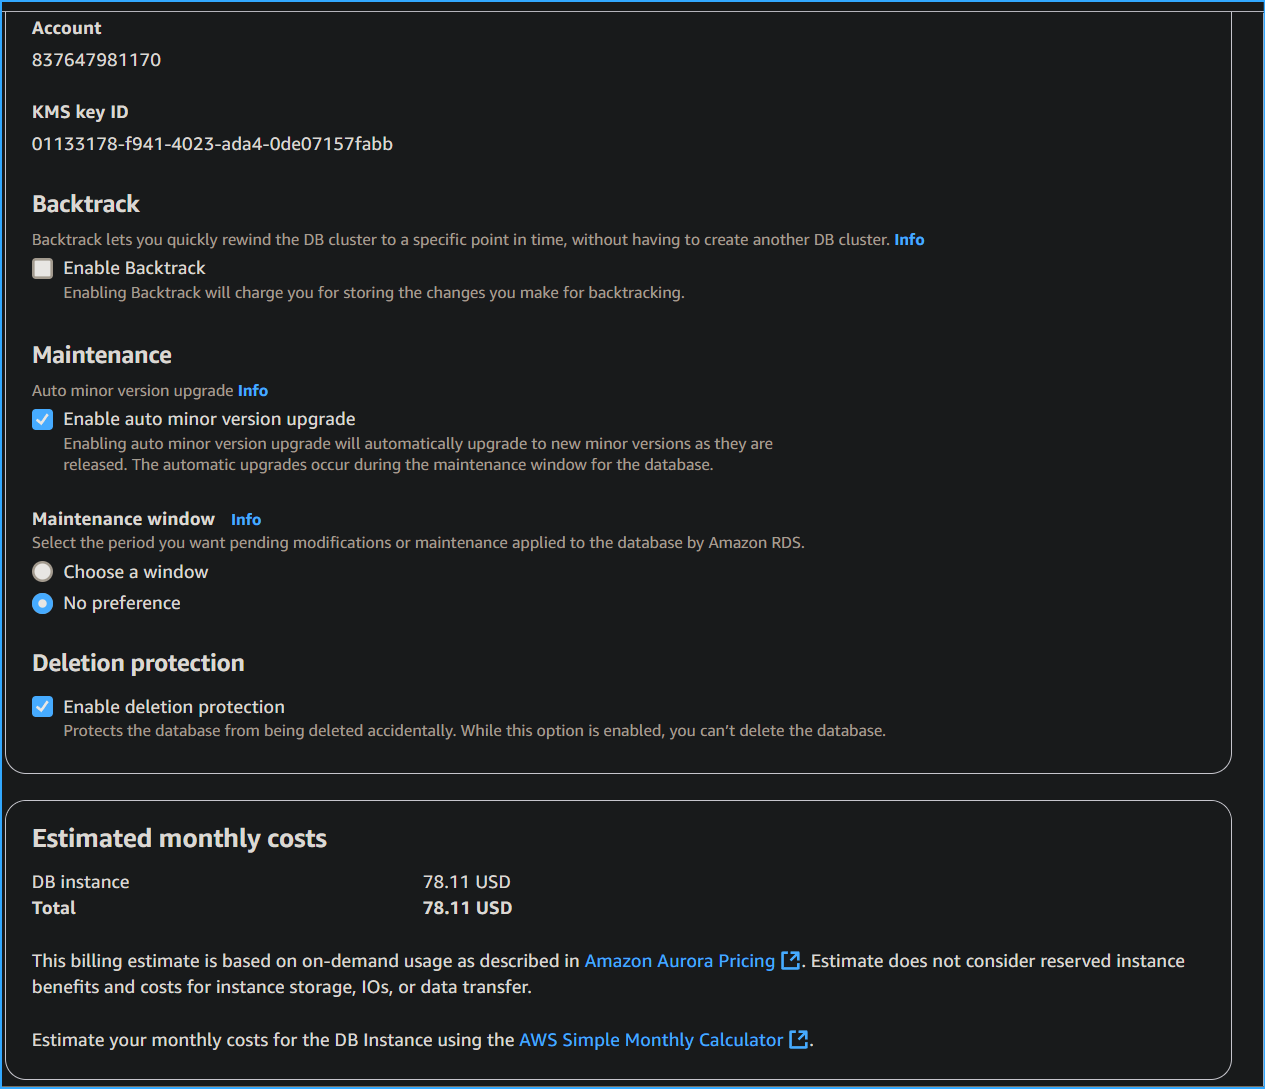
Under "Additional configuration," I set an initial database name
"restartdb" to simplify the connection process later.
Once all settings were configured, I clicked "Create database" and
waited approximately 7 minutes for the instance to become available.
Note: It's important to make a note of the database endpoint, username,
and password as they will be needed for connecting to the database
later.
Step 2-4: Getting Connection Information
After my RDS instance was created, I gathered the necessary connection
information:
-
I clicked on "Details" followed by "Show" to see the connection
information
-
I downloaded the PEM file (since I was using a Mac) for SSH connection
- I noted the LinuxServer address provided in the details
- I also noted the endpoint URL of my newly created RDS instance
Step 5-6: Connecting to Linux Server and Installing MySQL Client
Now it was time to establish connection with the Linux server and
install the MySQL client to interact with the database:
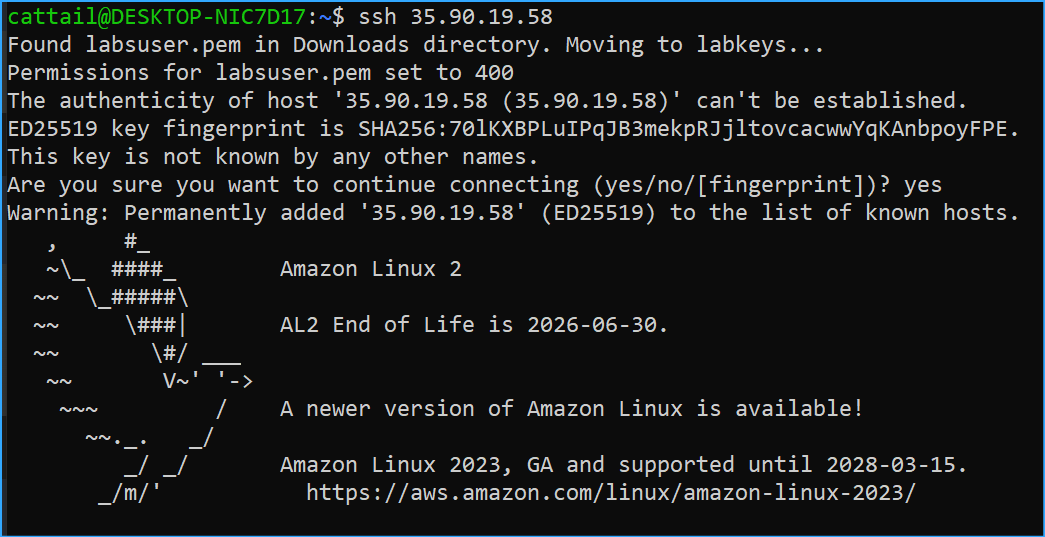
SSH Connection
I opened Terminal and connected to the Linux server using the command:
ssh -i /path/to/downloaded-key.pem ec2-user@my-linux-server-address
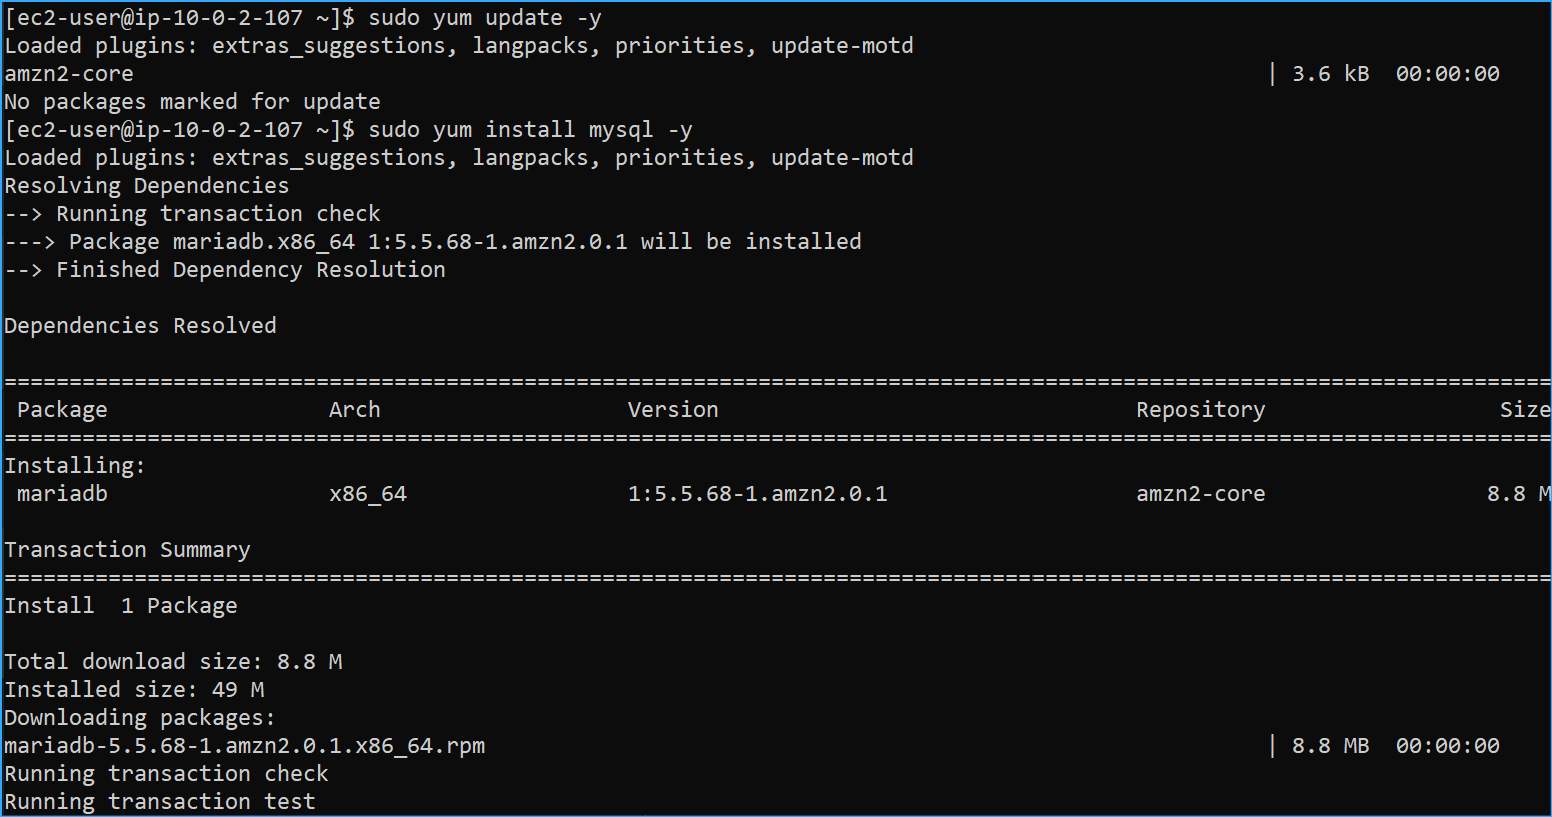
Installing MySQL Client
Once connected to the server, I installed the MySQL client with these
commands:
sudo yum update -y
sudo yum install mysql -y
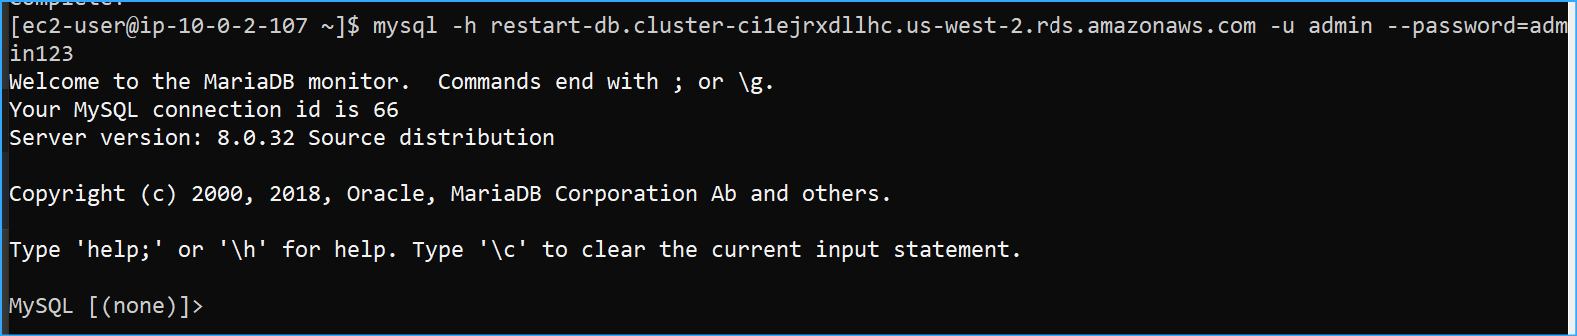
Connecting to the RDS Instance
With the MySQL client installed, I connected to my RDS instance using:
mysql -h my-rds-endpoint.rds.amazonaws.com -u admin -p
When prompted, I entered my password. Upon successful connection, I was
greeted with the MySQL prompt.
Step 7: Creating the RESTART Table
Now that I was connected to the database, I created the RESTART table
with the required columns:
CREATE DATABASE IF NOT EXISTS restartdb; USE restartdb; CREATE TABLE
RESTART ( Student_ID INT PRIMARY KEY, Student_Name VARCHAR(100) NOT
NULL, Restart_City VARCHAR(50), Graduation_Date DATETIME );
I verified the table creation.
Step 8: Inserting Sample Data into RESTART Table
With the table created, I inserted 10 sample rows as specified:
INSERT INTO RESTART (Student_ID, Student_Name, Restart_City,
Graduation_Date) VALUES (1001, 'John Smith', 'New York', '2023-05-15
10:00:00'), (1002, 'Maria Garcia', 'Chicago', '2023-06-20 11:30:00'),
(1003, 'James Johnson', 'San Francisco', '2023-07-10 09:15:00'), (1004,
'Sarah Williams', 'Boston', '2023-05-30 14:00:00'), (1005, 'Michael
Brown', 'Seattle', '2023-08-05 13:45:00'), (1006, 'Lisa Davis',
'Austin', '2023-09-12 10:30:00'), (1007, 'Robert Wilson', 'Denver',
'2023-06-25 15:20:00'), (1008, 'Jennifer Taylor', 'Atlanta', '2023-07-30
12:00:00'), (1009, 'David Martinez', 'Miami', '2023-08-22 11:15:00'),
(1010, 'Emily Anderson', 'Portland', '2023-09-05 09:30:00');
The data was successfully inserted, and I confirmed this by checking the
row count.
Step 9: Selecting All Data from RESTART Table
To verify the data insertion, I ran:
SELECT * FROM RESTART;
This displayed all 10 rows with their Student_ID, Student_Name,
Restart_City, and Graduation_Date fields. I captured this output for
submission.
Step 10: Creating the CLOUD_PRACTITIONER Table
Next, I created the CLOUD_PRACTITIONER table with the required columns:
CREATE TABLE CLOUD_PRACTITIONER ( Student_ID INT PRIMARY KEY,
Certification_Date DATETIME, FOREIGN KEY (Student_ID) REFERENCES
RESTART(Student_ID) );
I included a foreign key constraint to ensure referential integrity with
the RESTART table.
Step 11: Inserting Sample Data into CLOUD_PRACTITIONER Table
I inserted 5 sample rows into the CLOUD_PRACTITIONER table:
INSERT INTO CLOUD_PRACTITIONER (Student_ID, Certification_Date) VALUES
(1001, '2023-07-10 09:00:00'), (1003, '2023-08-15 14:30:00'), (1005,
'2023-09-20 10:45:00'), (1007, '2023-10-05 13:00:00'), (1009,
'2023-11-12 11:30:00');
I made sure to use Student_ID values that existed in the RESTART table
to maintain referential integrity.
Step 12: Selecting All Data from CLOUD_PRACTITIONER Table
To verify the data insertion, I ran:
SELECT * FROM CLOUD_PRACTITIONER;
This confirmed all 5 rows were properly inserted. I captured this output
for submission.
Step 13: Performing an Inner Join Between Tables
For the final step, I performed an inner join between the two tables to
display student ID, student name, and certification date:
SELECT r.Student_ID, r.Student_Name, cp.Certification_Date FROM RESTART
r INNER JOIN CLOUD_PRACTITIONER cp ON r.Student_ID = cp.Student_ID;
This query returned 5 rows, showing only students who had both restart
program and cloud practitioner certification data. I captured this
output for submission as required.
Note: The inner join shows only matching records between the two tables,
which is why only 5 records appear in the result (the ones with IDs
1001, 1003, 1005, 1007, and 1009).
Summary
I successfully:
-
Created an Amazon RDS MySQL instance following the specifications
- Connected to the RDS instance from a Linux server
- Created two tables with appropriate columns and constraints
- Populated the tables with sample data
- Performed SQL queries including a join operation
This hands-on experience demonstrated how Amazon RDS makes it easy to
set up and manage a relational database in the cloud, allowing me to
focus on data operations rather than database administration tasks.
 Configuring Aurora DB One
 Configuring Aurora DB Two
 Configuring Aurora DB Three
 Configuring Aurora DB Four
 Configuring Aurora DB Five
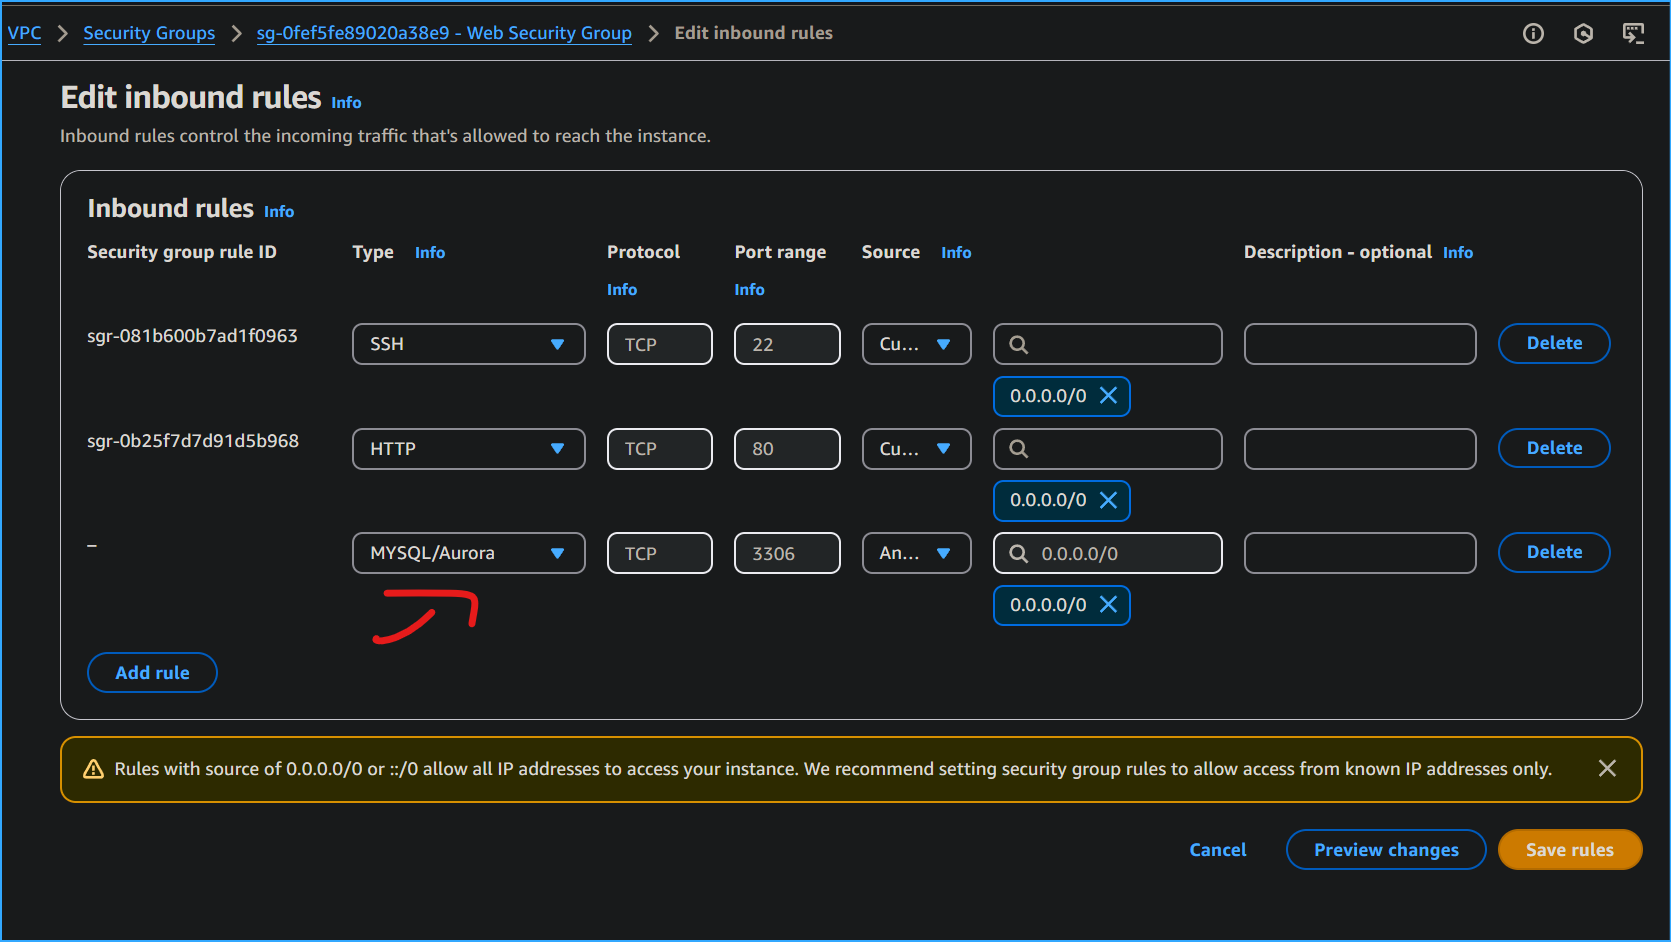 Added Rule to Web Security Group
 Configuring Aurora DB Six
 Configuring Aurora DB Seven
 Configuring Aurora DB Nine
 Configuring Aurora DB Ten
 SSH Into Server
 Installed MySQL Client
 Connected to RDS Instance After Copying Writer Endpoint and Applying Credentials
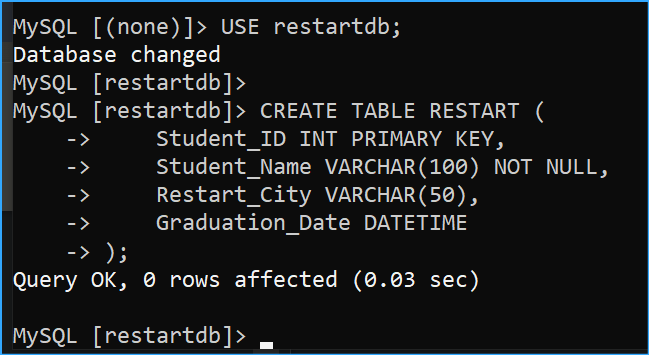 Created Restart Table
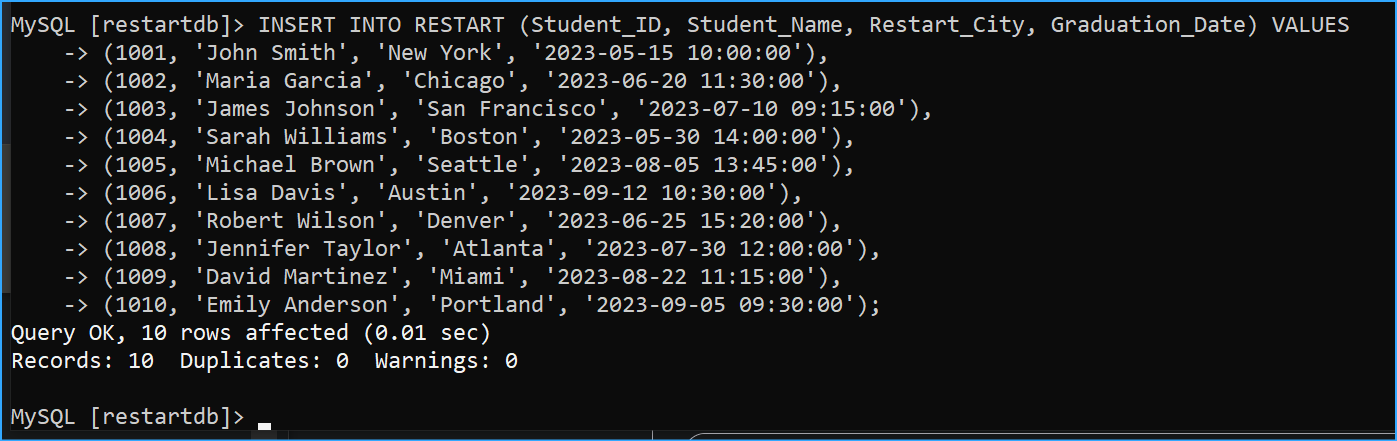 Inserted Sample Data Into Restart Table
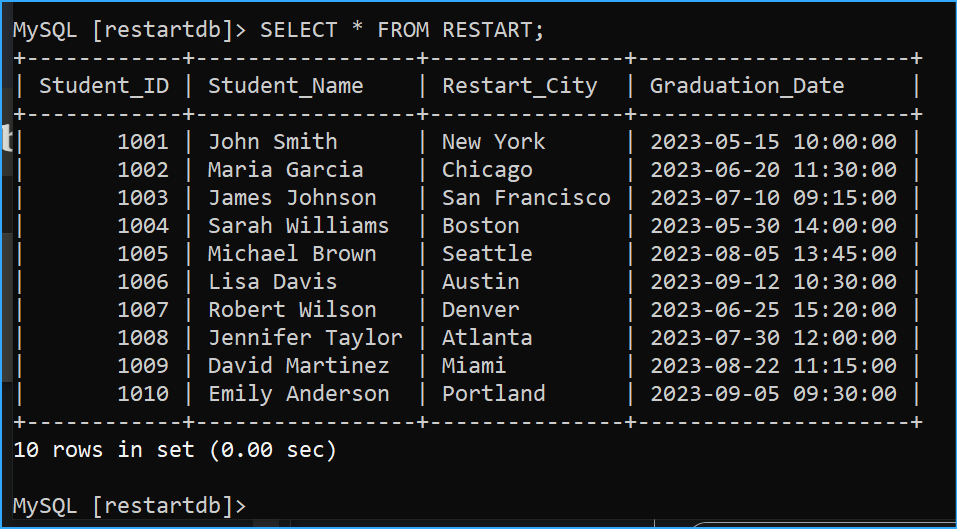 Selected All Data From Restart Table
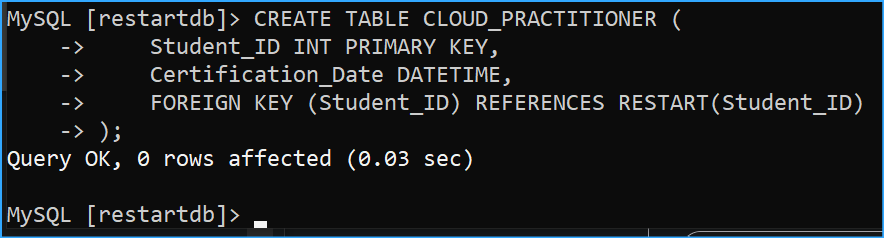 Created Cloud Practicioner Table
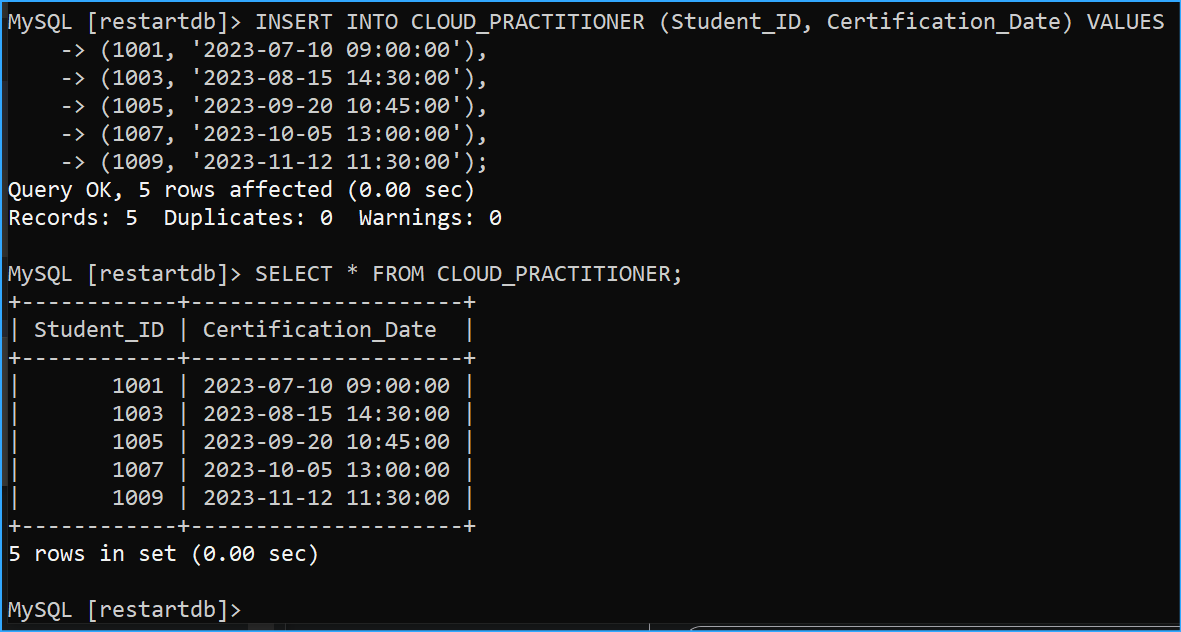 Inserted Sample Data Into Cloud Practicioner Table and Selected All Data From Table
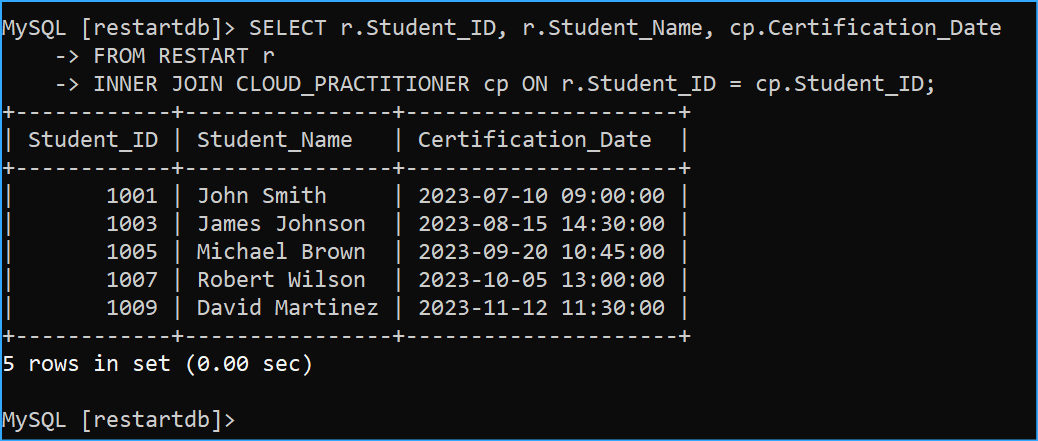 Performed Inner Join
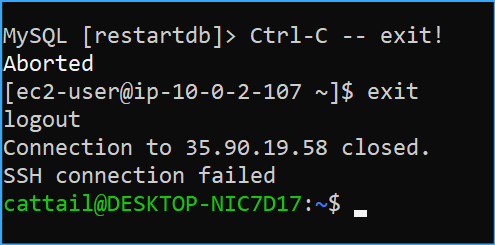 Exited SSH Connection to Database