Task 1: Investigating the customer's needs
Recall protocols which can be directly used with AWS's Security Group
(SG) and Network Access Control Lists (NACLs). A VPC needs an Internet
Gateway (IGW) in order for the VPC to reach the internet, which has the
route as 0.0.0.0/0. These routes go on what is called a Route Table,
which are associated to subnets so they know where they belong. As
mentioned in previous projects, you will follow the order of the
navigation console to build this VPC, and a troubleshooting method to
build a fully functioning VPC. When building a VPC from scratch, it is
easier to work from the top and move down to the bottom since you do not
have an instance yet. Think of this as building a sandwich; the VPC is
the bun, and the resources are everything in between.
For task 1, I investigated the customer's request and built a VPC that
has network connectivity. I completed this when I successfully pinged
from my EC2 instance to the internet showing that the VPC has network
connectivity.
In the scenario, Brock, the customer requesting assistance, asked for
help in creating resources for his VPC to be routable to the internet. I
kept the VPC CIDR at 192.168.0.0/18 and public subnet CIDR of
192.168.1.0/26.
Before I started, I reviewed VPC and its components to make it network
compatible:
-
A Virtual Private Cloud (VPC) is like a data center but in the cloud.
Its logically isolated from other virtual networks from which you can
spin up and launch your AWS resources within minutes.
-
Private Internet Protocol (IP) addresses are how resources within the
VPC communicate with each other. An instance needs a public IP address
for it to communicate outside the VPC. The VPC will need networking
resources such as an Internet Gateway (IGW) and a route table in order
for the instance to reach the internet.
-
An Internet Gateway (IGW) is what makes it possible for the VPC to
have internet connectivity. It has two jobs: perform network address
translation (NAT) and be the target to route traffic to the internet
for the VPC. An IGW's route on a route table is always 0.0.0.0/0.
- A subnet is a range of IP addresses within your VPC.
-
A route table contains routes for your subnet and directs traffic
using the rules defined within the route table. You associate the
route table to a subnet. If an IGW was on a route table, the
destination would be 0.0.0.0/0 and the target would be IGW.
-
Security groups and Network Access Control Lists (NACLs) work as the
firewall within your VPC. Security groups work at the instance level
and are stateful, which means they block everything by default. NACLs
work at the subnet level and are stateless, which means they do not
block everything by default.
Creating the VPC
Recall that a VPC is like a data center, but located in the cloud. It's
logically isolated from other virtual networks. Now you will build a
VPC.
I started at the top of the left navigation pane at Your VPCs and worked
my way down. I selected Your VPCs, navigated to the top right corner,
and selected Create VPC.
I used a top-down theory with the top being the VPC.
I navigated to "Your VPCs" and selected Create VPC.
I named the VPC: Test VPC
IPv4 CIDR block: 192.168.0.0/18
I left everything else as default, and selected Create VPC.
Creating Subnets
Recall that a subnet is a range of IP addresses within your VPC. In your
VPC, you can create a public and a private subnet. You can separate
subnets according to specific architectural needs. For example, if you
have servers that shouldn't be directly accessed by the internet, you
would put them in the private subnet. For test servers or instances that
require internet connectivity can be placed in the public subnet.
Companies also separate subnets according to offices, teams, or floors.
Now that the VPC was complete, I looked at the left navigation pane and
selected Subnets. In the top right corner, I selected Create subnet.
Note: Although almost anything can be created in any order, it is easier
to have an approach. Having a flow or an approach will assist you in
troubleshooting issues and ensure that you do not forget a resource.
I selected Create subnet.
Create Route Table
Recall that a route table contains the rules or routes that determine
where network traffic within your subnet and VPC will go. It controls
the network traffic like a router, and, just like a router, it stores IP
addresses within the VPC. You associate a route table to each subnet and
put the routes that you need your subnet to be able to reach. For this
step, you will create the route table first, and then add the routes as
you create AWS resources for the VPC.
I navigated to the left navigation pane, and selected Route Tables. In
the top right corner I selected Create route table.
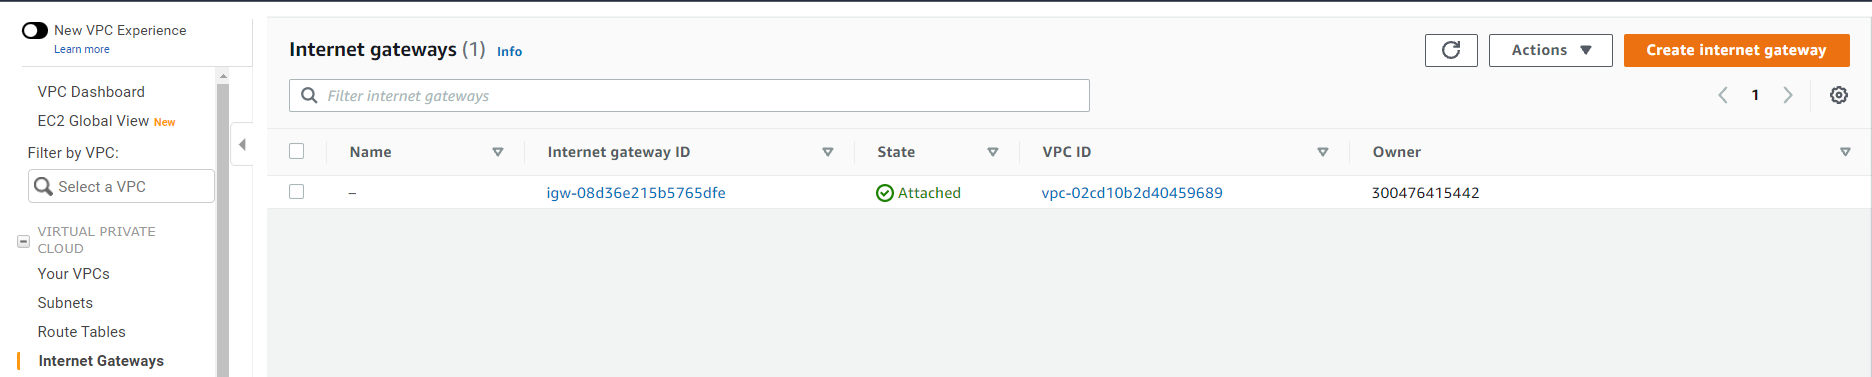
Create Internet Gateway and attach Internet Gateway
Recall that an IGW is what allows the VPC to have internet connectivity
and allows communication between resources in your VPC and the internet.
The IGW is used as a target in the route table to route
internet-routable traffic and to perform network address translation
(NAT) for EC2 instances. NAT is a bit beyond the scope of this project.
.
From the left navigation pane, I selected Internet Gateways. I created
an Internet Gateway (IGW) by selecting Create internet gateway at the
top right corner.
Once created, I attached the Internet Gateway to the VPC by selecting
Actions at the top right corner and clicking Attach to VPC.
Now my IGW was attached! I then needed to add its route to the route
table and associate the subnet I created to the route table.
Add route to route table and associate subnet to route table
I navigated to the Route Table section on the left navigation pane. I
selected Public Route Table, and then scrolled to the bottom and
selected the Routes tab. I selected the Edit routes button located in
the routes box.
On the Edit routes page, the first IP address was the local route and
could not be changed.
I selected Add route.
In the Destination section, I typed 0.0.0.0/0 in the search box. This is
the route to the IGW. I was telling the route table that any traffic
that needs internet connection will use 0.0.0.0/0 to reach the IGW so
that it can reach the internet.
I clicked in the Target section and selected Internet Gateway since I
was targeting any traffic that needs to go to the internet to the IGW.
Once I selected the IGW, I saw my TEST VPC IGW appear. I selected that
IGW, navigated to the bottom right, and selected Save changes.
Now my traffic had a route to the internet via the IGW.
From the Public route table dashboard, I selected the Subnet
associations tab. I selected the Edit subnet associations button.
I selected Save association.
Every route table needs to be associated to a subnet. You are now
associating this route table to this subnet. As you probably noticed,
the naming convention is kept the same (public route table, public
subnet, etc) in order to associate the same resources together. Keep
this in mind when your network and resources grow. You can have
multiples of the same resources and it can get confusing to which
belongs where.
Creating a Network ACL
Recall that an NACL is a layer of security that acts like a firewall at
the subnet level. The rules to set up a NACL are similar to security
groups in the way that they control traffic. The following rules apply:
NACLs must be associated to a subnet, NACLs are stateless, and they have
the following parts: - Rule number: The lowest number rule gets
evaluated first. As soon as a rule matches traffic, its applied; for
example: 10 or 100. Rule 10 would get evaluated first. - Type of
traffic; for example: HTTP or SSH - Protocol: You can specify all or
certain types here - Port range: All or specific ones - Destination:
Only applies to outbound rules - Allow or Deny specified traffic.
From the left navigation pane, I selected Network ACLs. I navigated to
the top right corner and selected Create network ACL to create a Network
Access Control Lists (NACLs).
On the Create network ACL, I configured the following:
- Name: Public Subnet NACL
- VPC: I chose Test VPC from dropdown
- I then chose Create network ACL
On the Network ACLs option, from the list of ACLs I selected Public
Subnet ACL
From the tabs below, I selected Inbound rules and then chose Edit
inbound rules
On the Edit inbound rules, I chose Add new rule and configured:
- Rule number: Entered 100
- Type: Chose All traffic from dropdown
- I chose Save changes
Back on the Network ACLs option, I ensured that Public Subnet ACL was
selected
I chose Outbound rules and then chose Edit outbound rules
On the Edit outbound rules, I chose Add new rule and configured:
- Rule number: Entered 100
- Type: Chose All traffic from dropdown
- I chose Save changes
Inbound: After creating the NACL, it looked like the following. This
indicated there was only one rule number, which was 100, that stated
that all traffic, all protocols, all port ranges, from any source
(0.0.0.0/0) were allowed to enter (inbound) the subnet. The asterisk *
indicated that anything else that did not match this rule was denied.
Outbound: This rule allowed all traffic to exit the subnet to any
destination.
Creating a Security Group
Recall that a security group is a virtual firewall at the instance level
that controls inbound and outbound traffic. Just like a NACL, security
groups control traffic; however, security groups cannot deny traffic.
Security groups are stateful; you must allow traffic through the
security group as it blocks everything by default, and it must be
associated to an instance. A security group has the following parts for
both inbound and outbound rules: Inbound Source: It can be an IP or a
specific resource Outbound Destination: Can by an IP such as anywhere
(0.0.0.0/0) Protocol: Example UDP or TCP Port range: All or specific
range Description: You can input a description
From the left navigation pane, I selected Security Groups. I navigated
to the top right corner and selected Create security group to create a
security group.
The completed security group showed that for Inbound rules I was
allowing SSH, HTTP, and HTTPS types of traffic, each of which had its
own protocols and port range. The source from which this traffic reaches
my instance could be originating from anywhere. For Outbound rules, I
was allowing all traffic from outside my instance.
I now had a functional VPC. The next task was to launch an EC2 instance
to ensure that everything works.
Task 2: Launch EC2 instance and SSH into instance
In task 2, I launched an EC2 instance within my Public subnet and tested
connectivity by running the command ping. This validated that my
infrastructure was correct, such as security groups and network ACLs, to
ensure that they were not blocking any traffic from my instance to the
internet and vice versa. This validated that I had a route to the IGW
via the route table and that the IGW was attached.
On the AWS Management Console, in the Search bar, I entered and chose
EC2 to go to the EC2 Management Console.
In the left navigation pane, I chose Instances.
I chose Launch instances and configured the following options:
In the Name and tags section, I left the Name blank.
In the Application and OS Images (Amazon Machine Image) section, I
configured the following options:
- Quick Start: I chose Amazon Linux.
- Amazon Machine Image (AMI): I chose Amazon Linux 2023 AMI.
In the Instance type section, I chose t3.micro.
In the Key pair (login) section, I chose vockey.
In the Network settings section, I chose Edit and configured the
following options:
- VPC - required: I chose Test VPC.
- Subnet: I chose Public Subnet.
- Auto-assign public IP: I chose Enable.
-
Firewall (security groups): I chose Select existing security group.
- I chose public security group.
I chose Launch instance.
To display the launched instance, I chose View all instances.
The EC2 instance named Bastion Server was initially in a Pending state.
The Instance state then changed to Running to indicate that the instance
had finished booting.
I SSH'd into the server.
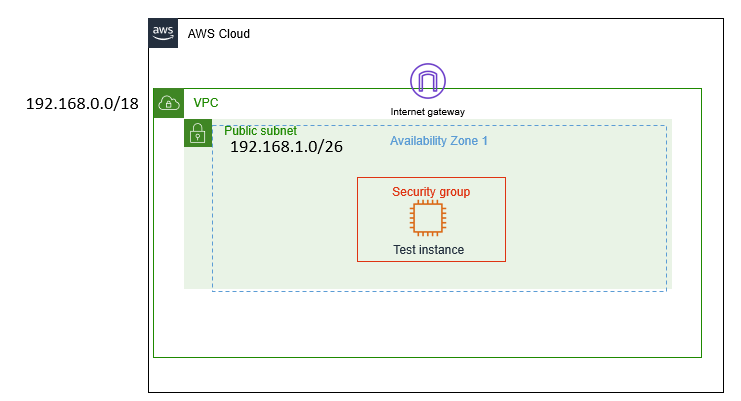 Customer VPC Architecture
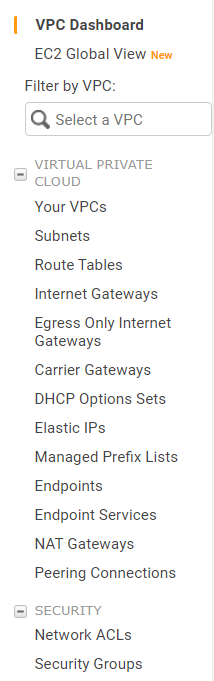 Top Down Guide to Creating VPC
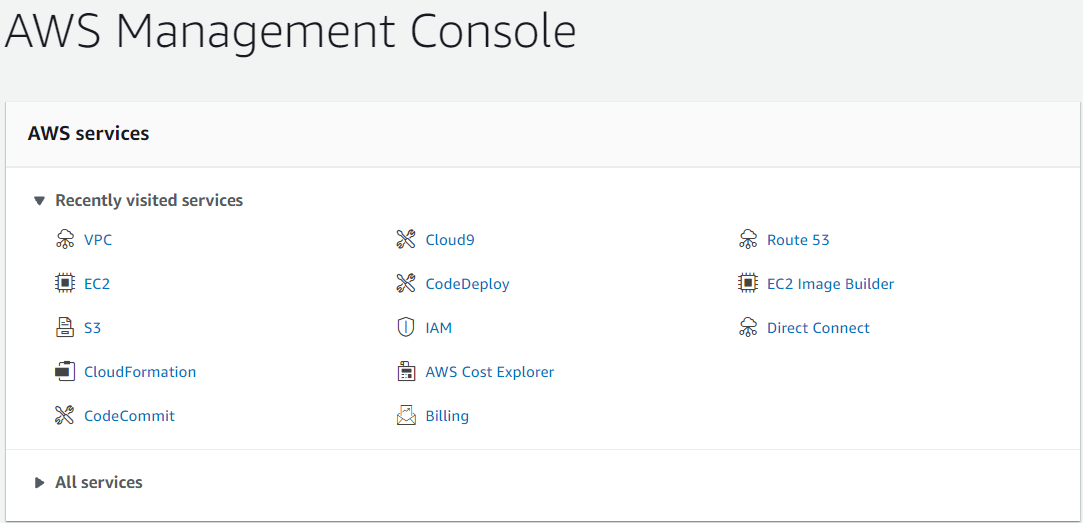 Recently Visited AWS Services in AWS Console
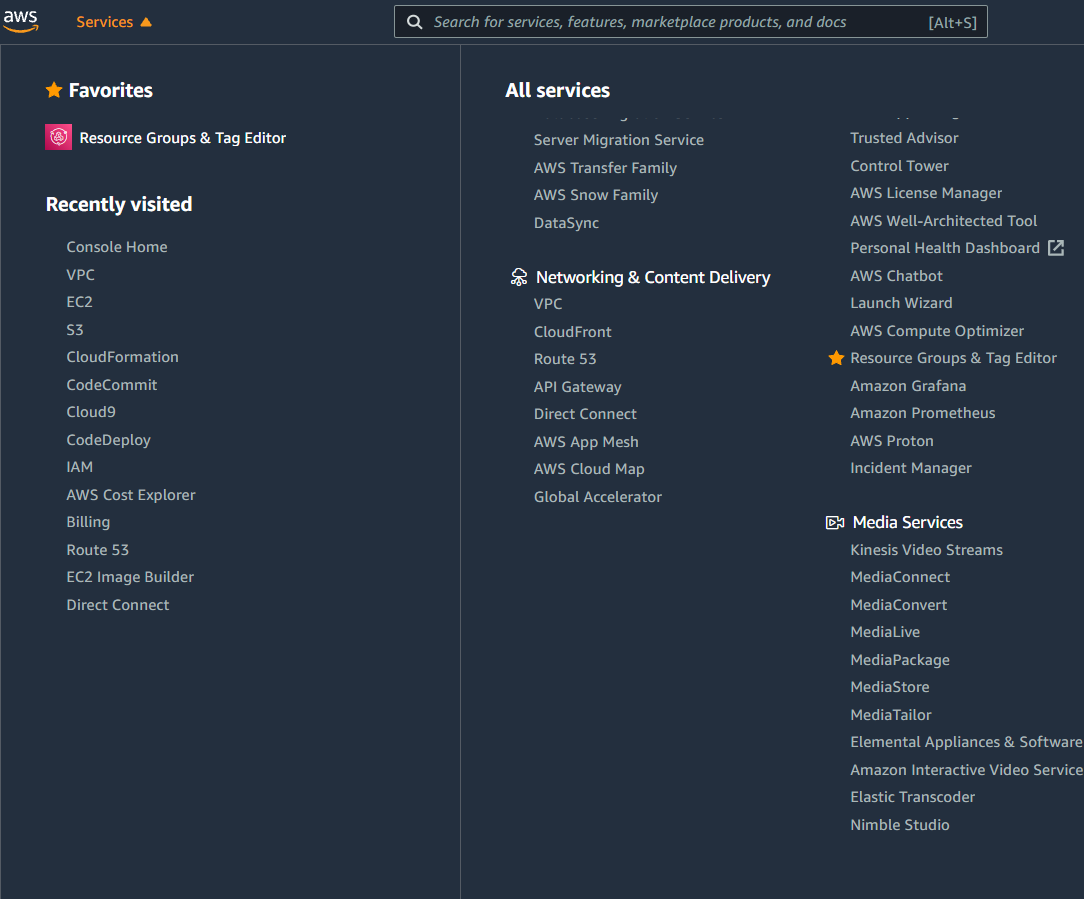 Services Navigation Dropdown
 Navigated to VPCs and Selected Create VPC
 VPC Settings Configuration
 Navigated to Subnets and Selected Create Subnet
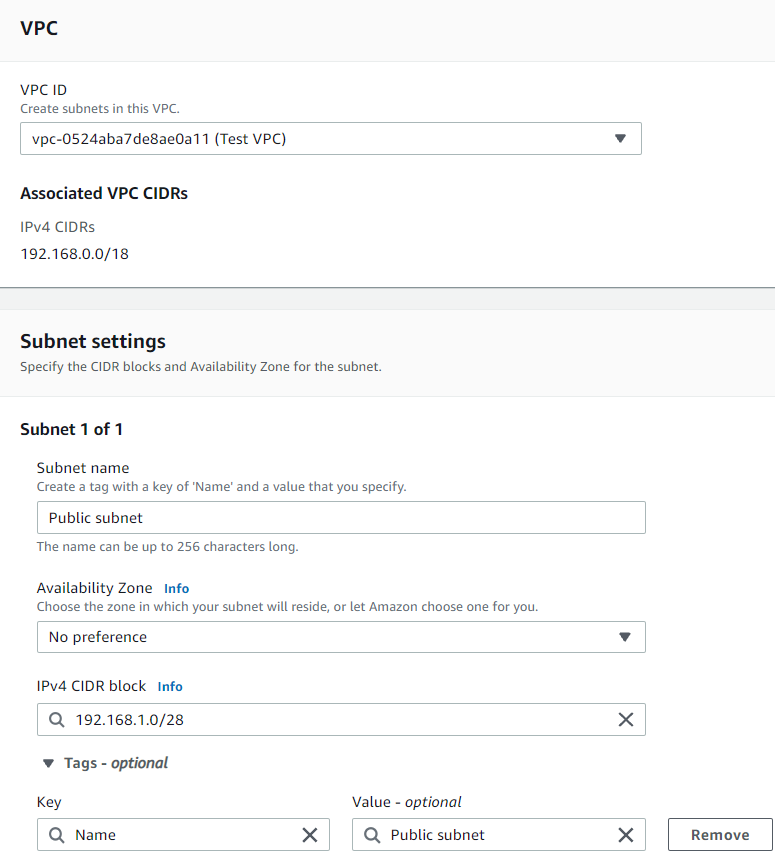 Subnet Configuration
 Navigated to Route Tables and Selected Create Route Table
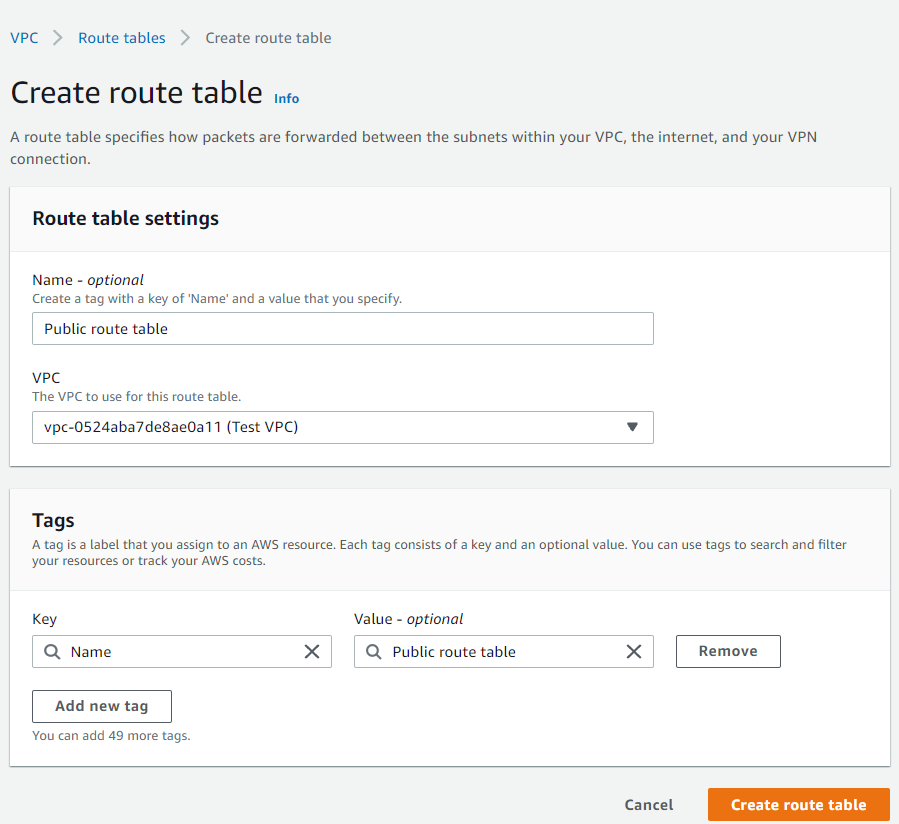 Route Table Configuration
 Navigated to Internet Gateways and Selected Create Internet
Gateway
Navigated to Internet Gateways and Selected Create Internet
Gateway
 Internet Gateway Configuration
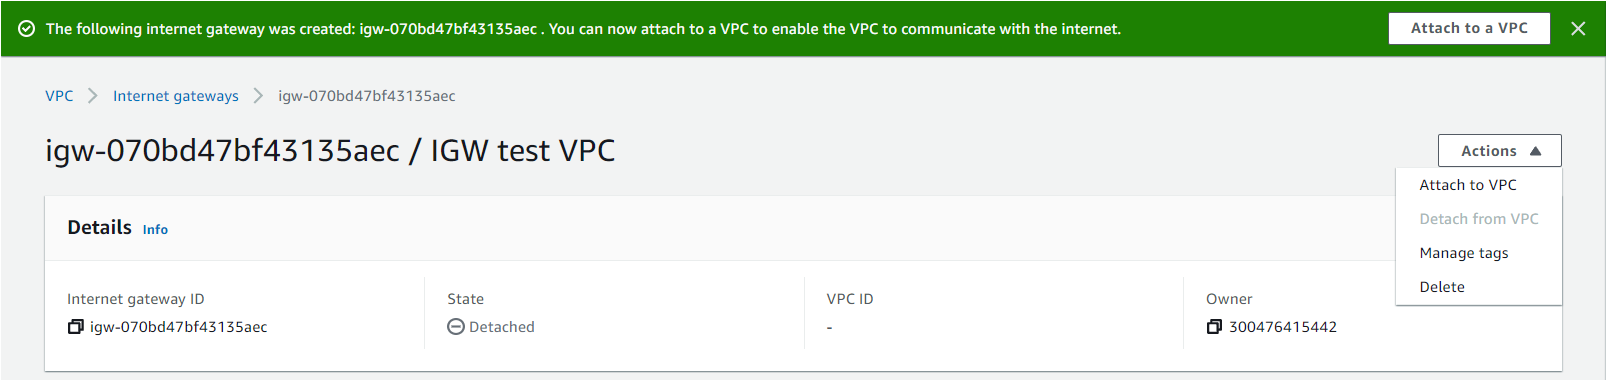 Attaching the IGW That Was Just Created
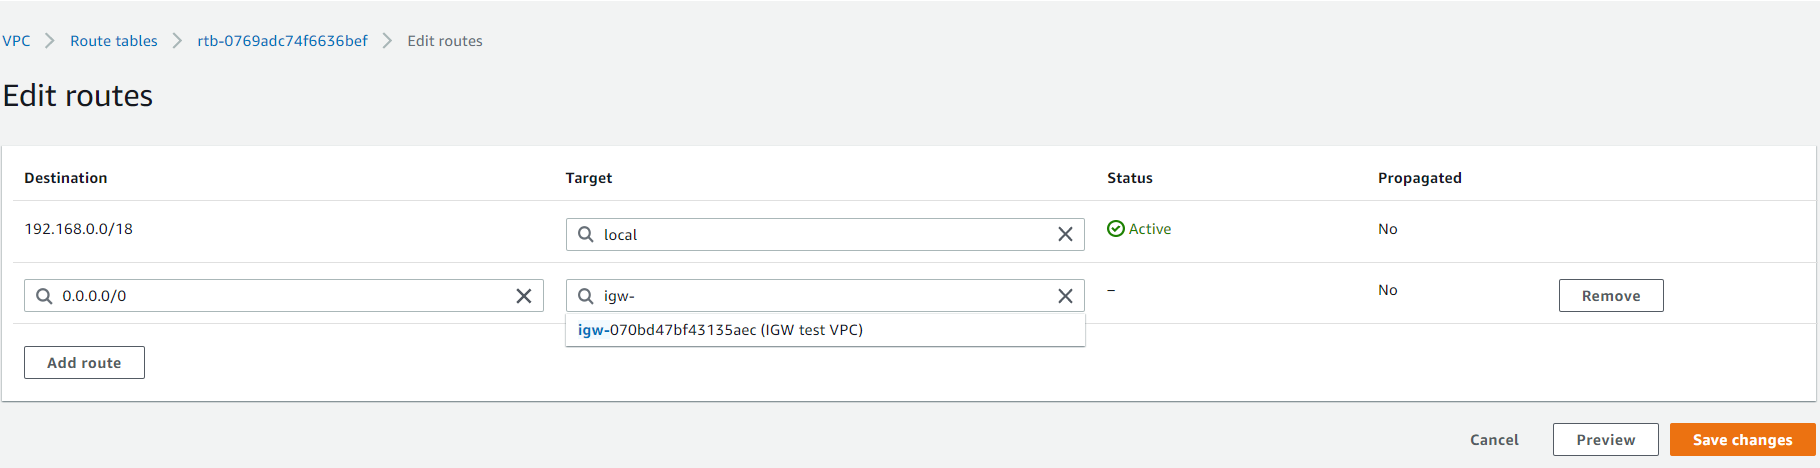 Adding the IGW in the Route Table
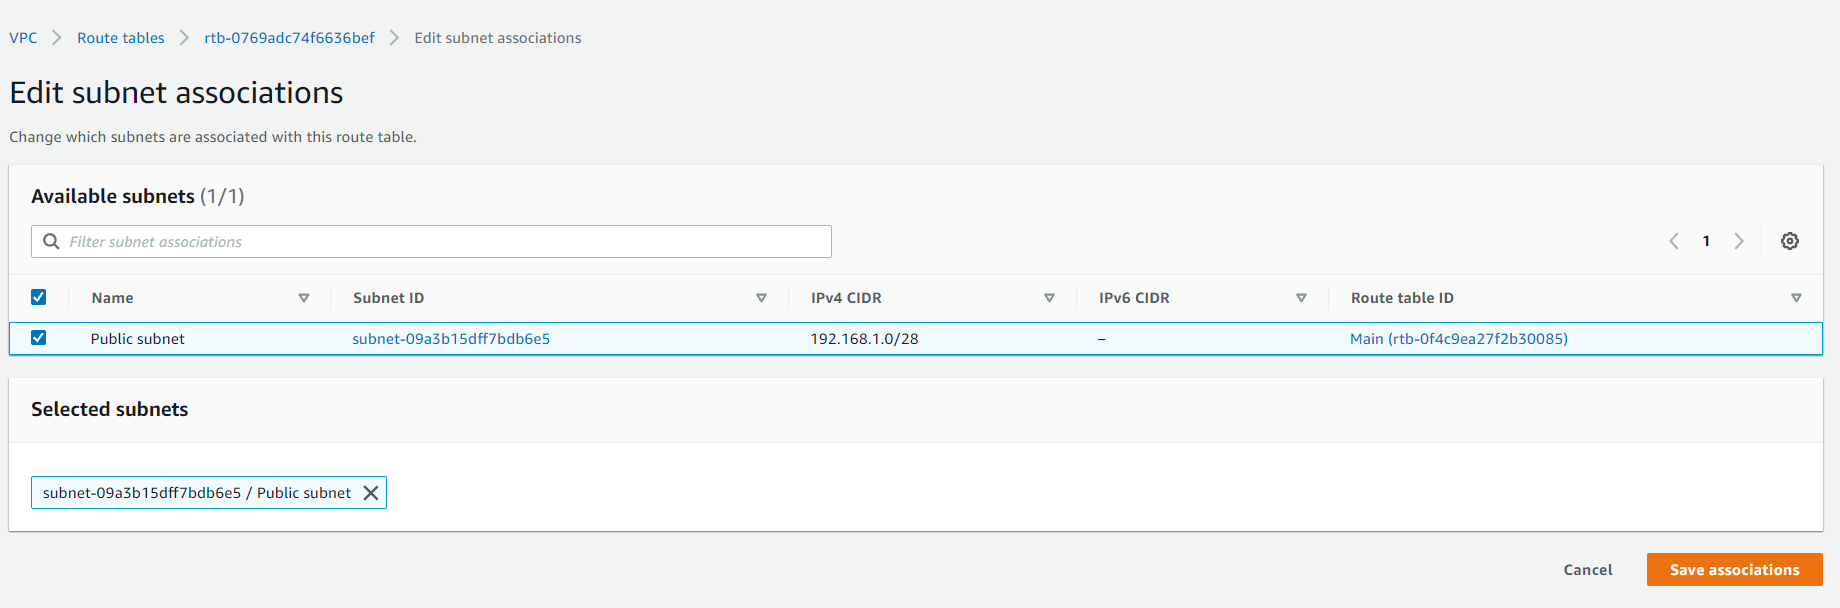 Associating the Public Subnet and Saving Associations
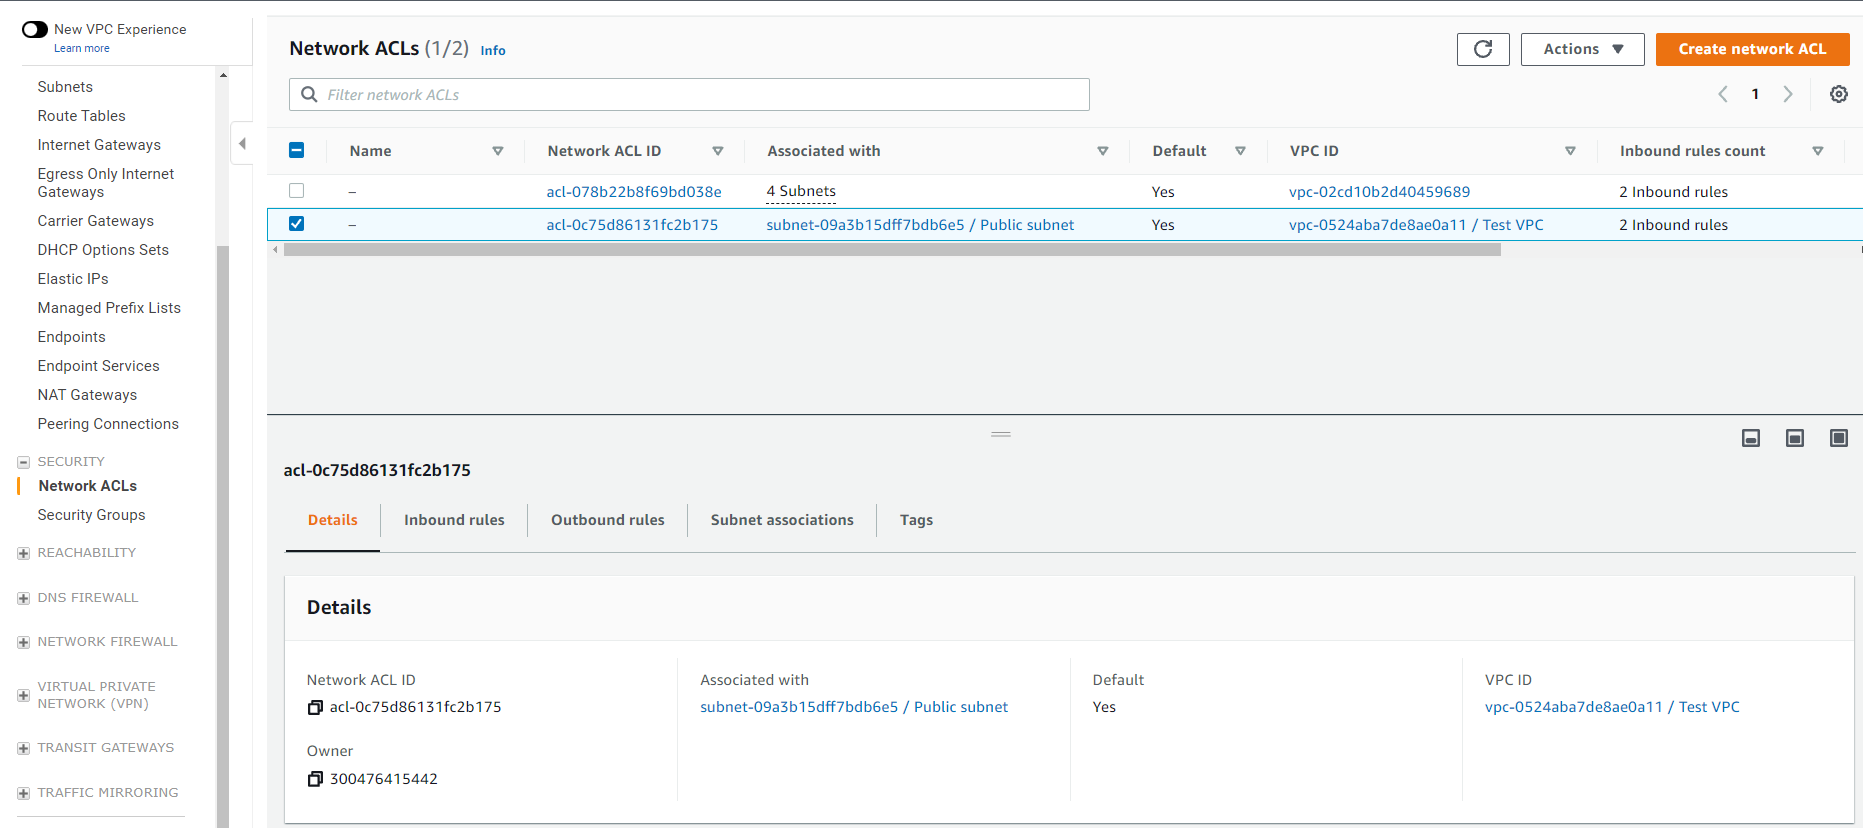 Selecting Create Network ACL
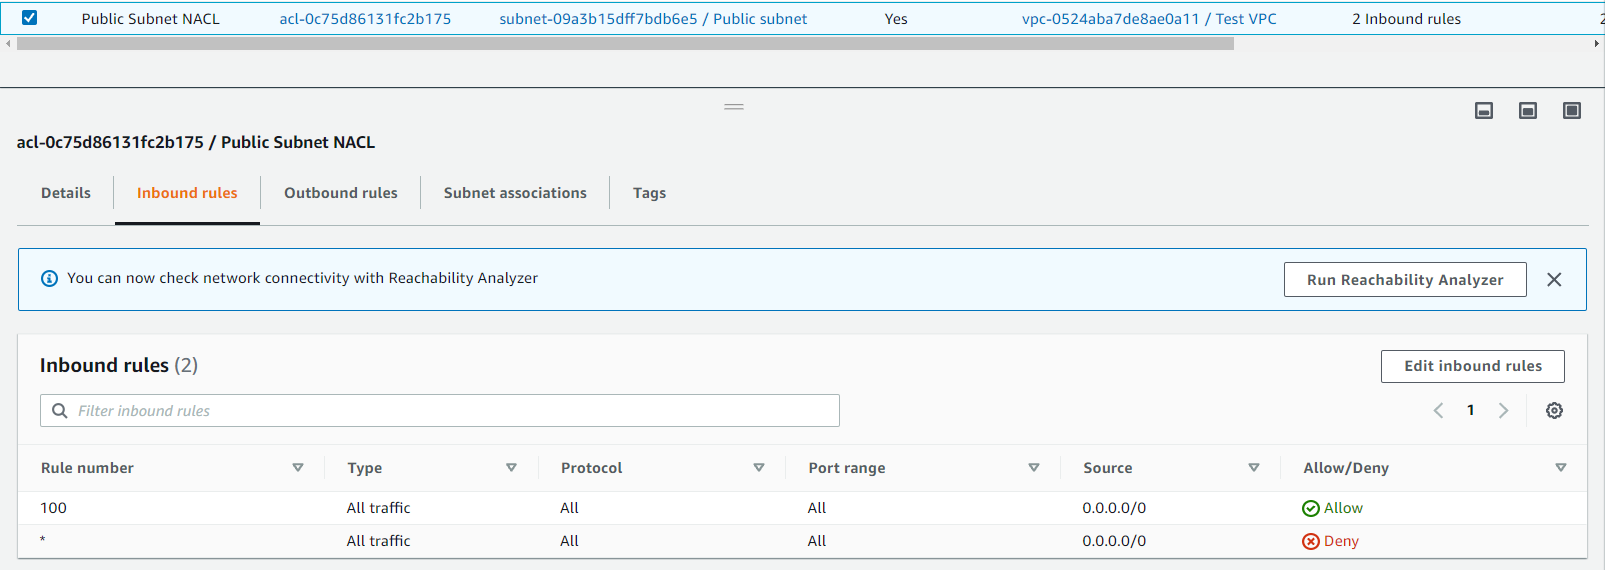 Inbound NACL Rules
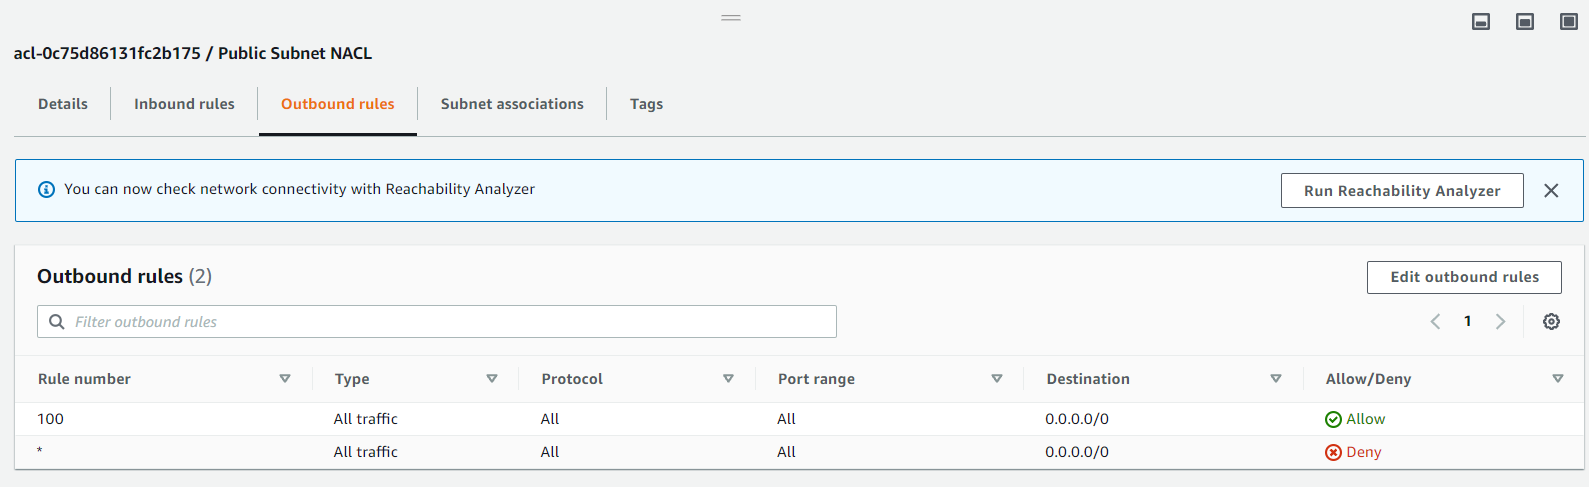 Outbound NACL Rules
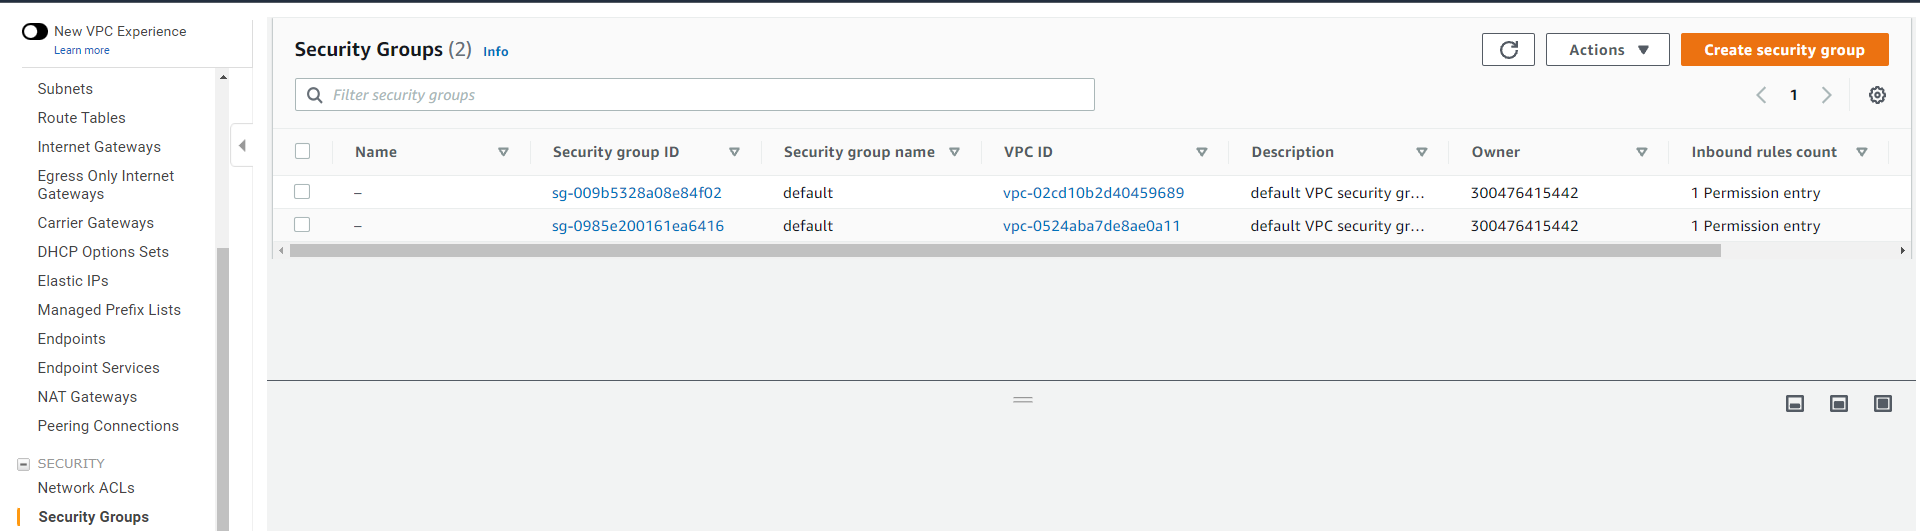 Creating Security Group
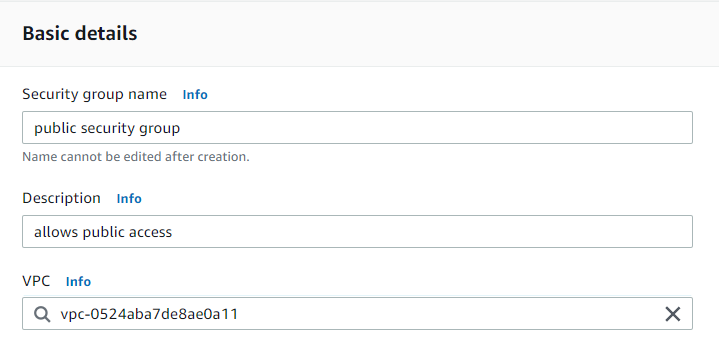 Configuring Basic Details of Security Group
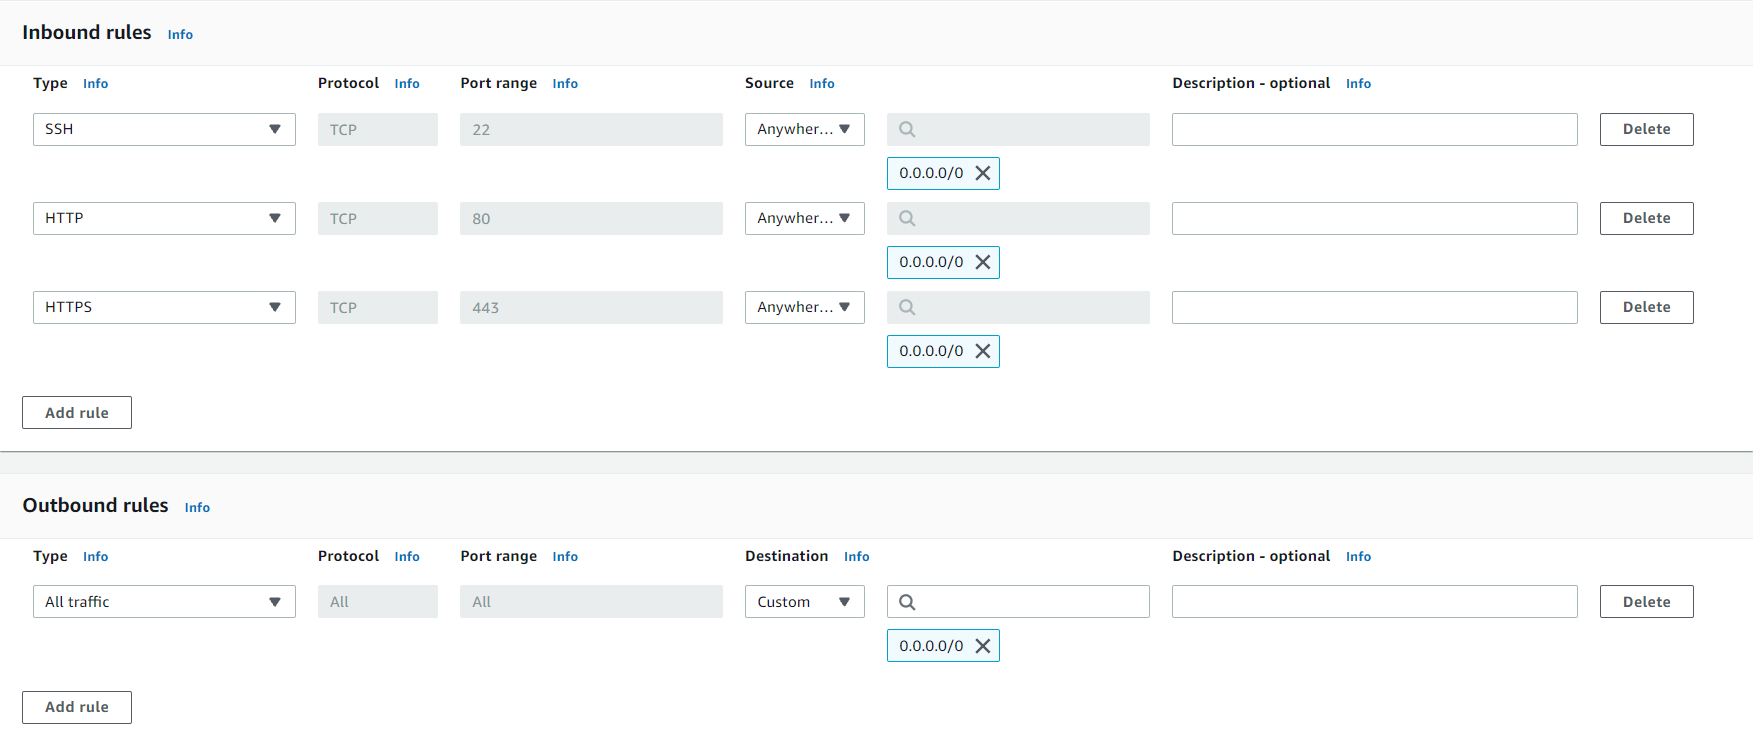 Configuration Details for Inbound and Outbound Rules for the
Security Group
Configuration Details for Inbound and Outbound Rules for the
Security Group
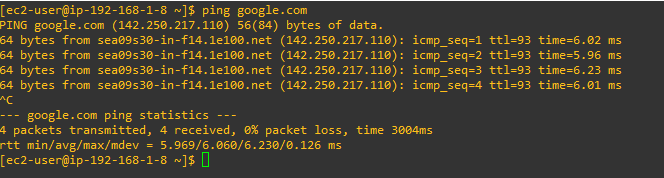 Using Ping to Test Internet Connectivity It Is Successful