Creating a Website on S3
In this project I created a static website
hosted on Amazon S3.
Overview
In this project, I practiced using AWS Command Line Interface (AWS CLI) commands from an Amazon Elastic Compute Cloud (Amazon EC2) instance to:
- Create an Amazon Simple Storage Service (Amazon S3) bucket.
- Create a new AWS Identity and Access Management (IAM) user that has full access to the Amazon S3 service.
- Upload files to Amazon S3 to host a simple website for the Café & Bakery.
- Create a batch file that can be used to update the static website when you change any of the website files locally
Clients will be able to access the website I deployed to Amazon S3. The website URL is similar to this example: http://.s3-website-us-west-2.amazonaws.com. I can create and access the bucket through the AWS Management Console or the AWS CLI.
Task 1: Connecting to an Amazon Linux EC2 Instance
First, I needed to establish a connection to my EC2 instance. I clicked
the Details button at the top of the lab interface and selected Show to
reveal the InstanceSessionUrl. After copying this URL, I pasted it into
a new browser tab which opened a console connection to the instance
using AWS Systems Manager Session Manager.
Once connected, I ran these commands to switch to the ec2-user and
verify my home directory:
sudo su -l ec2-user
pwd
Task 2: Configuring the AWS CLI
The AWS CLI was already pre-installed on the Amazon Linux instance,
which saved me some time. I ran the configuration command to set up my
credentials:
aws configure
At the prompts, I entered:
-
AWS Access Key ID: I copied and pasted the AccessKey value from the
lab environment
-
AWS Secret Access Key: I copied and pasted the SecretKey value from
the lab environment
- Default region name: us-west-2
- Default output format: json
Task 3: Creating an S3 Bucket
Next, I needed to create an S3 bucket with a unique name. I decided to
follow the naming convention of combining my first initial, last name,
and three random numbers. I executed this command to create my bucket:
aws s3api create-bucket --bucket askeries754 --region us-west-2
--create-bucket-configuration LocationConstraint=us-west-2
After running the command, I received a JSON response confirming
successful creation with the location URL:
http://askeries754.s3.amazonaws.com/
Task 4: Creating an IAM User with S3 Access
I needed to create a new IAM user with full access to Amazon S3. I did
this by running:
aws iam create-user --user-name awsS3user
Then I created a login profile for this user:
aws iam create-login-profile --user-name awsS3user --password
Training123!
To sign in as this user in the AWS Console, I needed the account number.
I found this by:
-
Clicking on the User dropdown menu in the top right corner of
the AWS Management Console
- Copying the 12-digit Account ID
- Signing out of the current session which I figured out caused extra unnecessary steps of signing back in again so I opened a private window to sign in instead but also using multi-session option in User dropdown could be a valid alternative option in this case
- Signing in as an IAM user using the account ID
-
Entering awsS3user as the username and Training123! as the password
Once signed in as awsS3user, I navigated to the S3 console and
discovered I couldn't see my bucket yet because I hadn't granted the
necessary permissions.
Back in my terminal, I ran this command to find the appropriate policy
for S3 full access:
aws iam list-policies --query "Policies[?contains(PolicyName,'S3')]"
After finding the policy name in the results (AmazonS3FullAccess), I
attached it to my user:
aws iam attach-user-policy --policy-arn
arn:aws:iam::aws:policy/AmazonS3FullAccess --user-name awsS3user
I then refreshed the browser tab in the AWS Console and could now see my
S3 bucket.
Task 5: Adjusting S3 Bucket Permissions
To make my bucket publicly accessible for website hosting, I needed to
adjust the permissions:
-
In the S3 console, I selected my bucket and went to the Permissions
tab
- Under "Block public access", I clicked Edit
- I deselected "Block all public access"
- I confirmed the changes when prompted
- Under "Object Ownership", I clicked Edit
- I selected "ACLs enabled"
- I acknowledged that ACLs would be restored
- I saved the changes
Task 6: Extracting the Website Files
Now I needed to extract the static website files that would be uploaded
to S3. In the SSH terminal, I ran:
cd ~/sysops-activity-files
tar xvzf static-website-v2.tar.gz
cd static-website
To verify the extraction was successful, I ran
ls and confirmed I could see the index.html
file and the css and images directories.
Task 7: Uploading Files to Amazon S3
With my files ready, I needed to configure my bucket for website hosting
and upload the files:
First, I configured the bucket as a website and set the index document:
aws s3 website s3://askeries754/ --index-document index.html
Then I uploaded all the files with public read access:
aws s3 cp /home/ec2-user/sysops-activity-files/static-website/
s3://askeries754/ --recursive --acl public-read
To verify the upload was successful, I listed the contents of my bucket:
aws s3 ls askeries754
In the AWS Console, I went to my bucket's Properties tab and noticed
that Static website hosting was enabled. I clicked on the Bucket website
endpoint URL and saw my Café & Bakery website successfully deployed and
accessible to the public!
Task 8: Creating a Batch File for Website Updates
To make future website updates easier, I created a batch file:
-
I checked my command history to find the S3 copy command I used
earlier:
history
- I created a new shell script:
cd ~
touch update-website.sh
- I opened the file in the VI editor:
vi update-website.sh
-
I added the following content (pressing 'i' to enter insert mode):
#!/bin/bash aws s3 cp
/home/ec2-user/sysops-activity-files/static-website/
s3://askeries754/ --recursive --acl public-read
- I saved the file (pressing Esc, then typing :wq and Enter)
- I made the script executable:
chmod +x update-website.sh
To test the script, I made some changes to the website:
- I opened the index.html file:
vi sysops-activity-files/static-website/index.html
- I changed the background colors:
-
Changed the first instance of
bgcolor="aquamarine" to
bgcolor="gainsboro"
-
Changed bgcolor="orange" to
bgcolor="cornsilk"
-
Changed the second instance of
bgcolor="aquamarine" to
bgcolor="gainsboro"
- I saved the file (Esc, :wq, Enter)
- I ran my update script:
./update-website.sh
I refreshed the website in my browser and saw the color changes,
confirming my update process worked!
Optional Challenge: Making the Update Process More Efficient
I noticed that my batch file was uploading all files every time, even
when only one file changed. To optimize this, I explored the AWS CLI's
sync command.
- I made another small change to index.html
-
Instead of using aws s3 cp, I updated
my script to use aws s3 sync:
aws s3 sync /home/ec2-user/sysops-activity-files/static-website/
s3://askeries754/ --acl public-read
When I ran the updated script, I noticed it only uploaded the changed
file (index.html) rather than all files. This made the update process
much more efficient by:
- Only transferring files that had changed
- Reducing data transfer and bandwidth usage
- Making updates faster, especially for larger websites
-
Maintaining better synchronization between local and remote versions
The sync command was clearly more efficient than the
cp command for managing website updates.
Conclusion
I successfully:
- Executed AWS CLI commands for IAM and S3 services
- Deployed a static website to an S3 bucket
-
Created and optimized a script that uses the AWS CLI to efficiently
update my website files
This experience gave me practical knowledge of how to host and maintain
a static website using Amazon S3, which is a cost-effective and scalable
solution for web hosting.
×
![]()
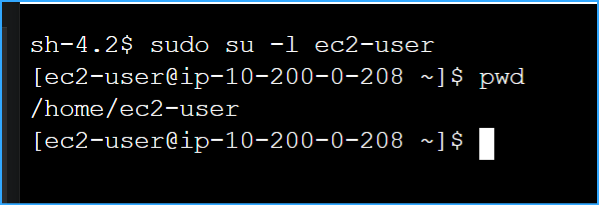 Changed user and home directory
 Created S3 bucket with name output as JSON
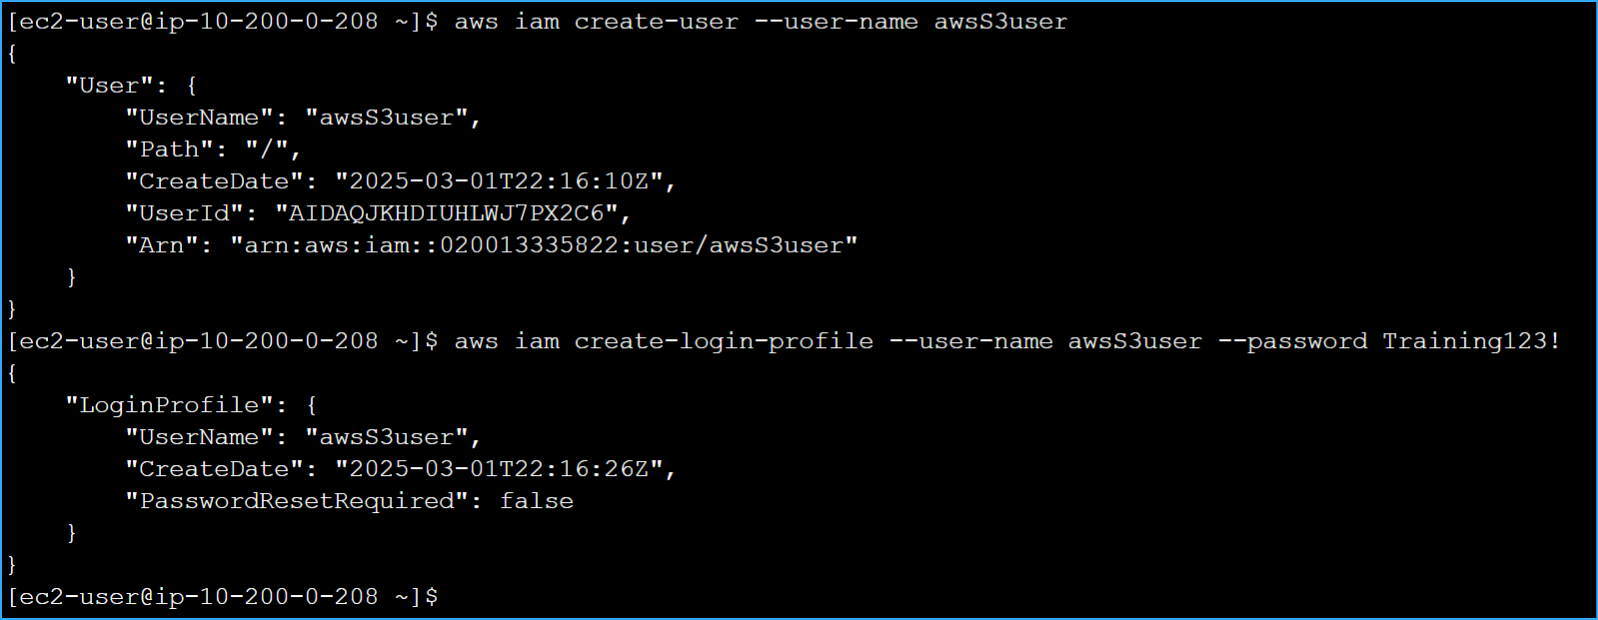 Created new IAM user and login profile
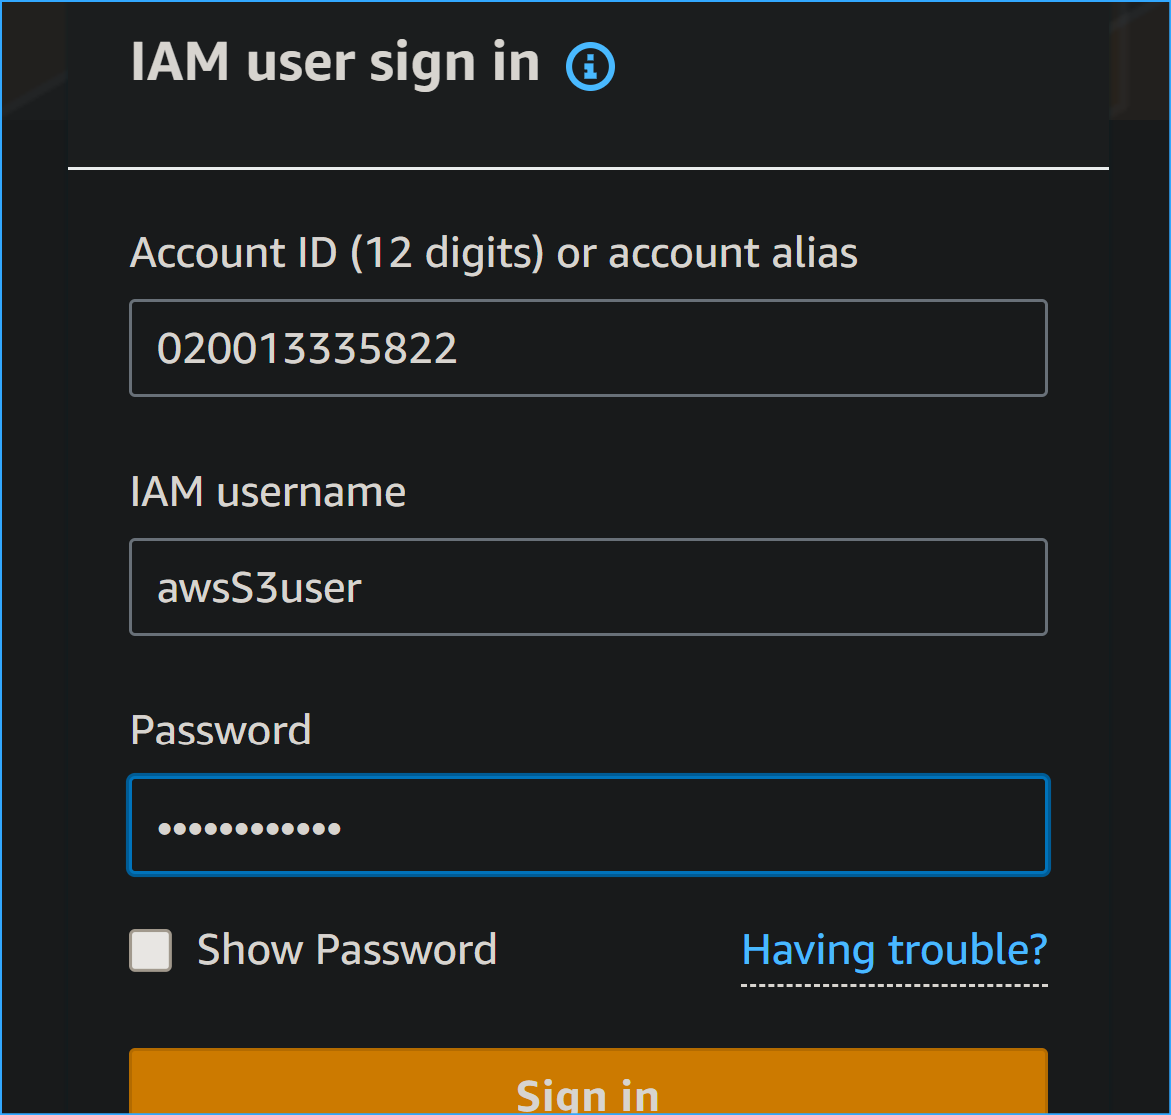 After copying account ID, used it and IAM credentials to sign in
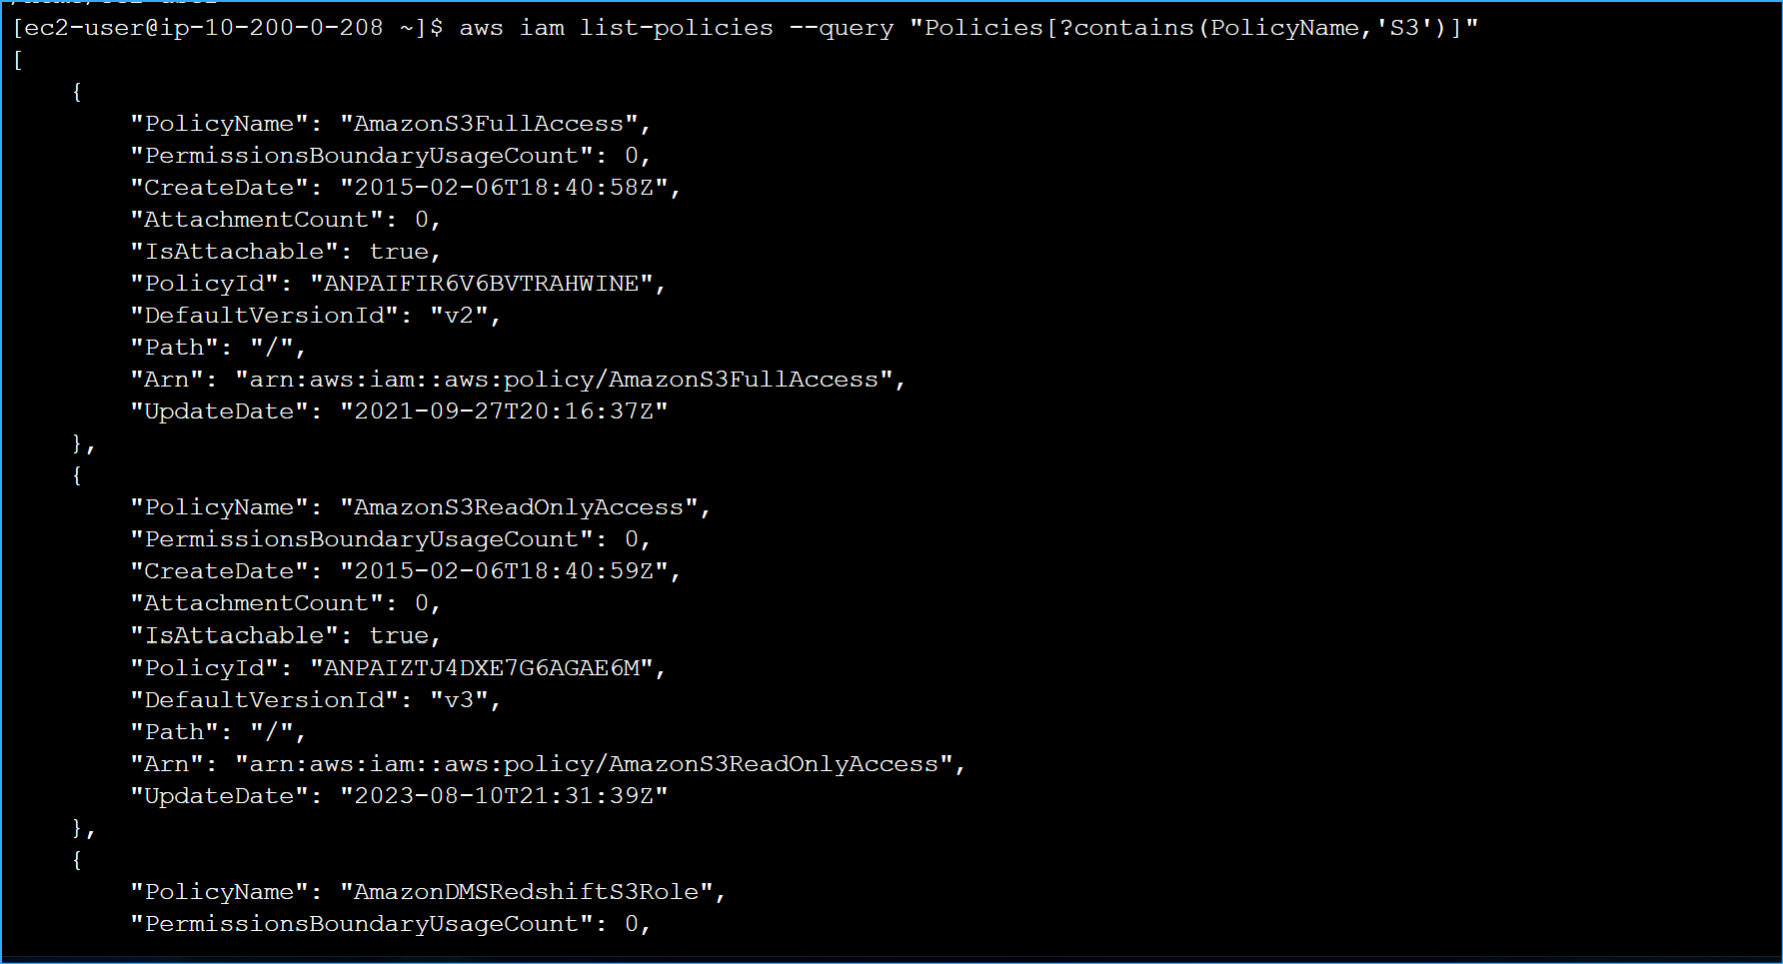 Ran command to find policy that grants permission to S3
 Granted full access to S3 for new user
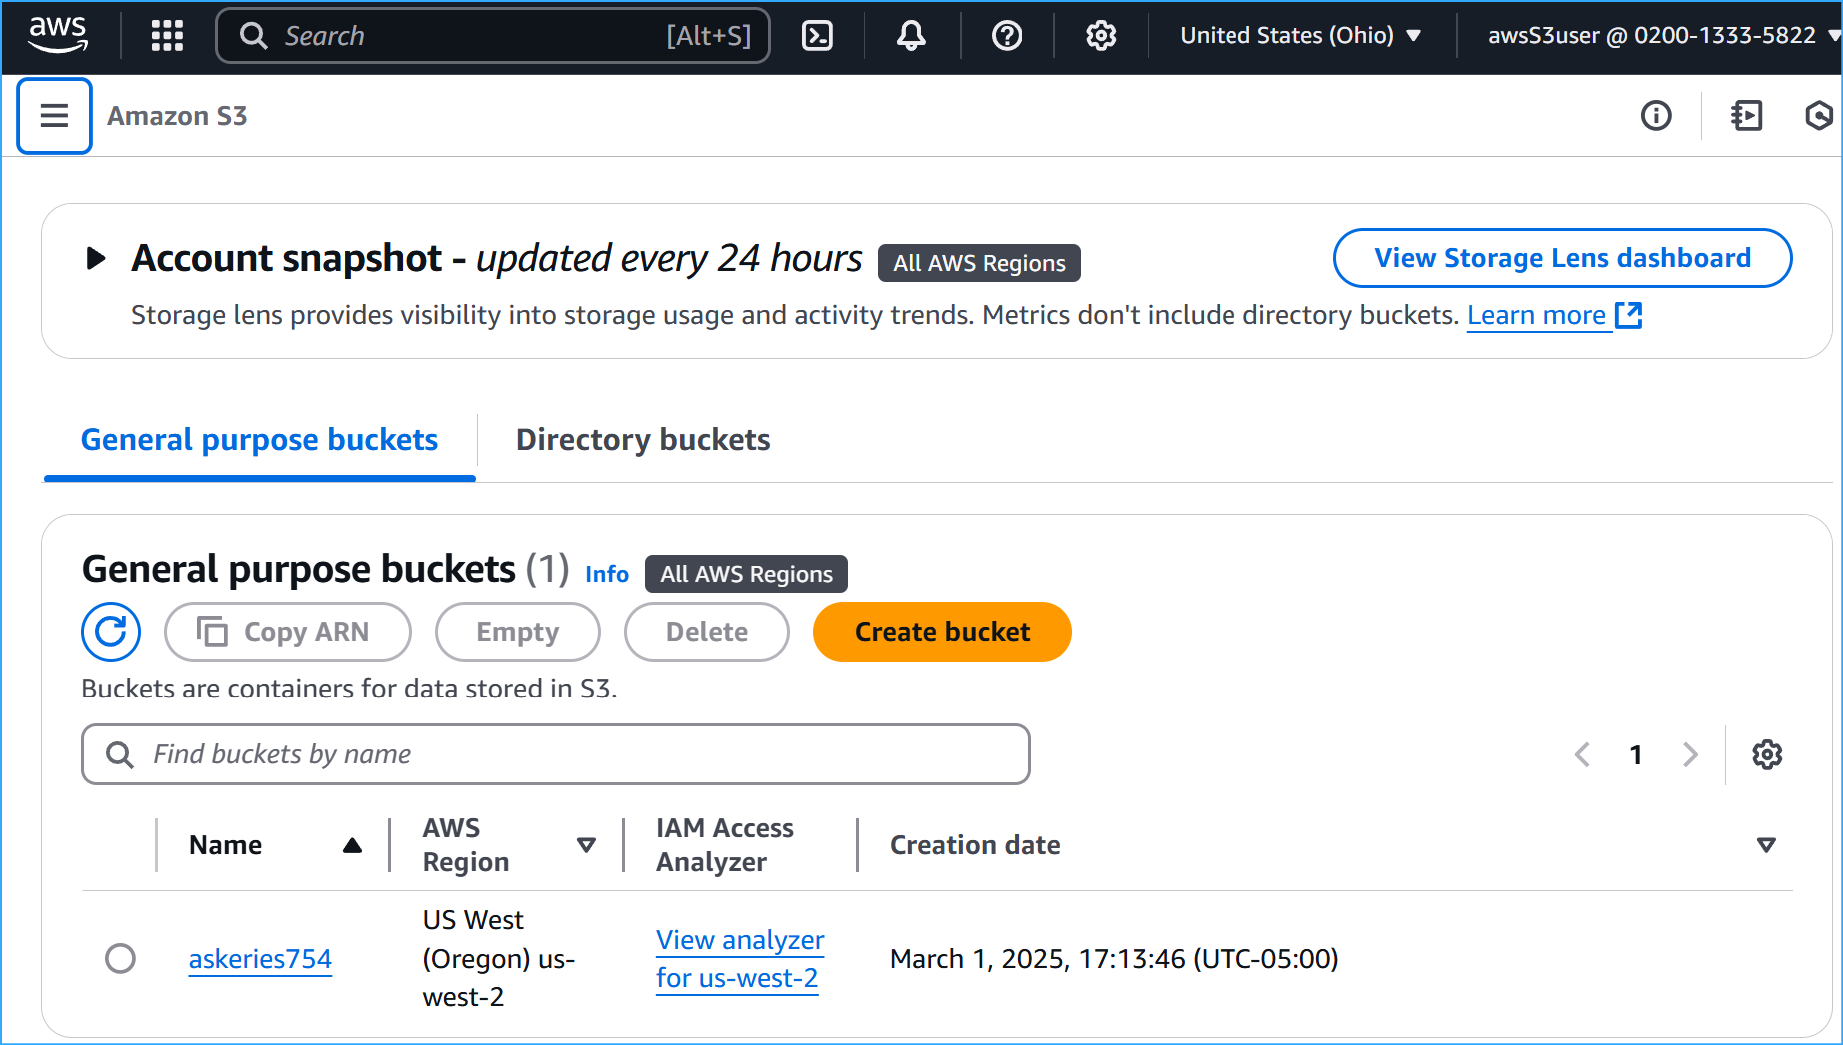 After granting permissions to this IAM user can now see S3 bucket
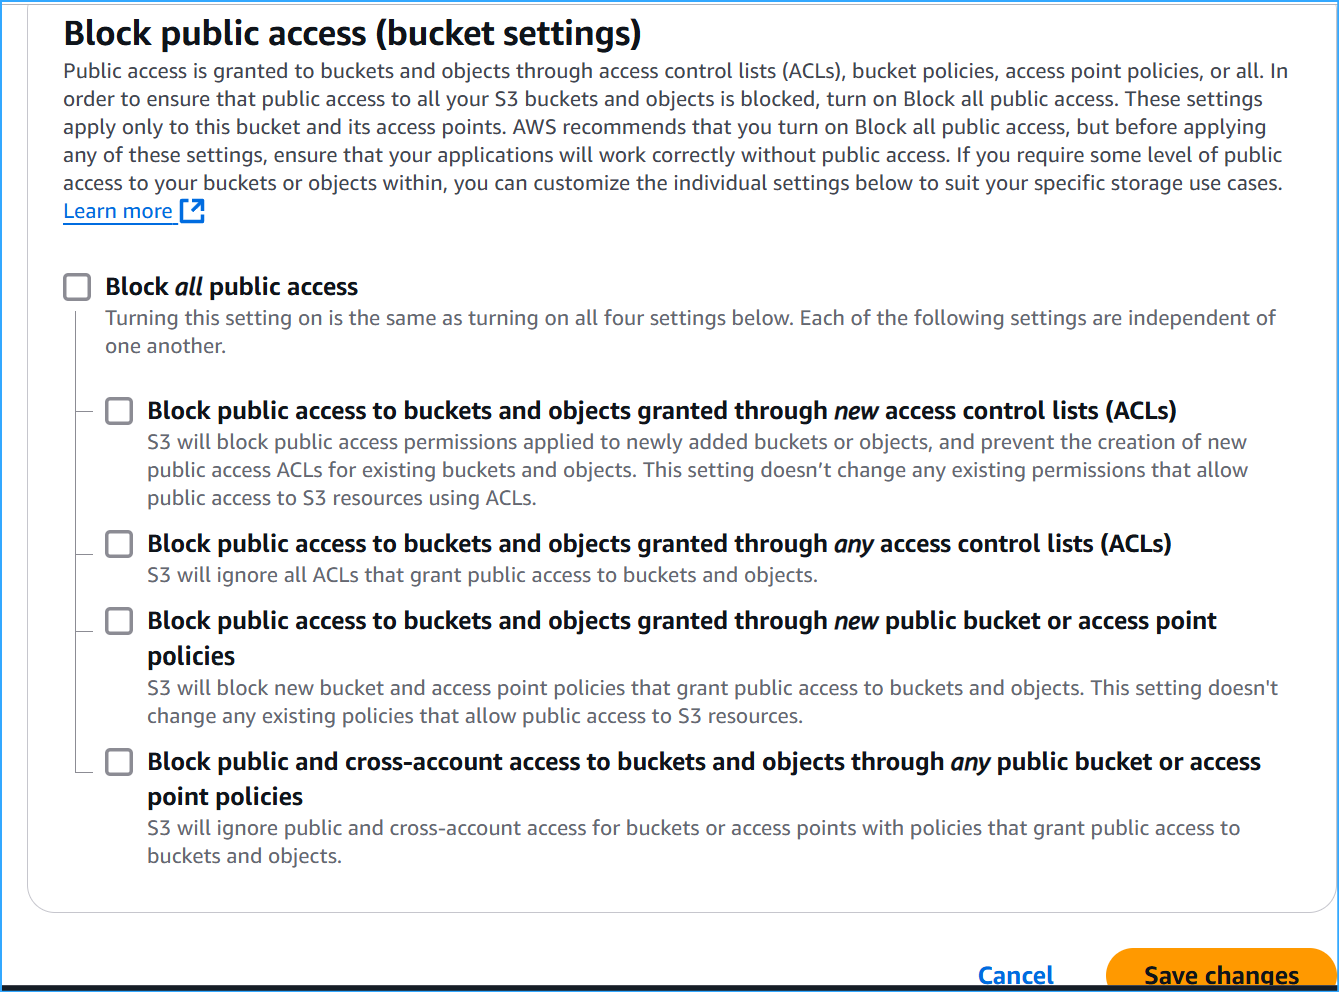 Turned off block public access setting in S3 bucket
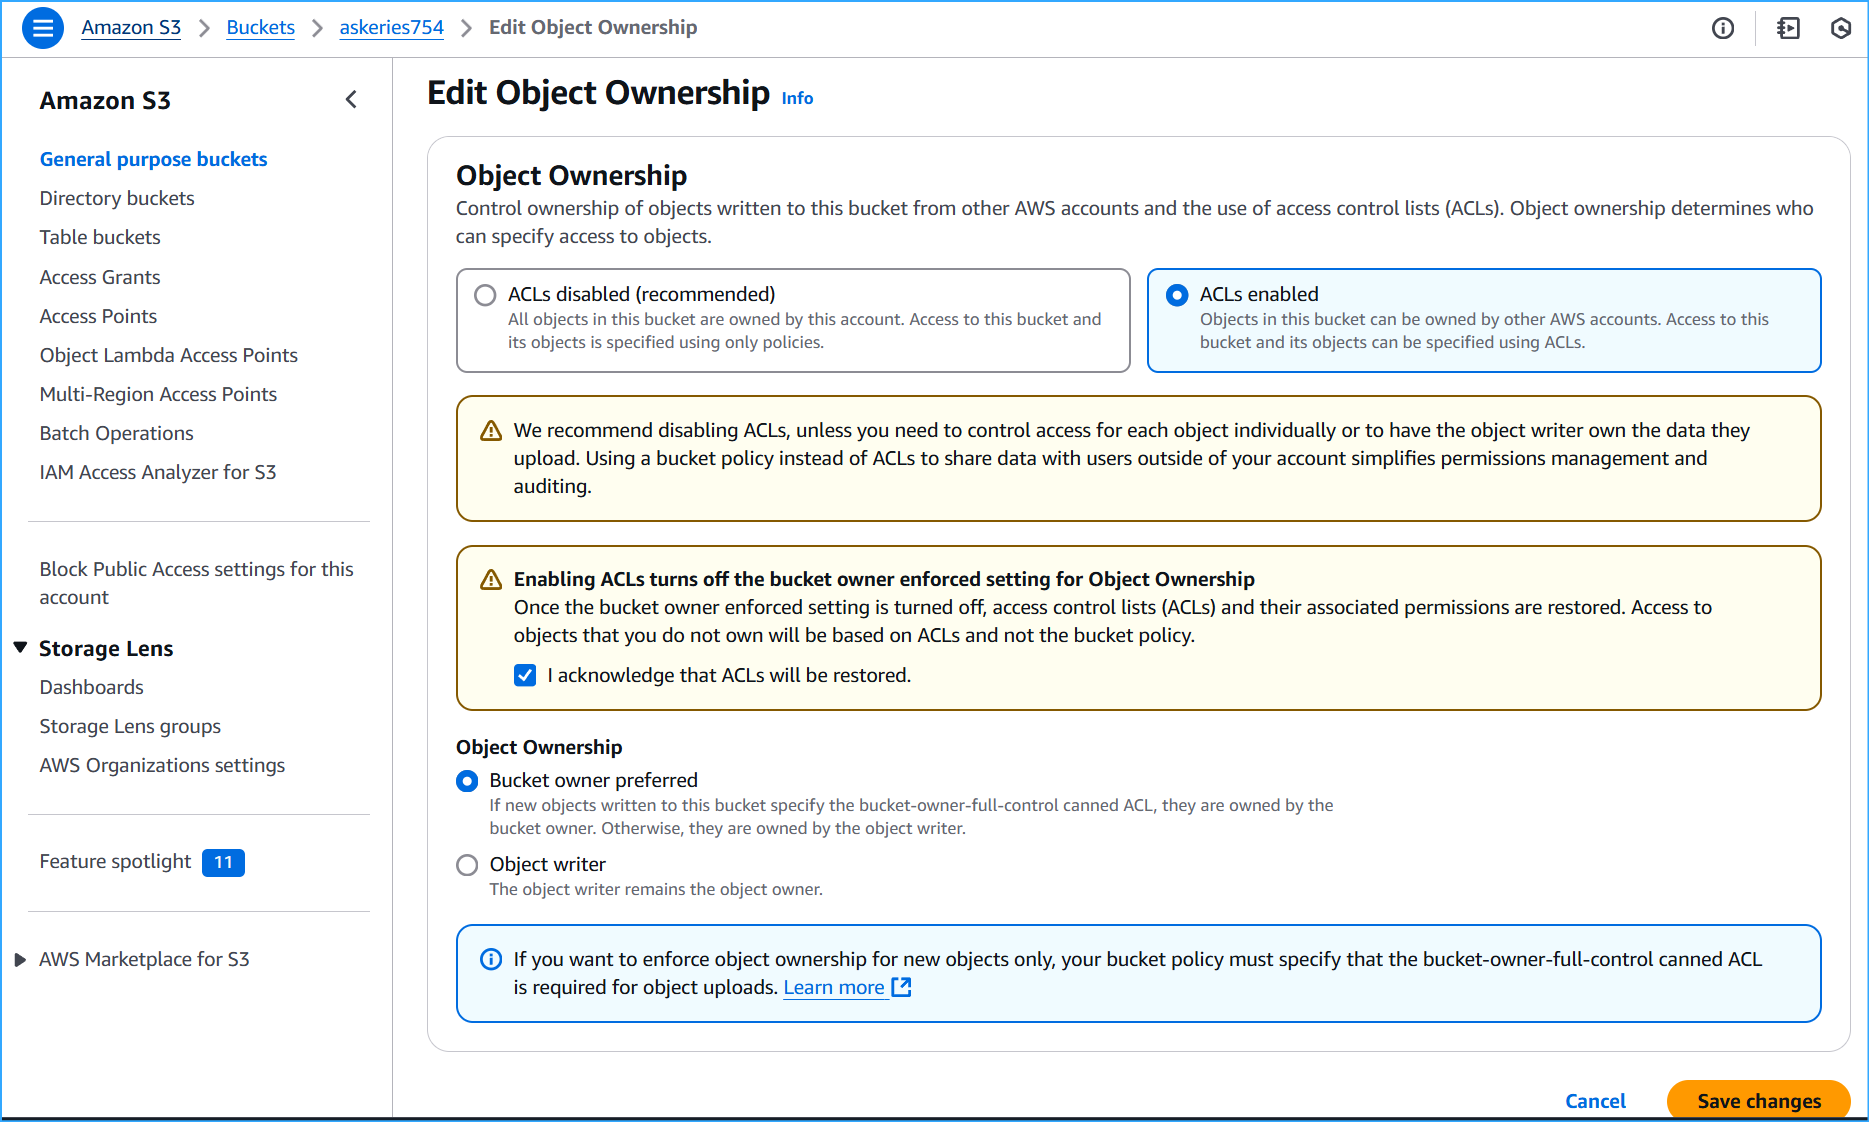 Enabled ACLs in object ownership, acknowledged ACLs will be restored
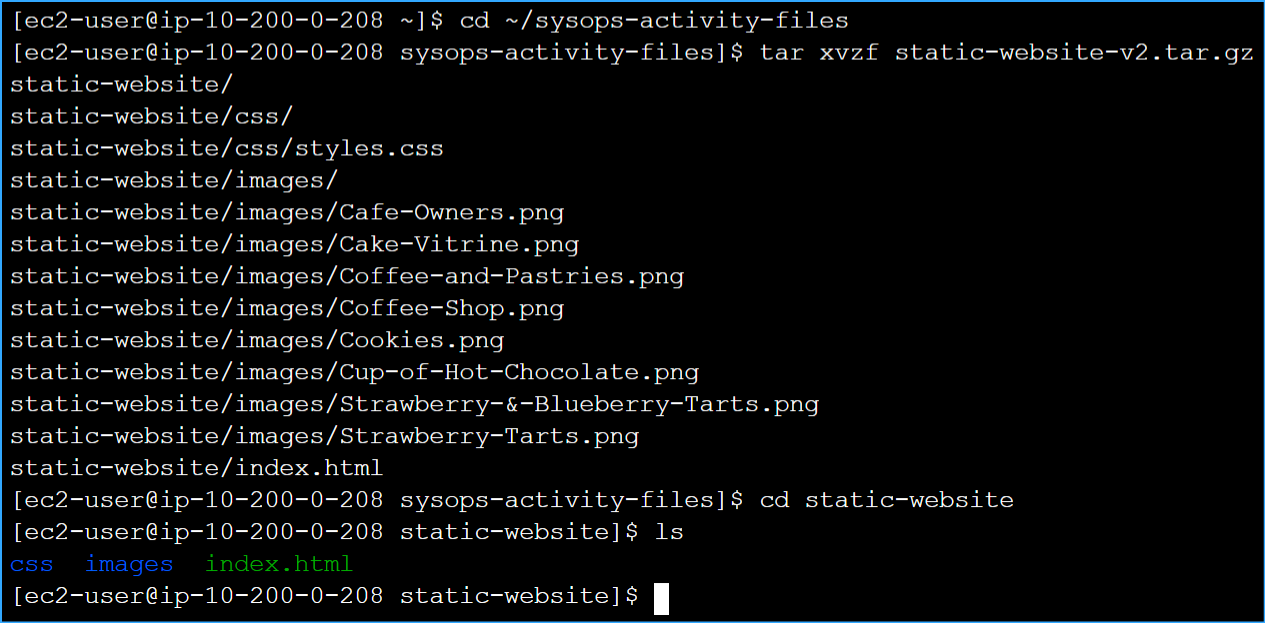 Extracted files and confirmed they were extracted correctly with ls
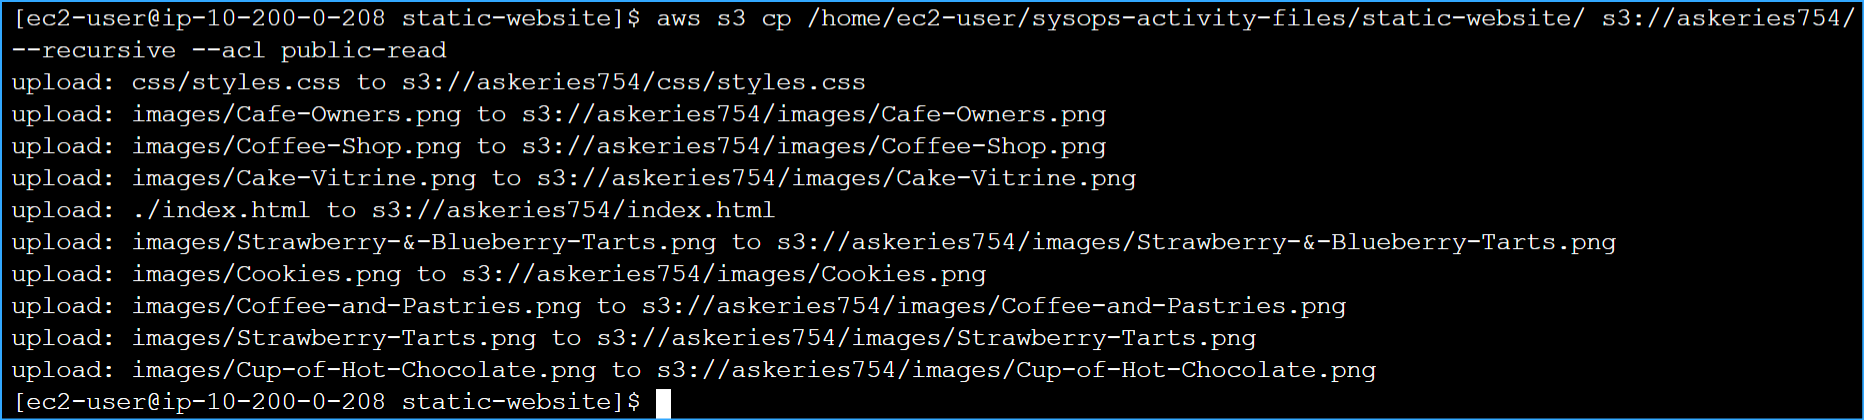 Uploaded files to bucket includes recursive parameter
 Verified files were uploaded to bucket
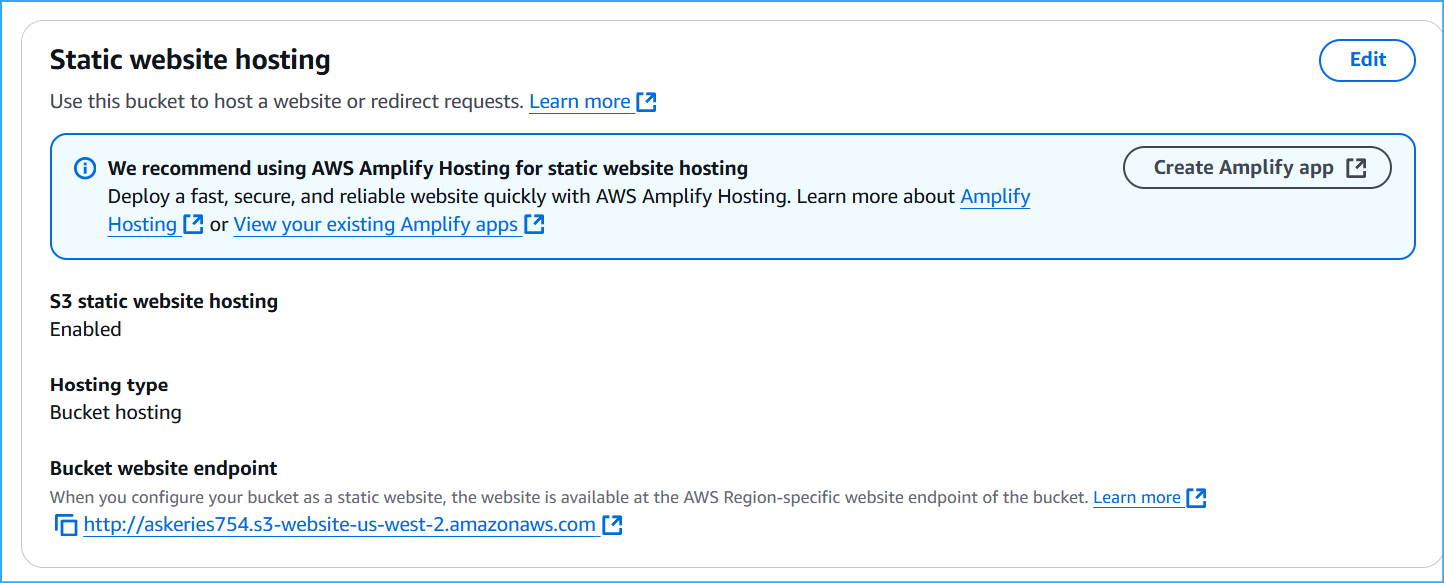 Copied bucket endpoint URL
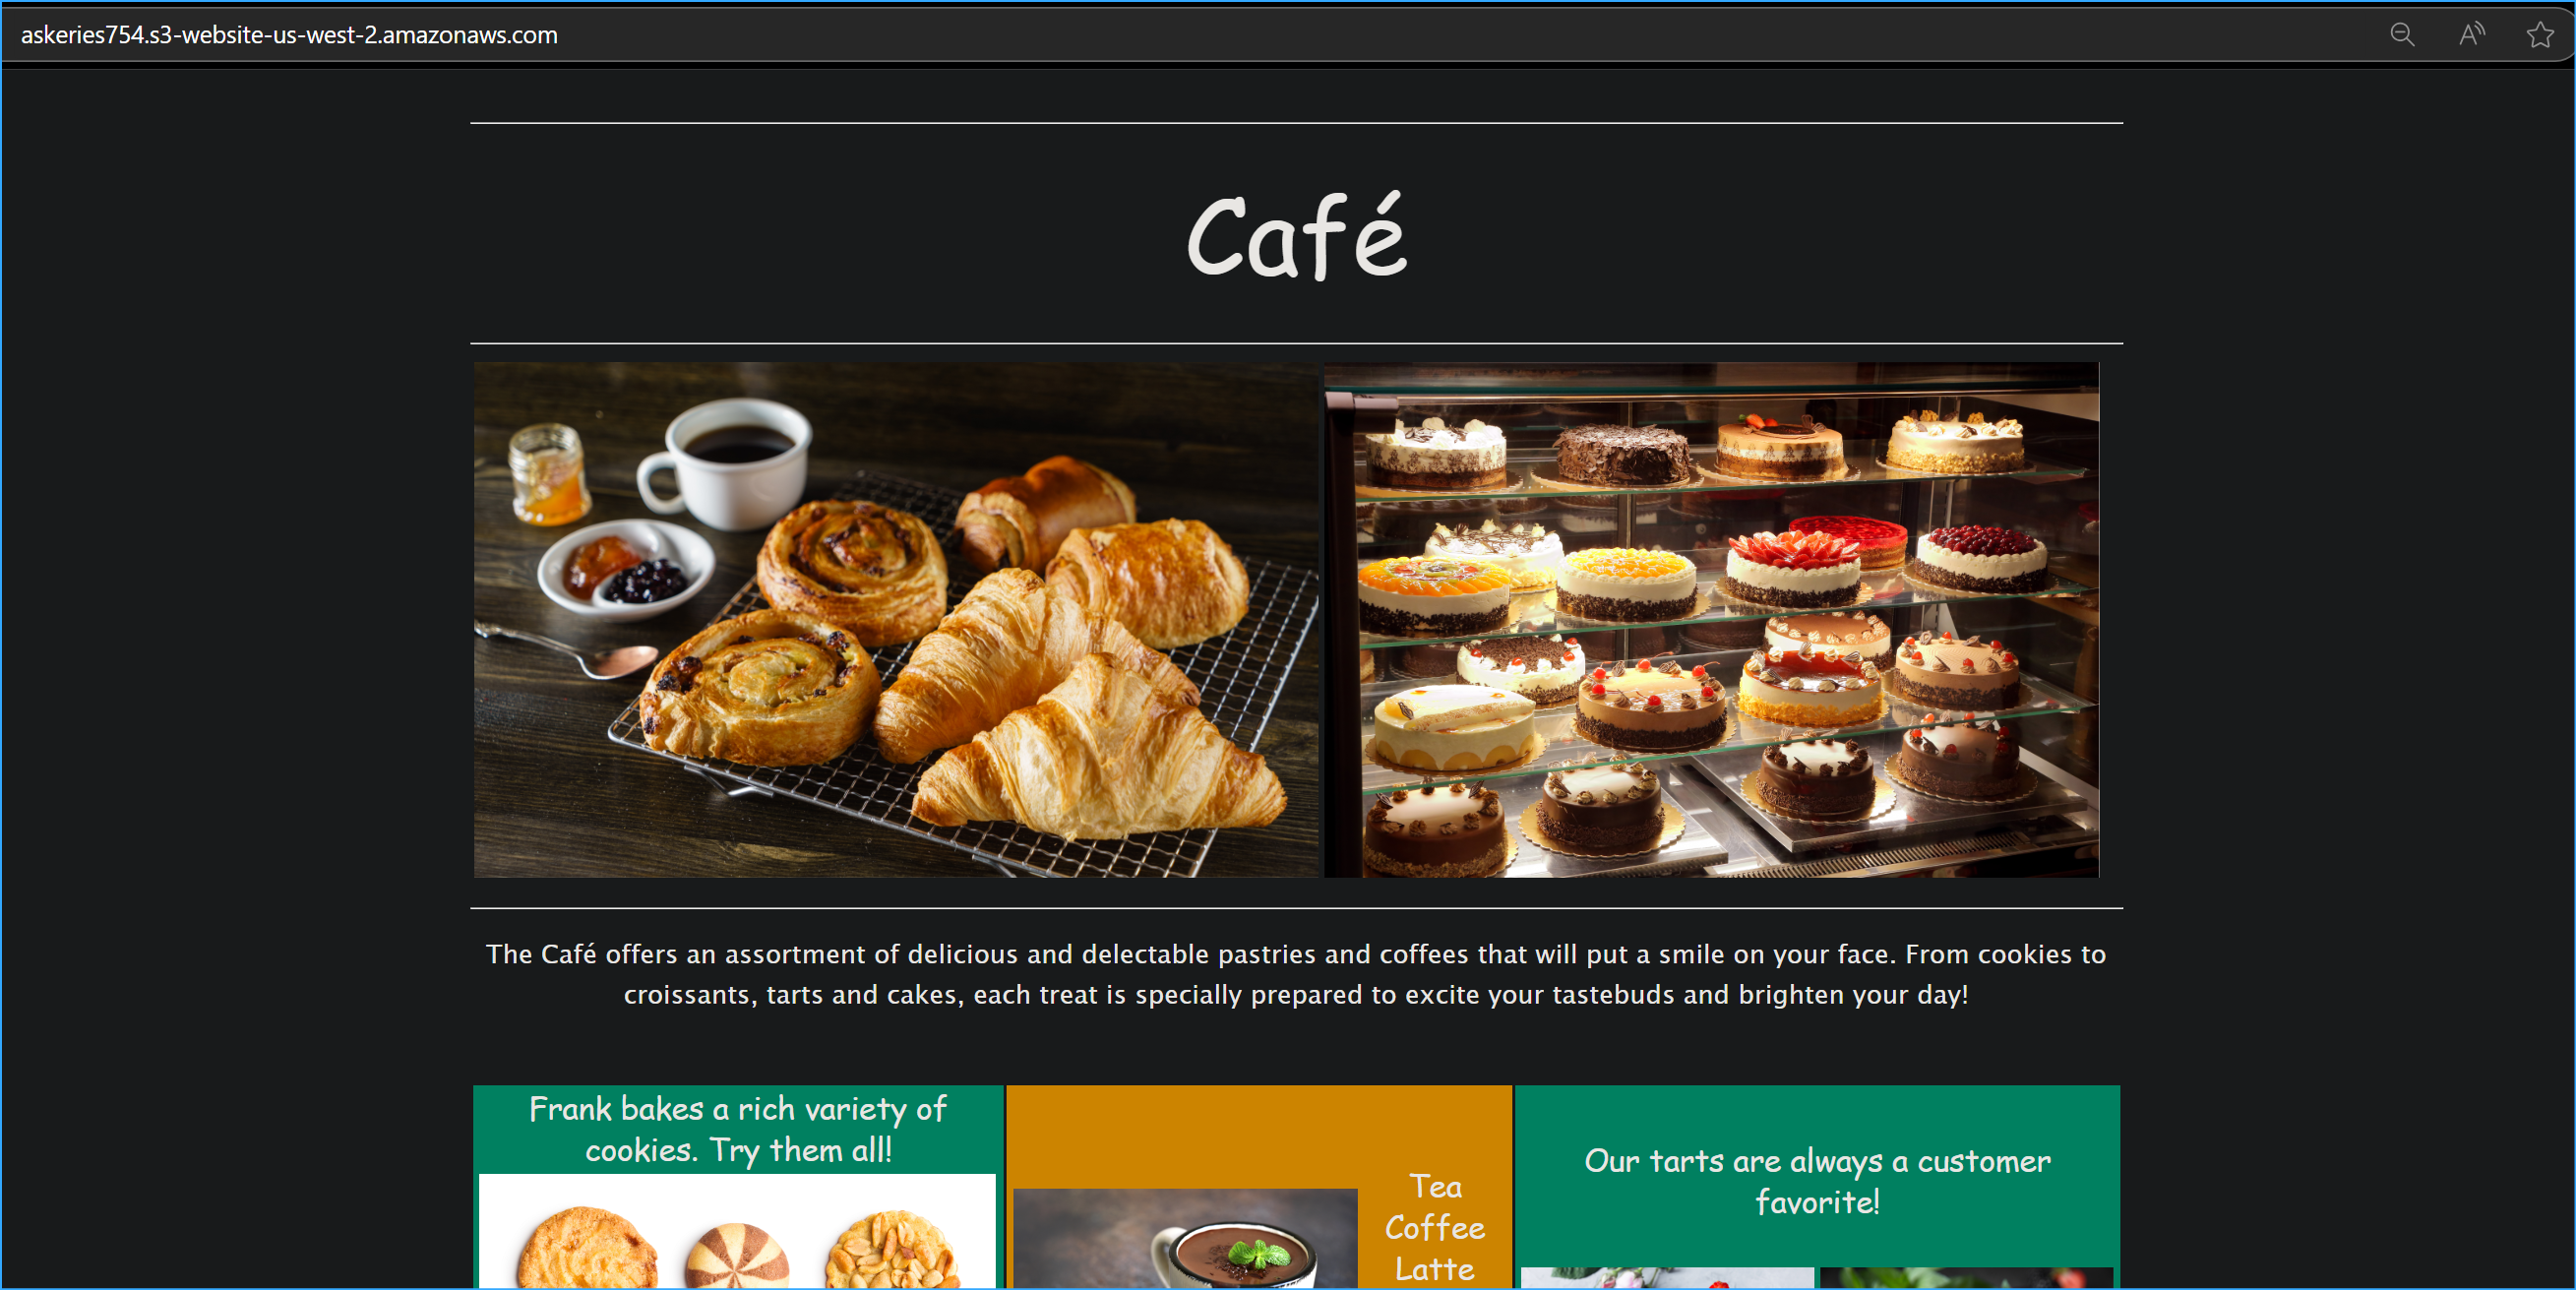 Pasted bucket endpoint URL in browser, verified it's available for public view
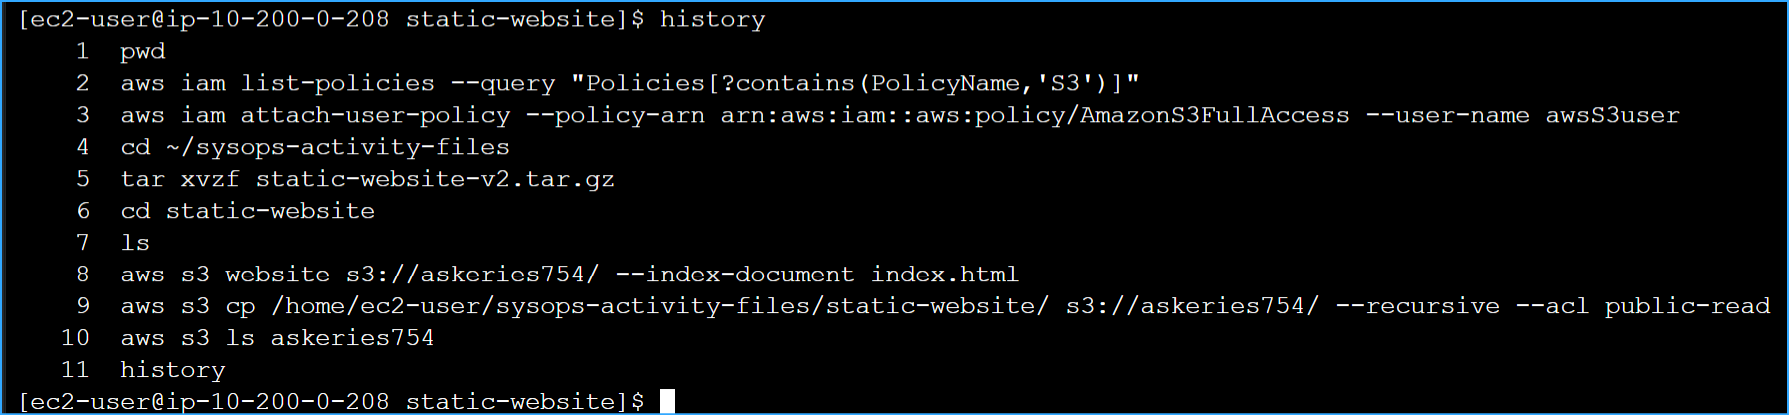 Ran history command to find my S3 copy command
 Changed directory to root and created empty file
 In Vim added standard bash file then my S3 copy command
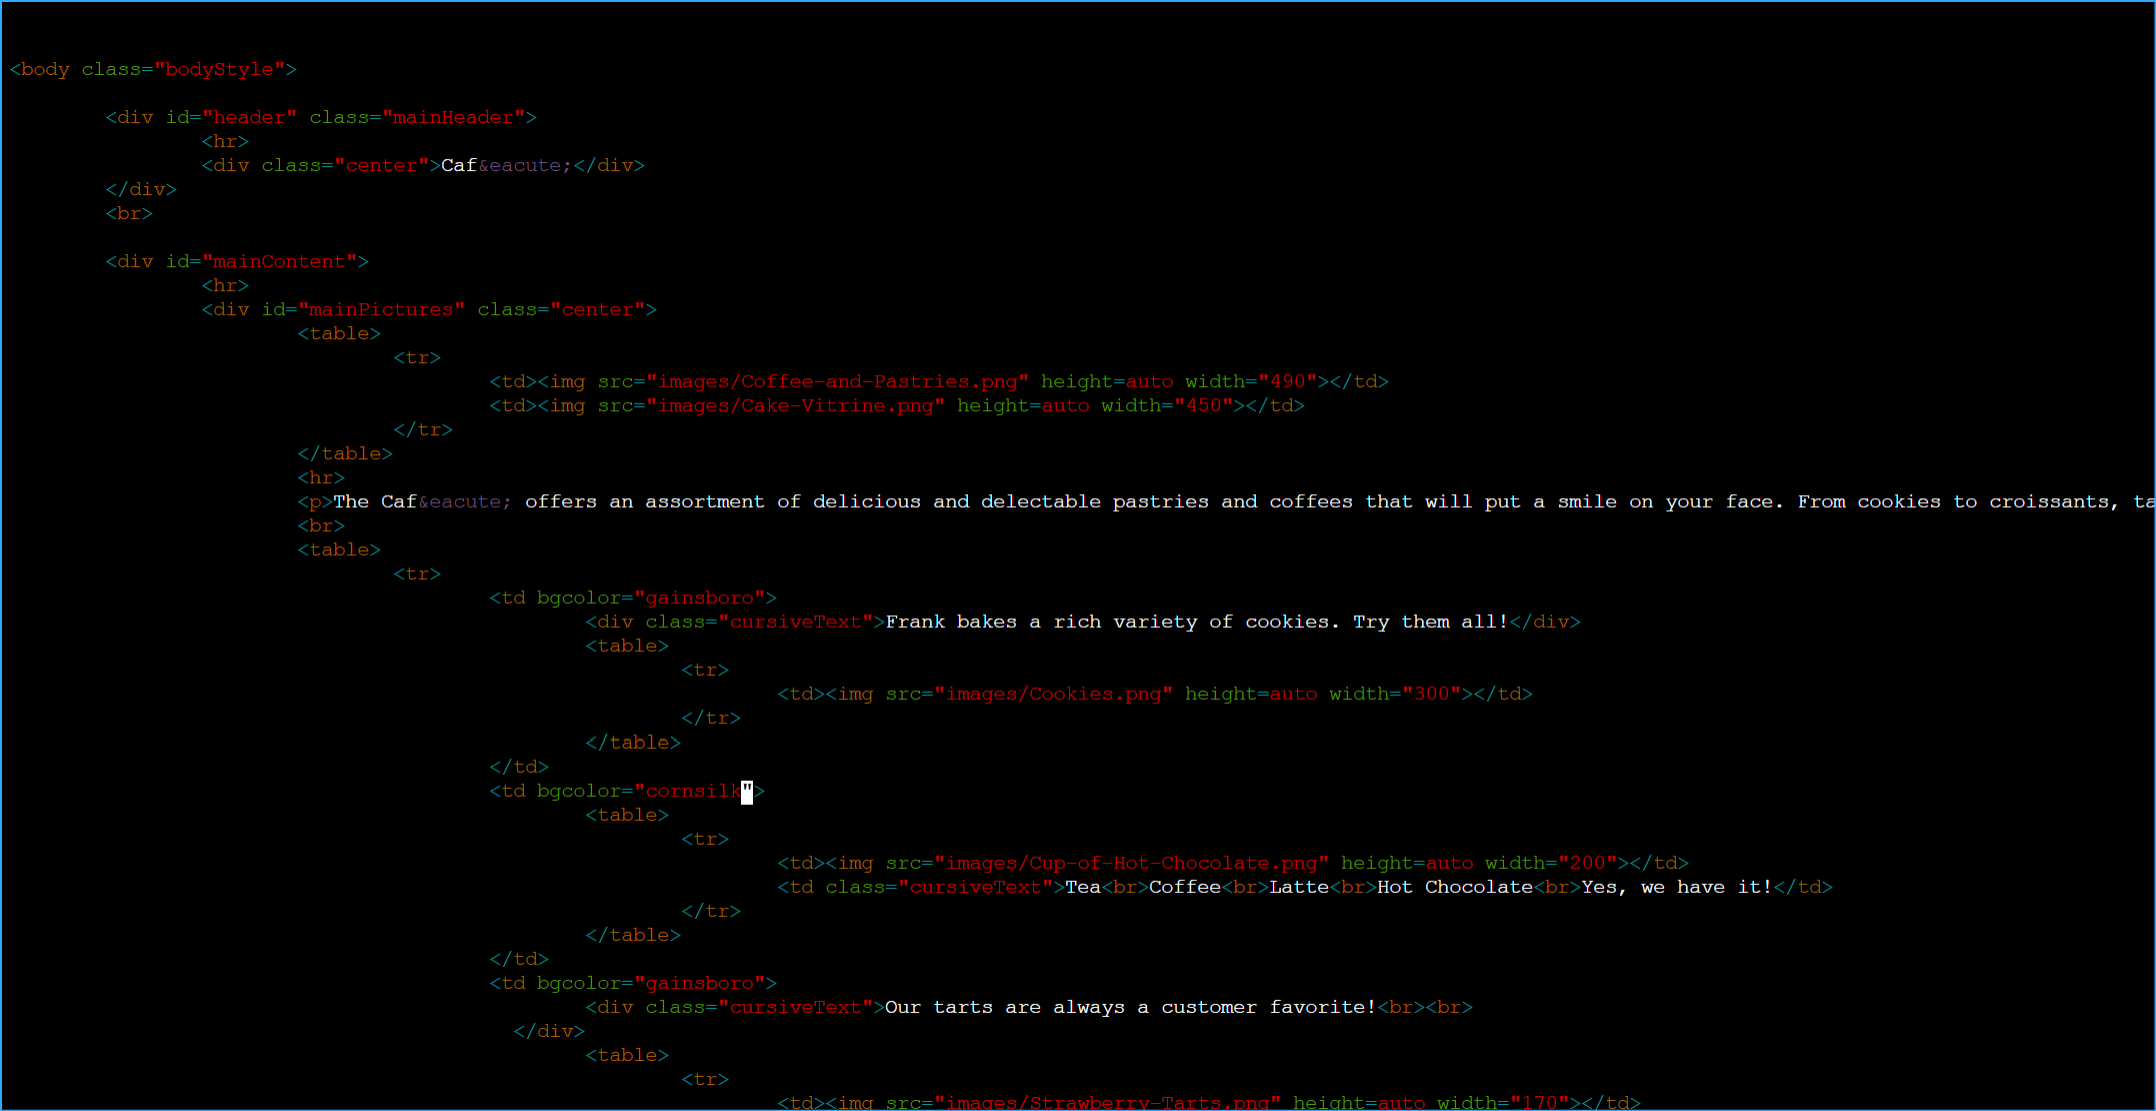 Changed what was aquamarine and orange background color to gainsboro and cornsilk in Vim
 Created updated website file, added copy to S3 in Vim, allowed permissions, edited index
 Ran update website command to see changes
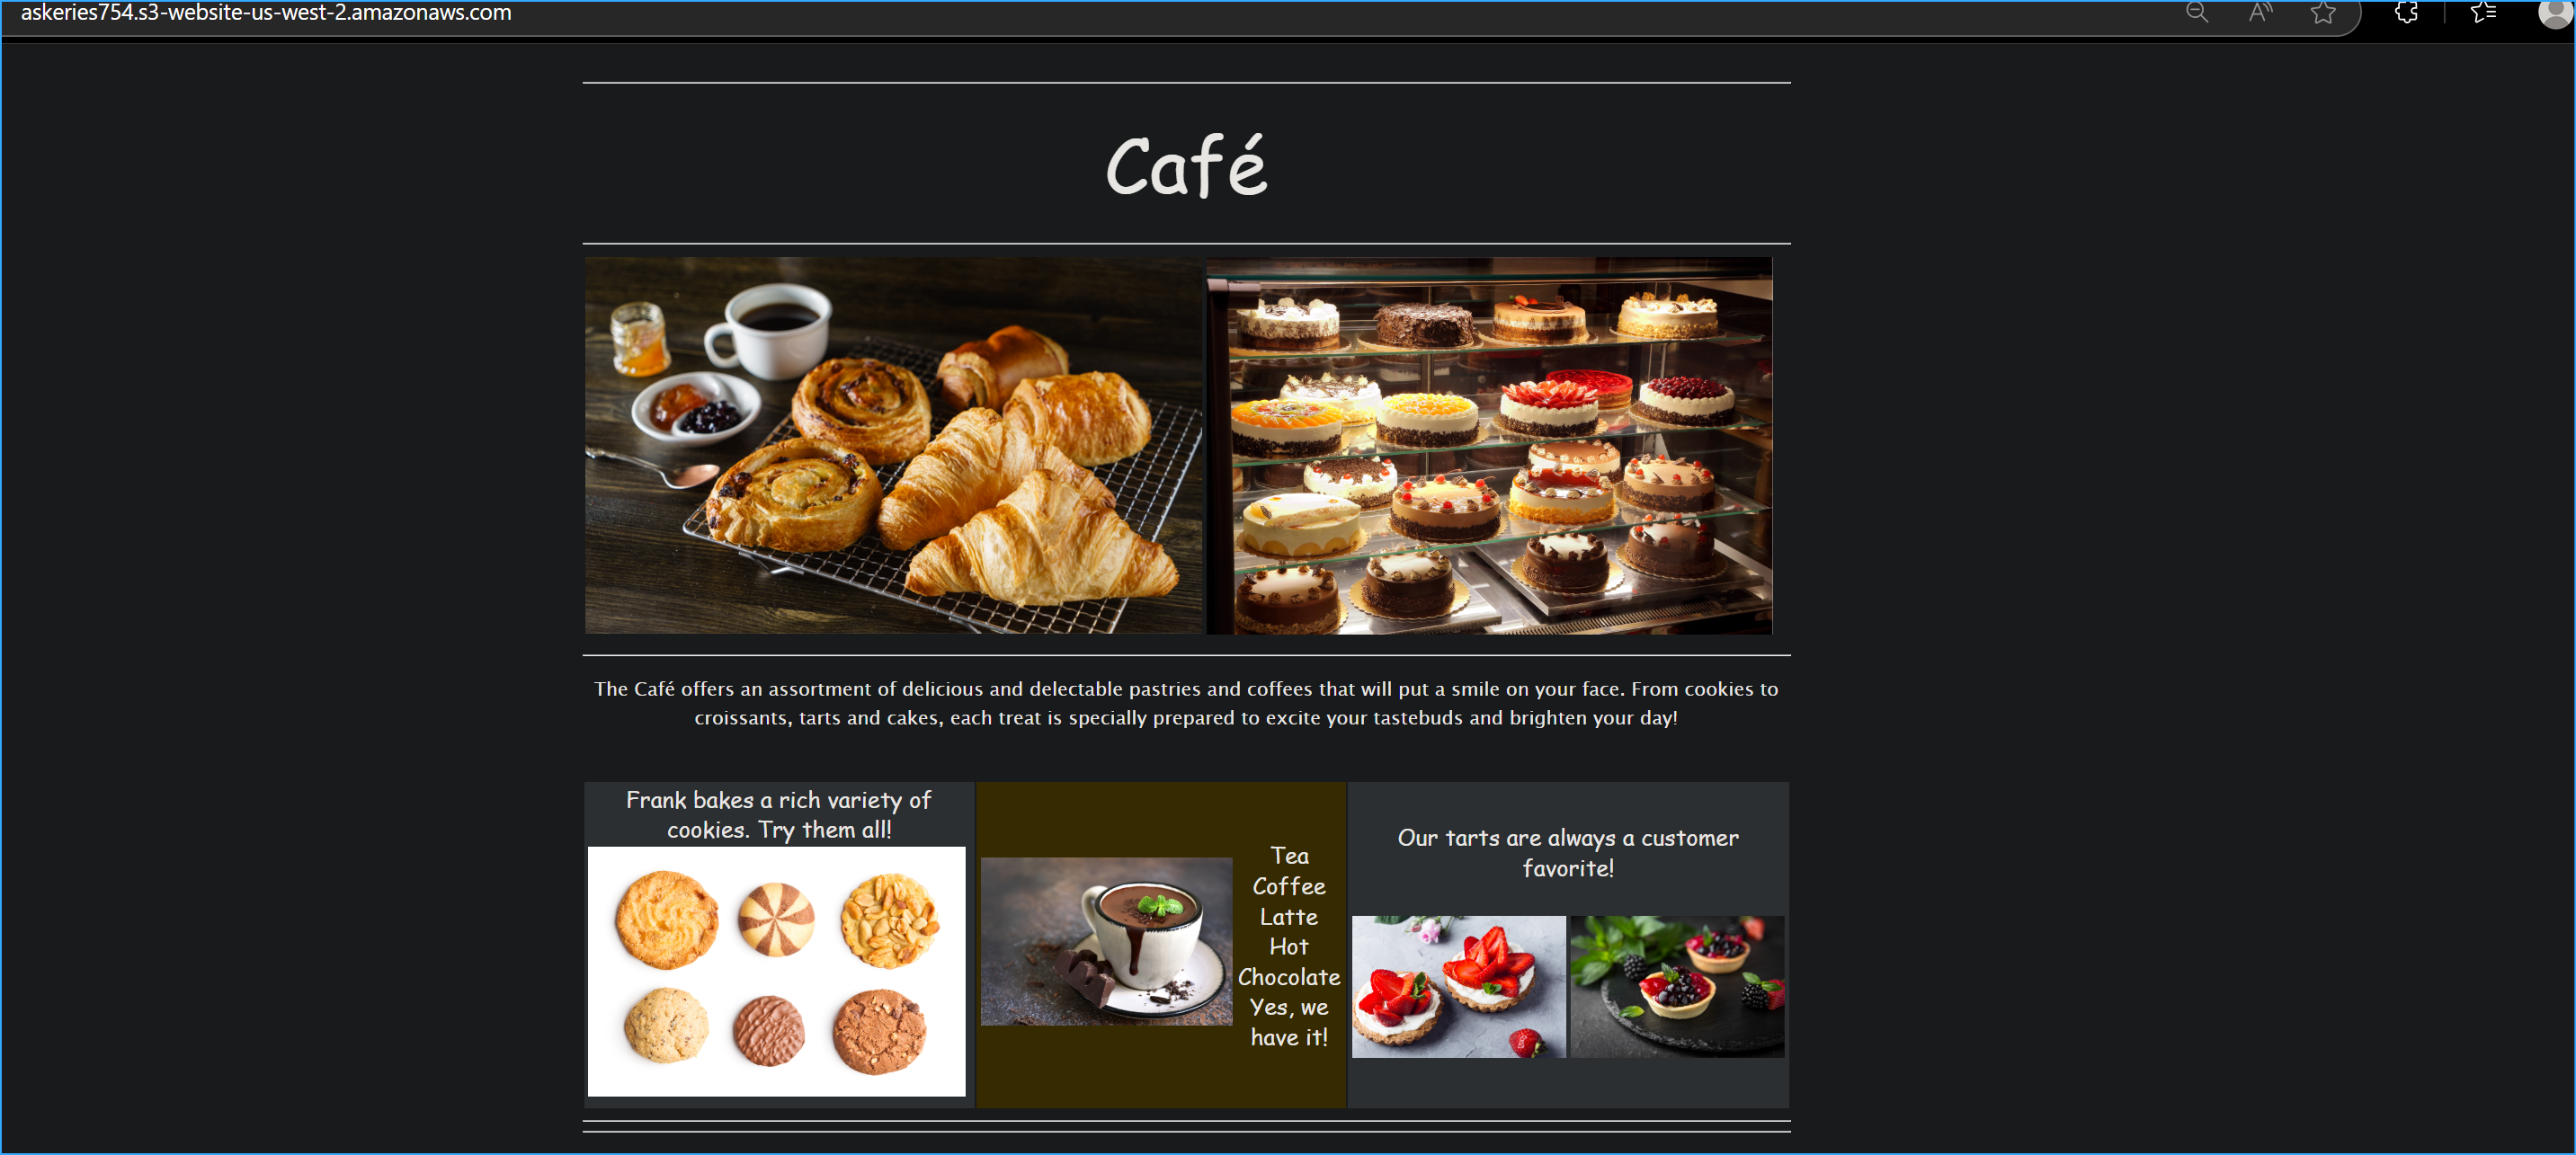 Verified updated website changes
 Replaced copy command in script with sync command for efficiency
 Updated shell script with sync command, made small change to web page index, updated script
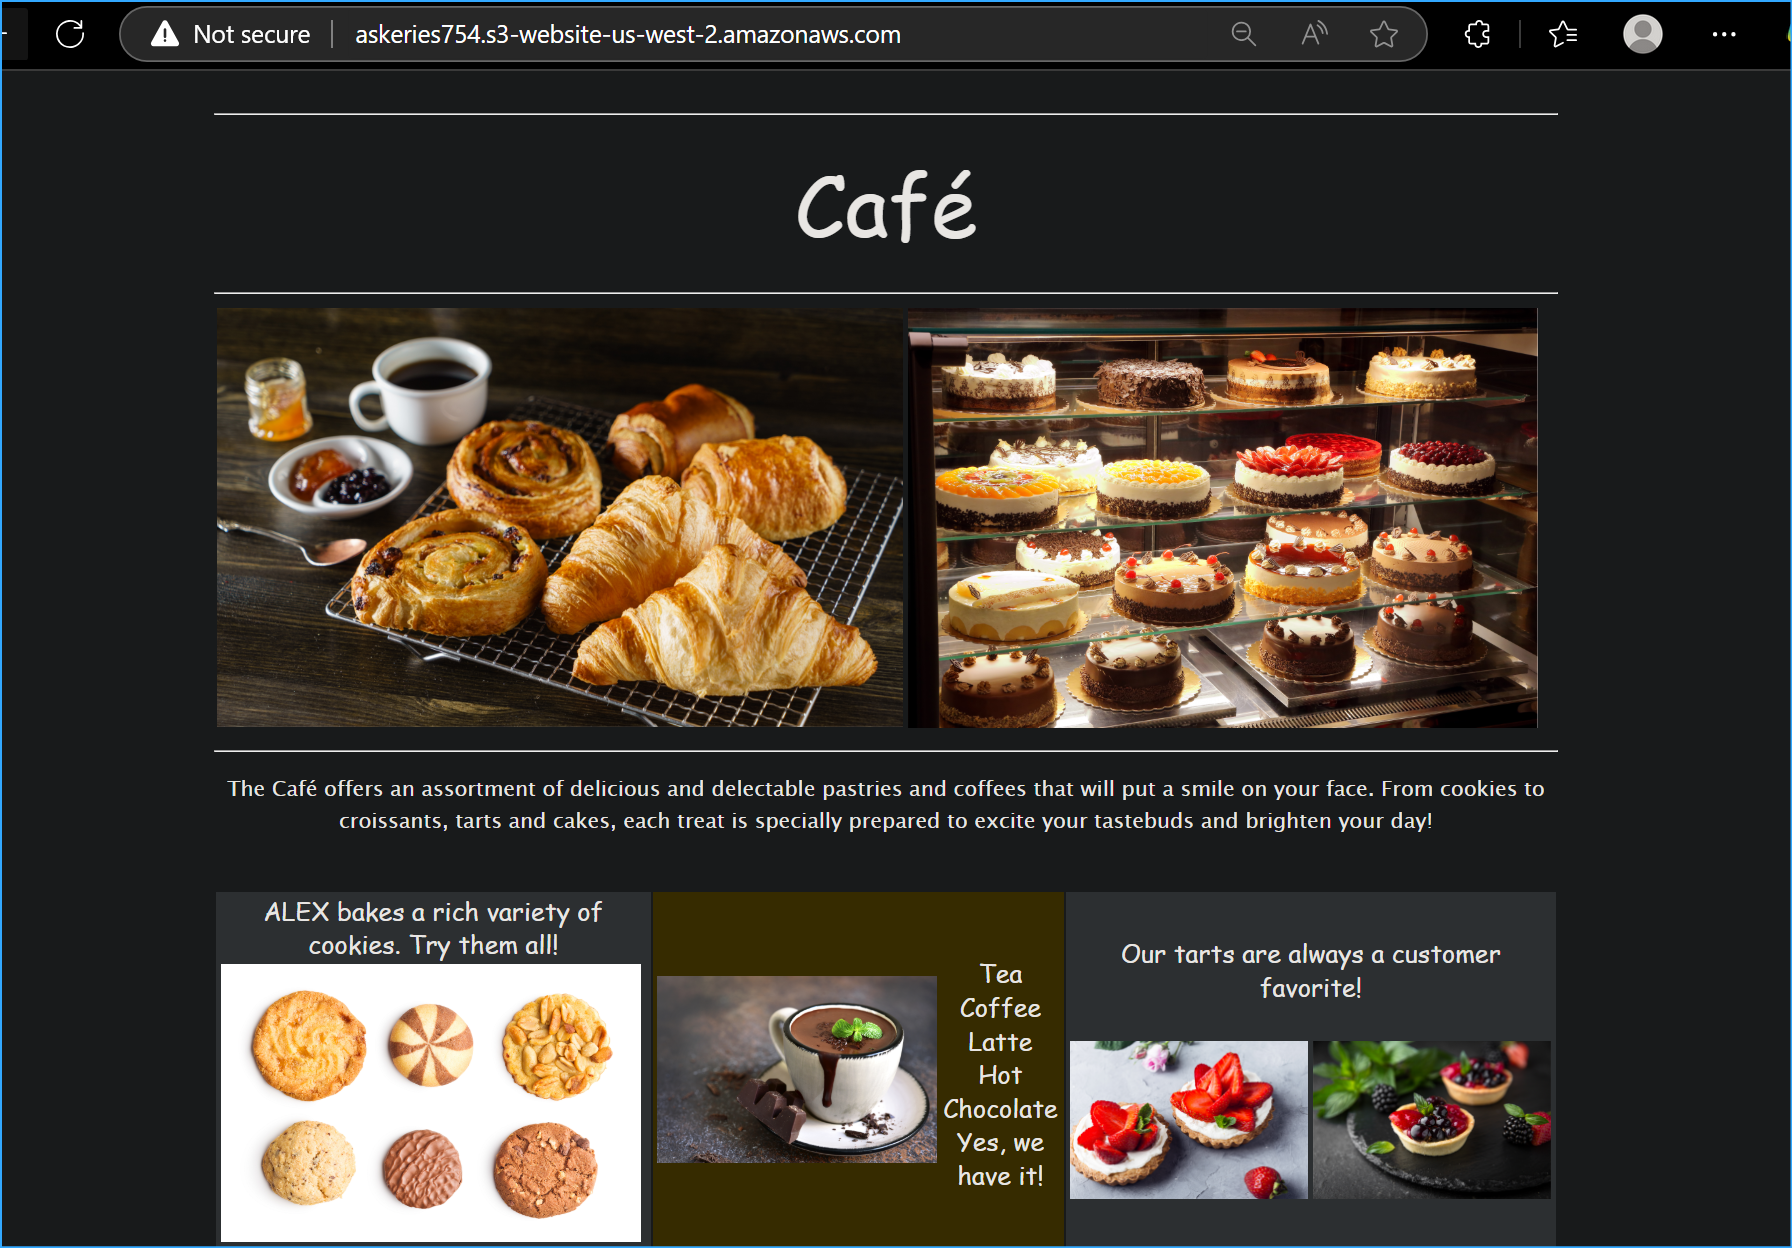 Can you notice the updated change versus before
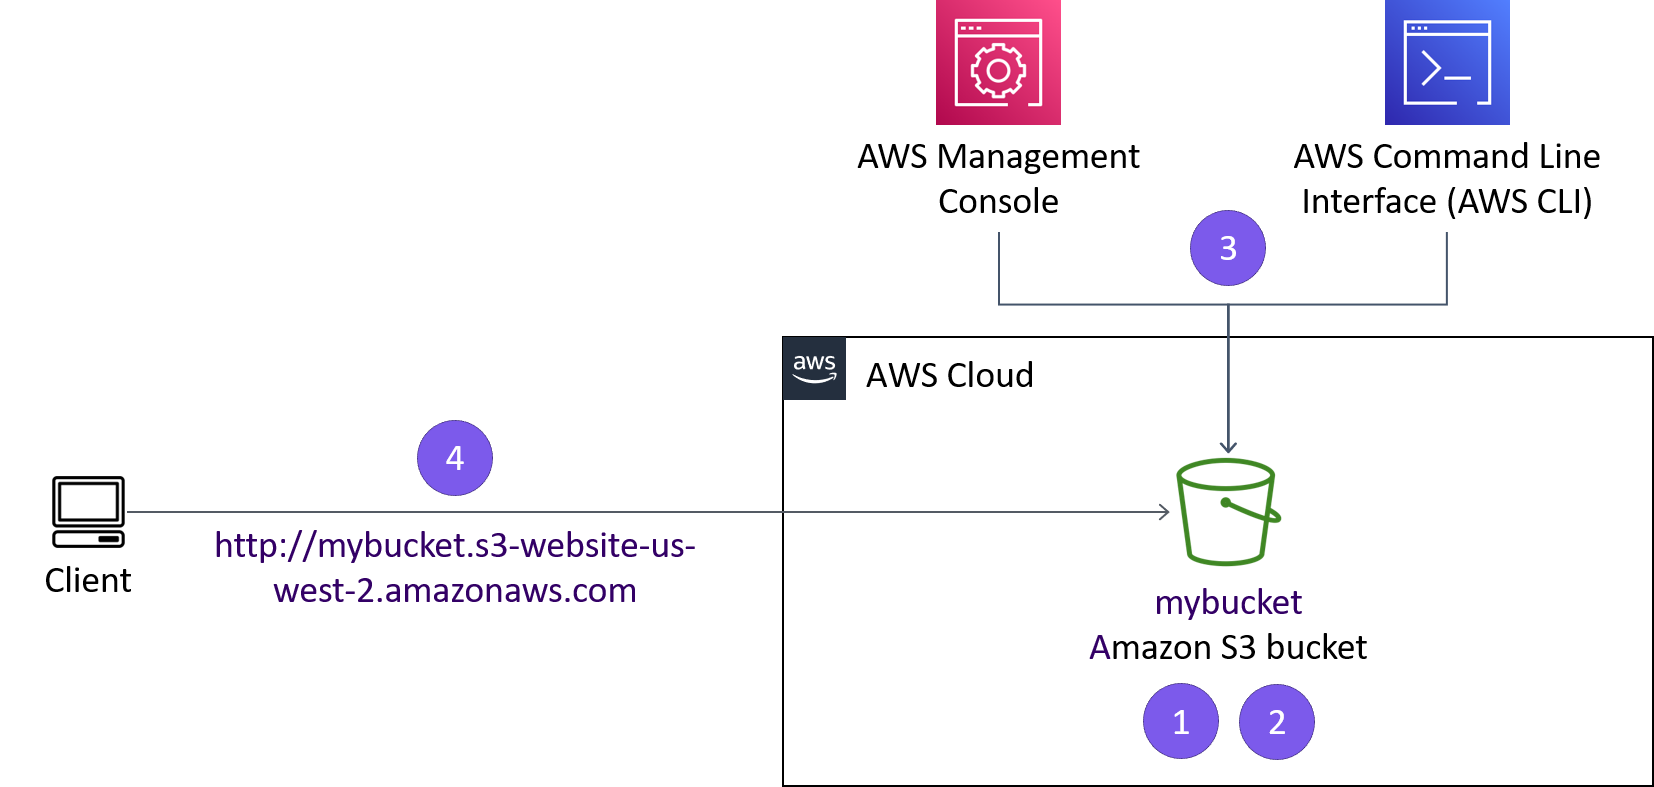 Project depiction