Task 2: Taking snapshots of my instance
In this section, I used the AWS Command Line Interface (AWS CLI) to
manage the processing of snapshots of an instance.
Task 2.1: Connecting to the Command Host EC2 instance
I needed to connect to the "Command Host" EC2 instance to run my
commands.
-
I went to the AWS Management Console, and in the Search bar, I entered
and chose EC2 to open the EC2 Management Console.
- In the navigation pane, I chose Instances.
-
From the list of instances, I selected Command Host.
- I clicked Connect.
-
On the EC2 Instance Connect tab, I chose Connect.
This opened a new browser tab with the EC2 Instance Connect terminal
window that I would use for the rest of my work.
I kept this terminal window open to complete the tasks throughout. I
also made a mental note that if the terminal became unresponsive, I
could refresh the browser or repeat these connection steps.
Task 2.2: Taking an initial snapshot
Next, I needed to identify the EBS volume attached to the "Processor"
instance and take an initial snapshot. I ran the following commands in
the EC2 Instance Connect terminal window, copying important outputs to a
text editor for later use.
-
First, I needed to display the EBS volume-id, so I ran:
aws ec2 describe-instances --filter 'Name=tag:Name,Values=Processor' --query 'Reservations[0].Instances[0].BlockDeviceMappings[0].Ebs.{VolumeId:VolumeId}'
The command returned a response similar to this: "VolumeId":
"vol-1234abcd". I made note of this value as I would need to use it
throughout the steps.
-
Next, I needed to take a snapshot of this volume. Before doing that, I
had to shut down the "Processor" instance, which required its instance
ID. I ran the following command to get it:
aws ec2 describe-instances --filters 'Name=tag:Name,Values=Processor' --query 'Reservations[0].Instances[0].InstanceId'
This gave me a value for the INSTANCE-ID that looked like:
"i-0b06965263c7ac08f"
-
To shut down the "Processor" instance, I ran:
aws ec2 stop-instances --instance-ids INSTANCE-ID
I made sure to replace
"INSTANCE-ID" with the actual
instance-id I retrieved.
-
To verify that the "Processor" instance had stopped, I ran:
aws ec2 wait instance-stopped --instance-id INSTANCE-ID
I waited until the command returned to a prompt, which indicated the
instance had stopped successfully.
-
Now I could create my first snapshot of the volume. I ran:
aws ec2 create-snapshot --volume-id VOLUME-ID
I made sure to replace
"VOLUME-ID" with the VolumeId I had
retrieved earlier. The command returned information that included a
SnapshotId (something like
"snap-0643809e73e6cce13"), which I
noted for the next step.
-
To check the status of my snapshot, I ran:
aws ec2 wait snapshot-completed --snapshot-id SNAPSHOT-ID
I replaced "SNAPSHOT-ID" with the
actual SnapshotId from the previous step, and waited for the command
to return to the prompt before continuing.
-
Finally, I restarted the "Processor" instance with:
aws ec2 start-instances --instance-ids INSTANCE-ID
I waited a couple of minutes for the instance to return to the
running state.
Task 2.3 Scheduling the creation of subsequent snapshots
I then used the Linux scheduling system (cron) to set up a recurring
snapshot process so that new snapshots of my data would be taken
automatically.
For the purposes of this project, I scheduled snapshot creation to
happen every minute so I could quickly verify the results of my work.
I needed to create a cron job to manage the number of snapshots that
would be maintained for my volume.
This section didn't require stopping the instance in order to create the
snapshots, which would allow me to generate a large number of snapshots
quickly.
-
To create and schedule a cron entry that would run a job every minute,
I ran:
echo "* * * * *  aws ec2 create-snapshot --volume-id VOLUME-ID 2>&1 >> /tmp/cronlog" > cronjob
crontab cronjob
This took 1-2 minutes to take effect.
-
To verify that subsequent snapshots were being created, I ran:
aws ec2 describe-snapshots --filters "Name=volume-id,Values=VOLUME-ID"
I replaced "VOLUME-ID" with my
actual VolumeId, and then re-ran the command after a few minutes to
confirm that new snapshots were appearing.
-
I waited a few minutes so that several more snapshots would be
generated before beginning the next task.
S3 Bucket Versioning and Recovery Process Report
Initial Setup and Challenge
I was tasked with activating versioning for an S3 bucket, syncing local
files, deleting a file both locally and from the bucket, and then
recovering the deleted file using versioning capabilities.
Step-by-Step Execution
1. Bucket Creation and Versioning Setup
First, I had to create an S3 bucket since my initial attempt revealed
the bucket didn't exist:
aws s3 mb s3://s3-bucket-3692
I encountered a "NoSuchBucket" error initially, which told me I needed
to create the bucket first before proceeding.
Then I enabled versioning on the bucket:
aws s3api put-bucket-versioning --bucket s3-bucket-3692 --versioning-configuration Status=Enabled
I verified versioning was active by running:
aws s3api get-bucket-versioning --bucket s3-bucket-3692
The output showed "Status": "Enabled",
which confirmed to me that versioning was properly configured on the
bucket.
2. File Download and Management
Next, I downloaded the sample files I would be working with:
wget https://aws-tc-largeobjects.s3.us-west-2.amazonaws.com/CUR-TF-100-RSJAWS-3-23732/183-lab-JAWS-managing-storage/s3/files.zip
unzip files.zip
I examined the extracted files to understand what I was working with:
ls -la files
I saw that the directory contained several files including file1.txt,
file2.txt, and file3.txt.
3. Syncing Files to S3
I then synced the local files to my S3 bucket:
aws s3 sync files s3://s3-bucket-3692/files/
To make sure everything uploaded correctly, I listed the bucket
contents:
aws s3 ls s3://s3-bucket-3692/files/
I confirmed that all files were successfully uploaded to the bucket.
4. Testing the Versioning Mechanism
Since I encountered some issues with the original files, I decided to
test versioning with a new file I created:
# Create a new test file
echo "Version 1" > files/testfile.txt

# Upload to S3
aws s3 cp files/testfile.txt s3://s3-bucket-3692/files/

# Modify the file
echo "Version 2" > files/testfile.txt

# Upload again
aws s3 cp files/testfile.txt s3://s3-bucket-3692/files/
This created two versions of testfile.txt in the bucket, giving me a
good way to test the versioning functionality.
5. Deleting and Checking for Versions
I proceeded to delete the test file both locally and from S3:
# Delete locally
rm files/testfile.txt

# Delete from S3
aws s3 rm s3://s3-bucket-3692/files/testfile.txt
I confirmed the file was deleted by checking the bucket contents:
aws s3 ls s3://s3-bucket-3692/files/
The file was no longer visible in the normal listing, which showed it
was successfully "deleted" - though with versioning enabled, I knew this
actually meant a delete marker was placed.
6. Retrieving Version Information
Next, I listed all versions of the deleted file to see what was
available:
aws s3api list-object-versions --bucket s3-bucket-3692 --prefix files/testfile.txt
To make the information easier to work with, I extracted just the
version ID:
aws s3api list-object-versions --bucket s3-bucket-3692 --prefix files/testfile.txt --query 'Versions[0].VersionId' --output text
The output showed both versions of the file and a delete marker, which
confirmed to me that versioning was working correctly. I noted that the
version ID
"DSMAfAam38Ct8IUfxT41YmjKJ.47akgM"
corresponded to the most recent version before deletion.
7. Recovering the Deleted File
I downloaded the previous version using the version ID I had identified:
aws s3api get-object --bucket s3-bucket-3692 --key files/testfile.txt --version-id DSMAfAam38Ct8IUfxT41YmjKJ.47akgM files/testfile.txt
Initially I ran into some issues with the version ID format, but
retrieving it directly using the query parameter helped me resolve this
problem.
8. Restoring the File to S3
Finally, I uploaded the recovered file back to the bucket:
aws s3 cp files/testfile.txt s3://s3-bucket-3692/files/
I verified the file was successfully restored by checking the bucket
contents again:
aws s3 ls s3://s3-bucket-3692/files/
The final listing showed all files including the restored testfile.txt
with its timestamp, which confirmed to me that my recovery was
successful.
Conclusion
Through this exercise, I successfully demonstrated the complete
workflow of S3 versioning, including:
- Setting up and verifying bucket versioning
- Testing file modifications to create versions
-
Confirming that deletion creates a delete marker rather than
permanently removing files
- Retrieving file version information
- Recovering a deleted file using its version ID
- Restoring access to the file in the bucket
This process proved to me the value of S3 versioning for protecting
against accidental deletion and providing robust data recovery options
in cloud storage environments.
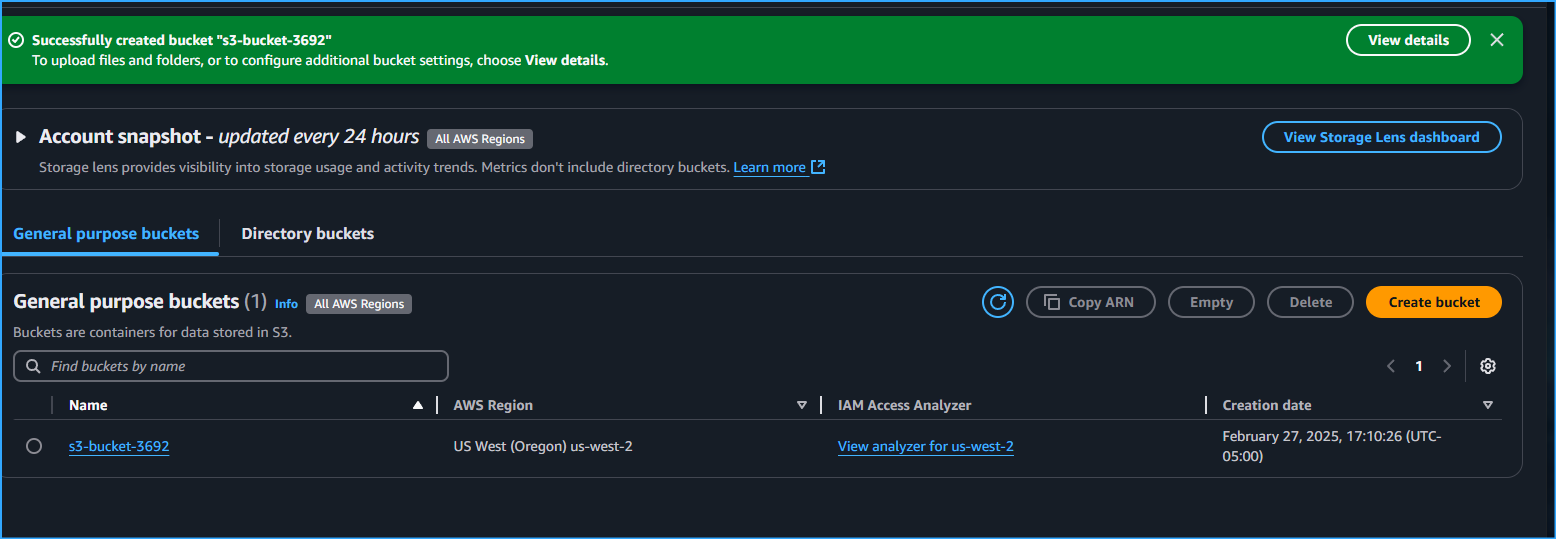 Created S3 Bucket 3692
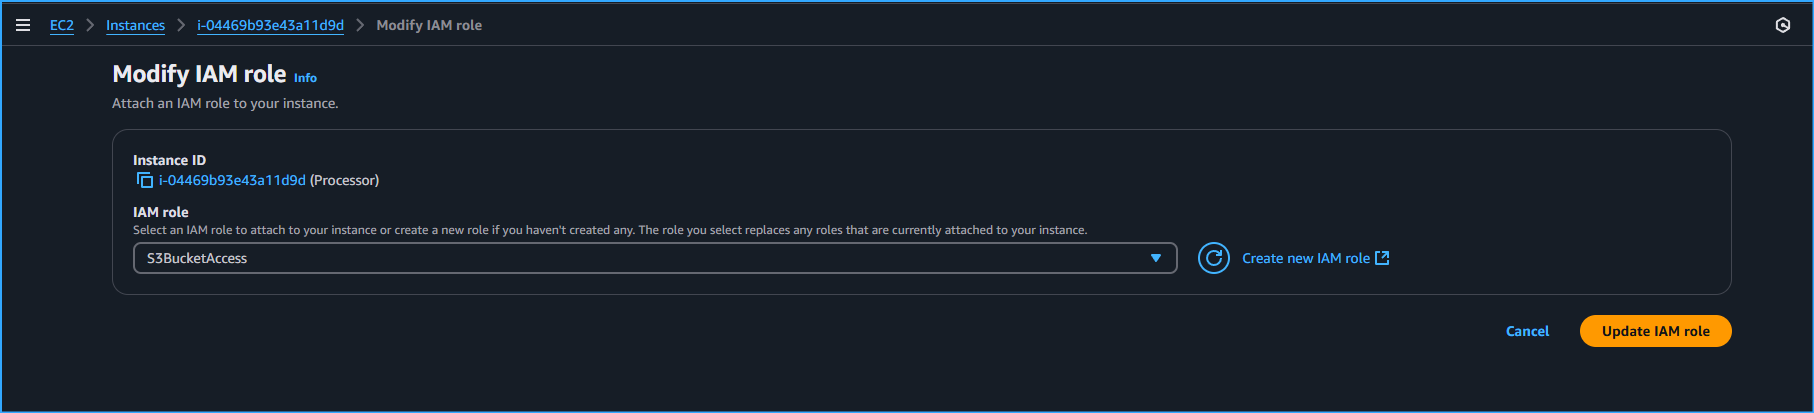 Modifying IAM Role On Processor Instance To S3 Bucket Access
 Ran CMDs To Display EBS Volume ID Then Took Snapshot
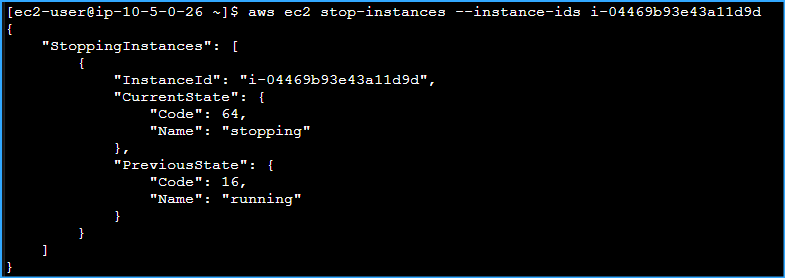 Shut Down Processor Instance
 Created Snapshot Volume Of Processor Instance Then Checked Status Of Snapshot
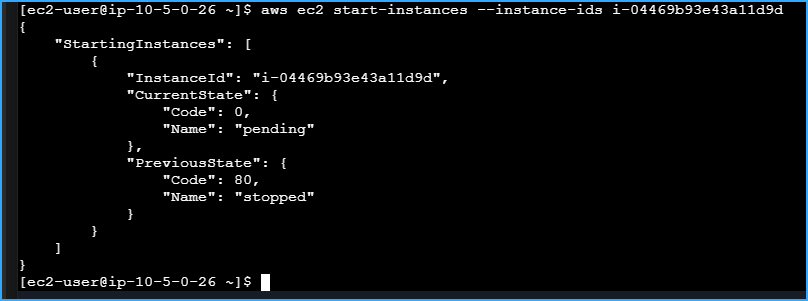 Restarted Processor Instance After Stopping It And Creating Snapshots
 Created And Scheduled Cron Job To Schedule Recurring Snapshots Every Minute Then Verified Several Snapshots After Some Time
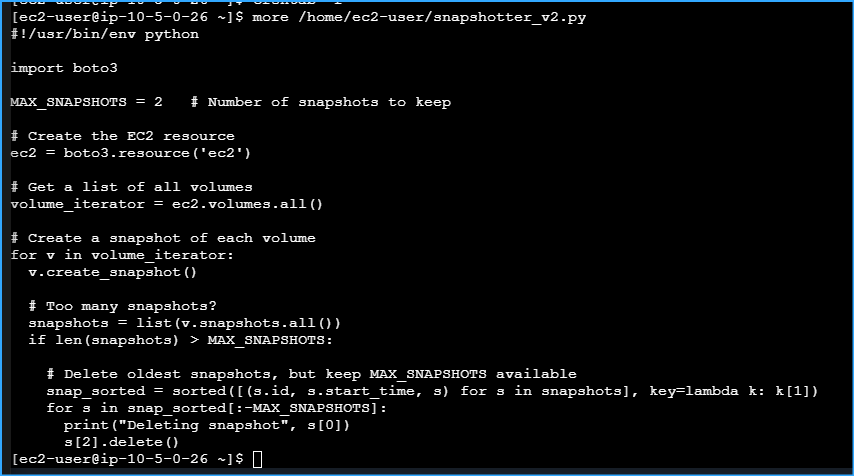 Examining Contents Of Python Script Regarding EBS Volumes
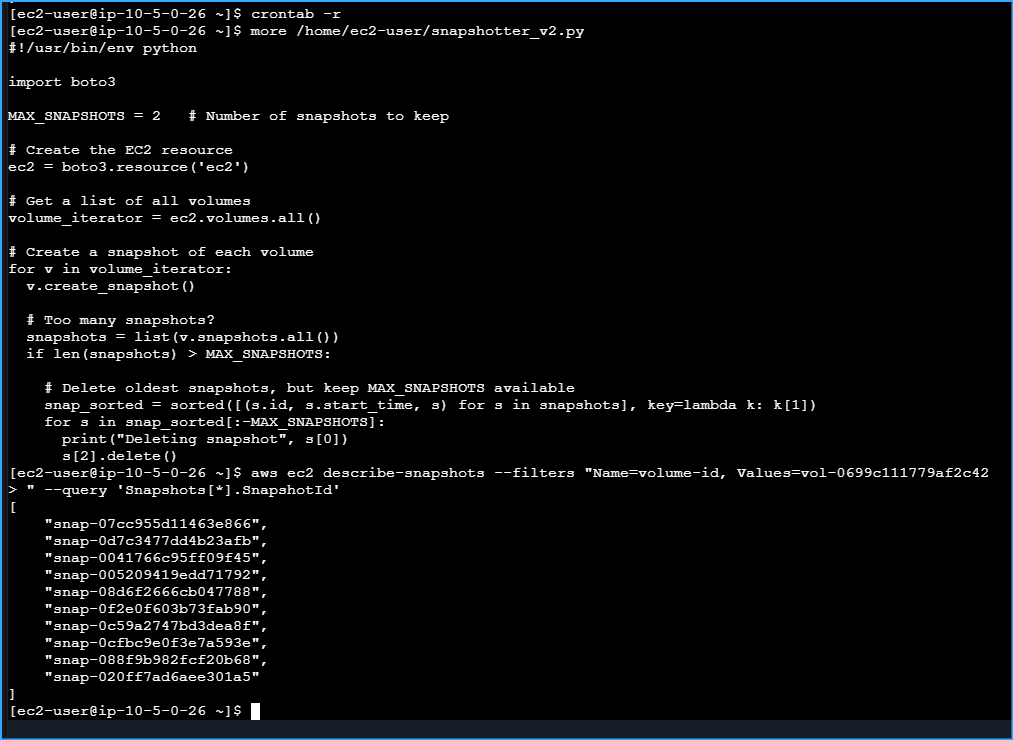 CMD At Top Was For Stopping Cron Job At Bottom Shows Snapshots Before It Was Stopped
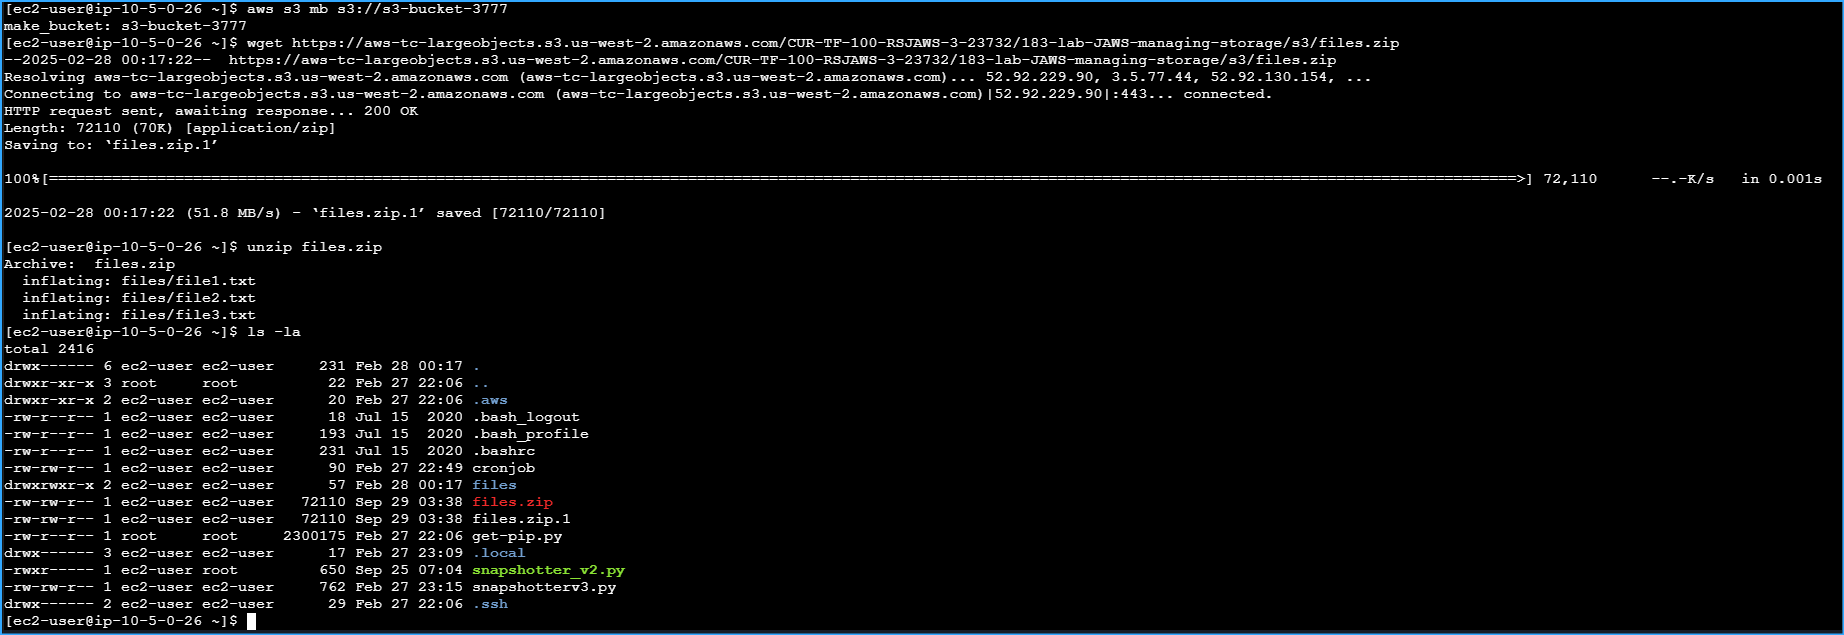 Made S3 Bucket Then Downloaded And Extracted Sample Files And Made Sure Files Zip Dir Exists
 Enabled Bucket Versioning And Synced Files To Newly Created S3 Bucket
 Deleted File1txt On Local Machine Then Synced Local Dir With S3 To Remove Files From S3 That Dont Exist Locally
 Checked That File1txt Was Removed From S3 Bucket
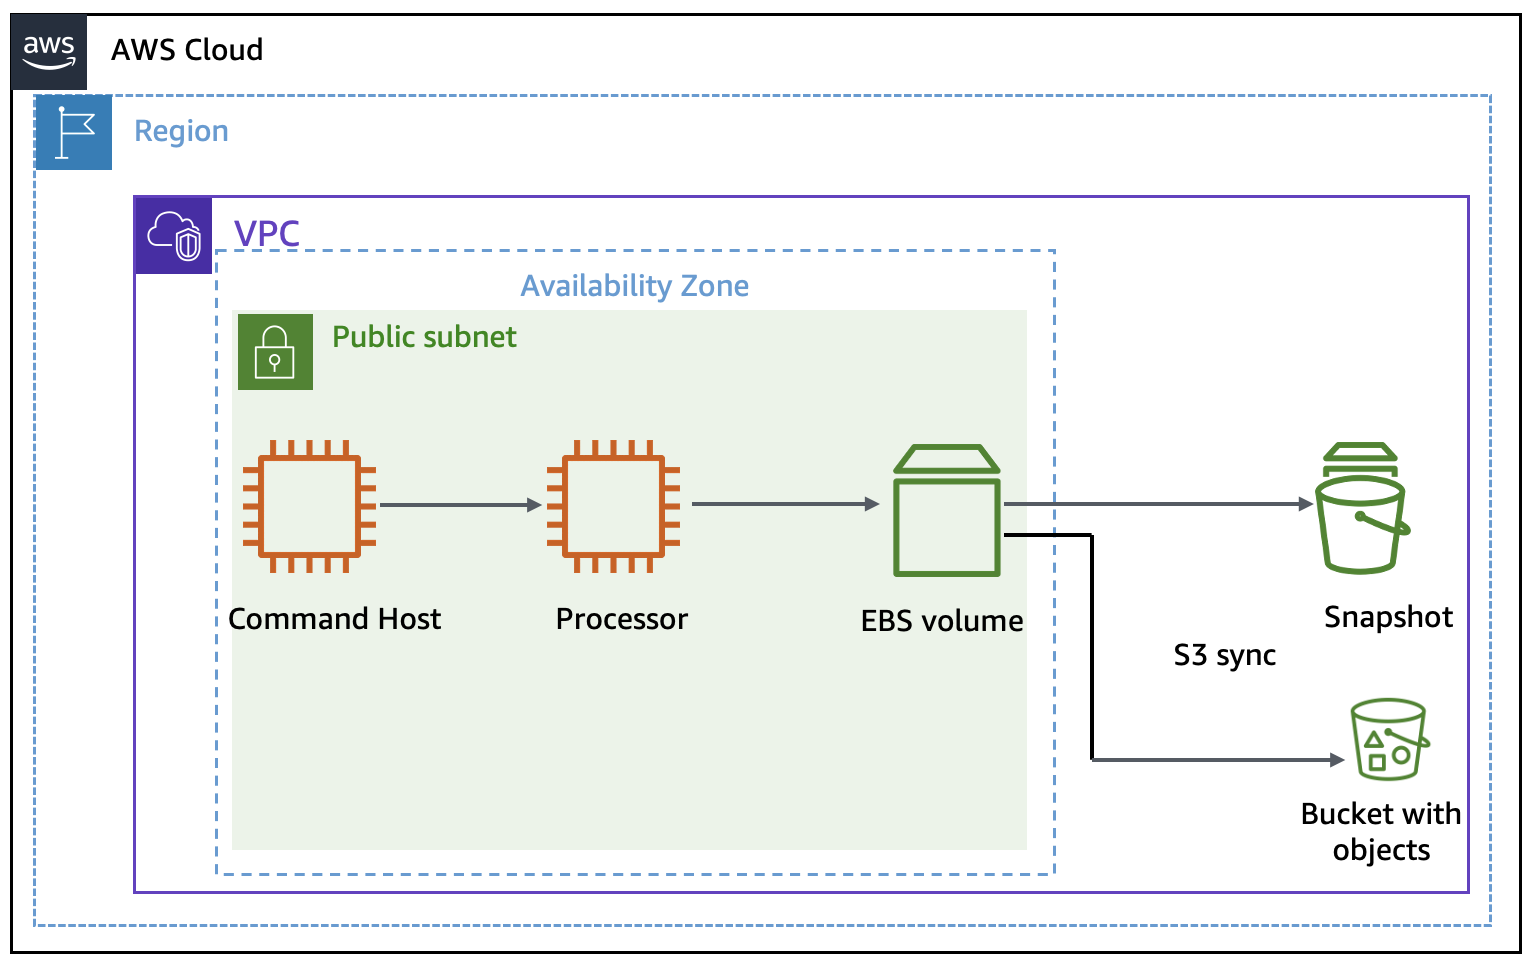 Architecture