Working with Amazon EBS
Project Overview
I recently completed this project with Amazon Elastic Block Store
(Amazon EBS), which is a scalable, high-performance block-storage
service designed for Amazon EC2. Throughout my work, I learned how to
create an EBS volume and perform various operations like attaching it to
an instance, creating a file system, and taking a snapshot backup.
Task 1: Creating a New EBS Volume
I followed these steps to create a new EBS volume:
-
On the AWS Management Console, in the Search bar, I entered and chose
EC2 to open the EC2 Management Console.
-
In the left navigation pane, I selected "Instances" and found that an
EC2 instance named "Lab" had already been launched for me.
-
I made note of the Availability Zone for my Lab instance, which was
"us-west-2a".
-
Tip: I had to scroll right to see the Availability Zone column.
-
Then I went to the left navigation pane, clicked on "Volumes" under
Elastic Block Store, and saw an existing 8 GiB volume that the EC2
instance was using.
- I clicked "Create volume"
- I selected "General Purpose SSD (gp2)" for Volume type
- I entered "1" for Size (GiB)
-
Note: I was restricted from creating large volumes.
-
I chose the same Availability Zone as my EC2 instance (us-west-2a)
-
In the Tags section, I clicked "Add tag" and set:
- Key: Name
- Value: My Volume
- I clicked "Create volume"
A new volume appeared with a "Creating" status in the Volume state
column, which soon changed to "Available".
Tip: Have to click Refresh to see new volume.
Task 2: Attaching the Volume to an EC2 Instance
I then attached my volume to the EC2 instance:
- I selected "My Volume"
- From the Actions menu, I chose "Attach volume"
- From the Instance dropdown list, I selected the Lab instance
- The Device name field was already set to "/dev/sdf"
-
I would need this device identifier later for commands.
- I clicked "Attach volume"
The Volume state of my new volume changed to "In-use."
Task 3: Connecting to the Lab EC2 Instance
To connect to my instance, I:
-
In the AWS Management Console, I searched for and opened the EC2
Management Console
- Selected "Instances" in the navigation pane
- Selected the Lab instance from the list
- Clicked "Connect"
- On the EC2 Instance Connect tab, clicked "Connect"
This opened a new browser tab with the EC2 Instance Connect terminal
window.
Note: If the terminal becomes unresponsive, refresh the browser or
repeat these steps to connect again.
If you prefer to use an SSH client to connect to the EC2 instance, you
can
Task 4: Creating and Configuring the File System
In this task, I added the new volume to my Linux instance as an ext3
file system under the "/mnt/data-store" mount point.
First, I viewed the available storage on my instance by running:
df -h
The output looked something like:
Filesystem Size Used Avail Use% Mounted on
devtmpfs 488M 60K 488M 1% /dev
tmpfs 497M 0 497M 0% /dev/shm
/dev/xvda1 7.8G 982M 6.7G 13% /
This showed the original 8 GB disk volume, but my new volume wasn't
shown yet.
To create an ext3 file system on the new volume, I ran:
sudo mkfs -t ext3 /dev/sdf
Then I created a directory to mount the new storage volume:
sudo mkdir /mnt/data-store
To mount the new volume, I ran:
sudo mount /dev/sdf /mnt/data-store
echo "/dev/sdf /mnt/data-store
ext3 defaults,noatime 1 2" | sudo tee -a /etc/fstab
The last line in this command ensured that the volume would be mounted
even after the instance was restarted.
I viewed the configuration file to see the setting on the last line:
cat /etc/fstab
Then I checked the available storage again:
df -h
The output now contained an additional line similar to:
Filesystem Size Used Avail Use% Mounted on
devtmpfs 488M 60K 488M 1% /dev
tmpfs 497M 0 497M 0% /dev/shm
/dev/xvda1 7.8G 982M 6.7G 13% /
/dev/xvdf 976M 1.3M 924M 1% /mnt/data-store
To create a file and add some text on the mounted volume, I ran:
sudo sh -c "echo some text has been written > /mnt/data-store/file.txt"
To verify that the text had been written to my volume, I ran:
cat /mnt/data-store/file.txt
The output displayed the text that I had copied to the file.
Task 5: Creating an Amazon EBS Snapshot
In this final task, I created a snapshot of my EBS volume.
I noted that Amazon EBS snapshots are stored in Amazon S3 for
durability. New EBS volumes can be created from snapshots for cloning or
restoring backups. Amazon EBS snapshots can also be shared among AWS
accounts or copied over AWS Regions.
- I went to the EC2 Management Console
- Selected "Volumes" and chose "My Volume"
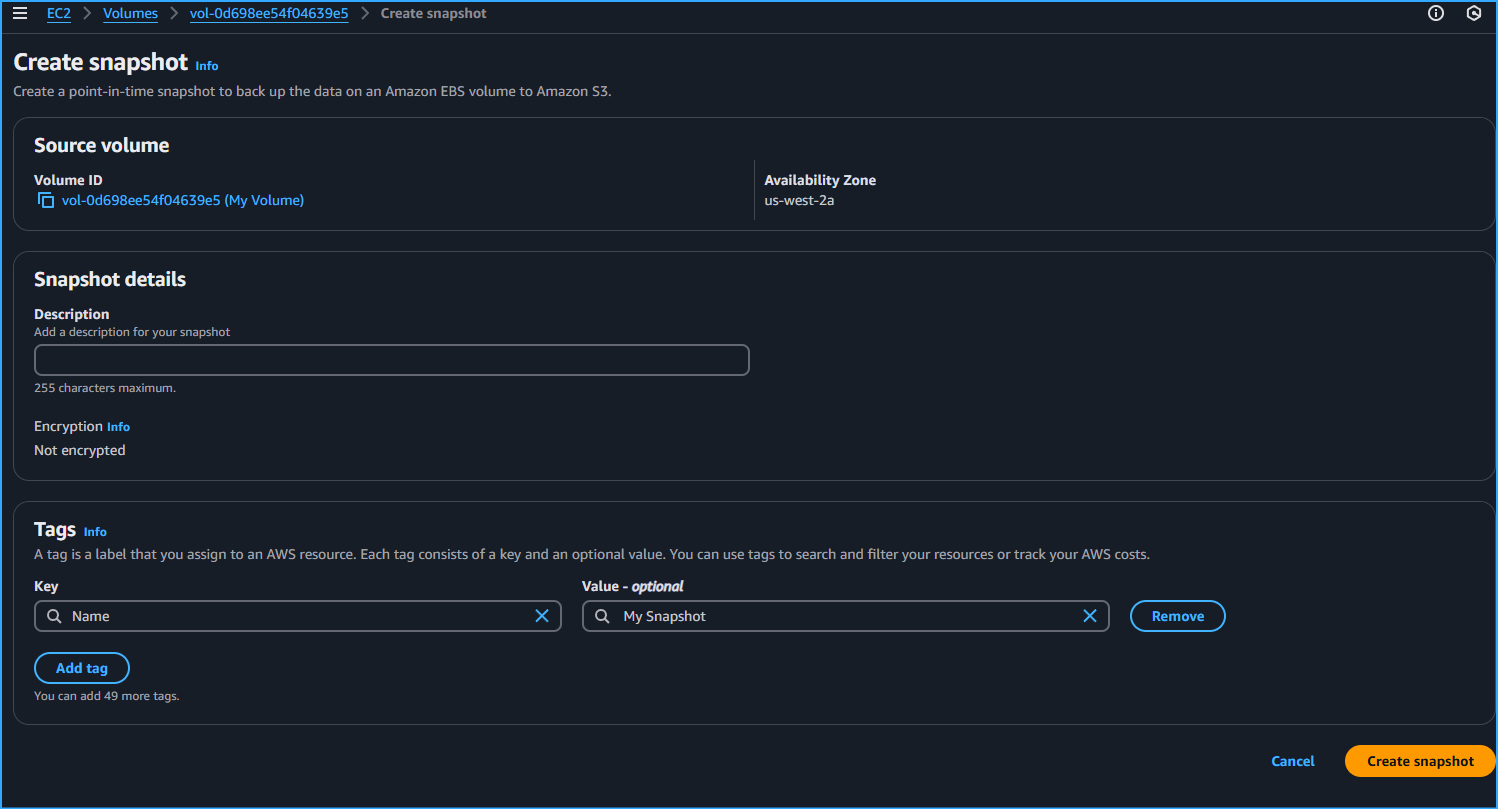
- From the Actions menu, I selected "Create snapshot"
-
In the Tags section, I clicked "Add tag" and set:
- Key: Name
- Value: My Snapshot
- I clicked "Create snapshot"
- I selected "Snapshots" in the left navigation pane
The Snapshot status of my snapshot was initially "Pending" but later
changed to "Completed." I learned that only used storage blocks are
copied to snapshots, so empty blocks don't use any snapshot storage
space.
Back in my EC2 Instance Connect terminal window, I deleted the file I
had created on my volume:
sudo rm /mnt/data-store/file.txt
Note: If terminal is unresponsive, refresh the browser or reconnect as
needed.
To verify that the file had been deleted, I ran:
ls /mnt/data-store/file.txt
The following message displayed:
ls: cannot access /mnt/data-store/file.txt: No such file or directory
This confirmed that my file had been successfully deleted.
Summary
Throughout this project, I successfully:
-
Created a new 1 GiB EBS volume in the same availability zone as my EC2
instance
-
Attached this volume to my EC2 instance with the device name
"/dev/sdf"
- Connected to my EC2 instance using EC2 Instance Connect
-
Formatted the new volume with an ext3 file system and mounted it at
"/mnt/data-store"
-
Configured the volume to mount automatically after instance restart
- Created and verified a text file on the mounted volume
- Created an EBS snapshot of my volume for backup purposes
- Deleted the test file I had created
This hands-on experience gave me practical knowledge of working with
Amazon EBS, including volume creation, attachment, file system
configuration, and snapshot creation for backup and recovery purposes.
×
![]()
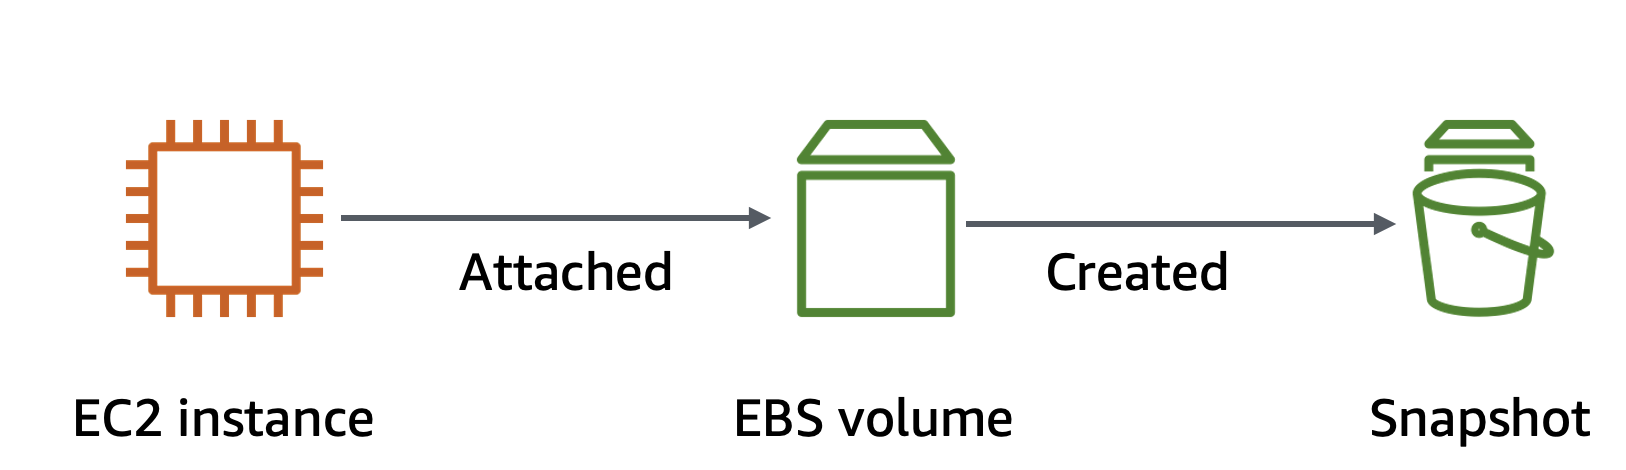 Task Scenario
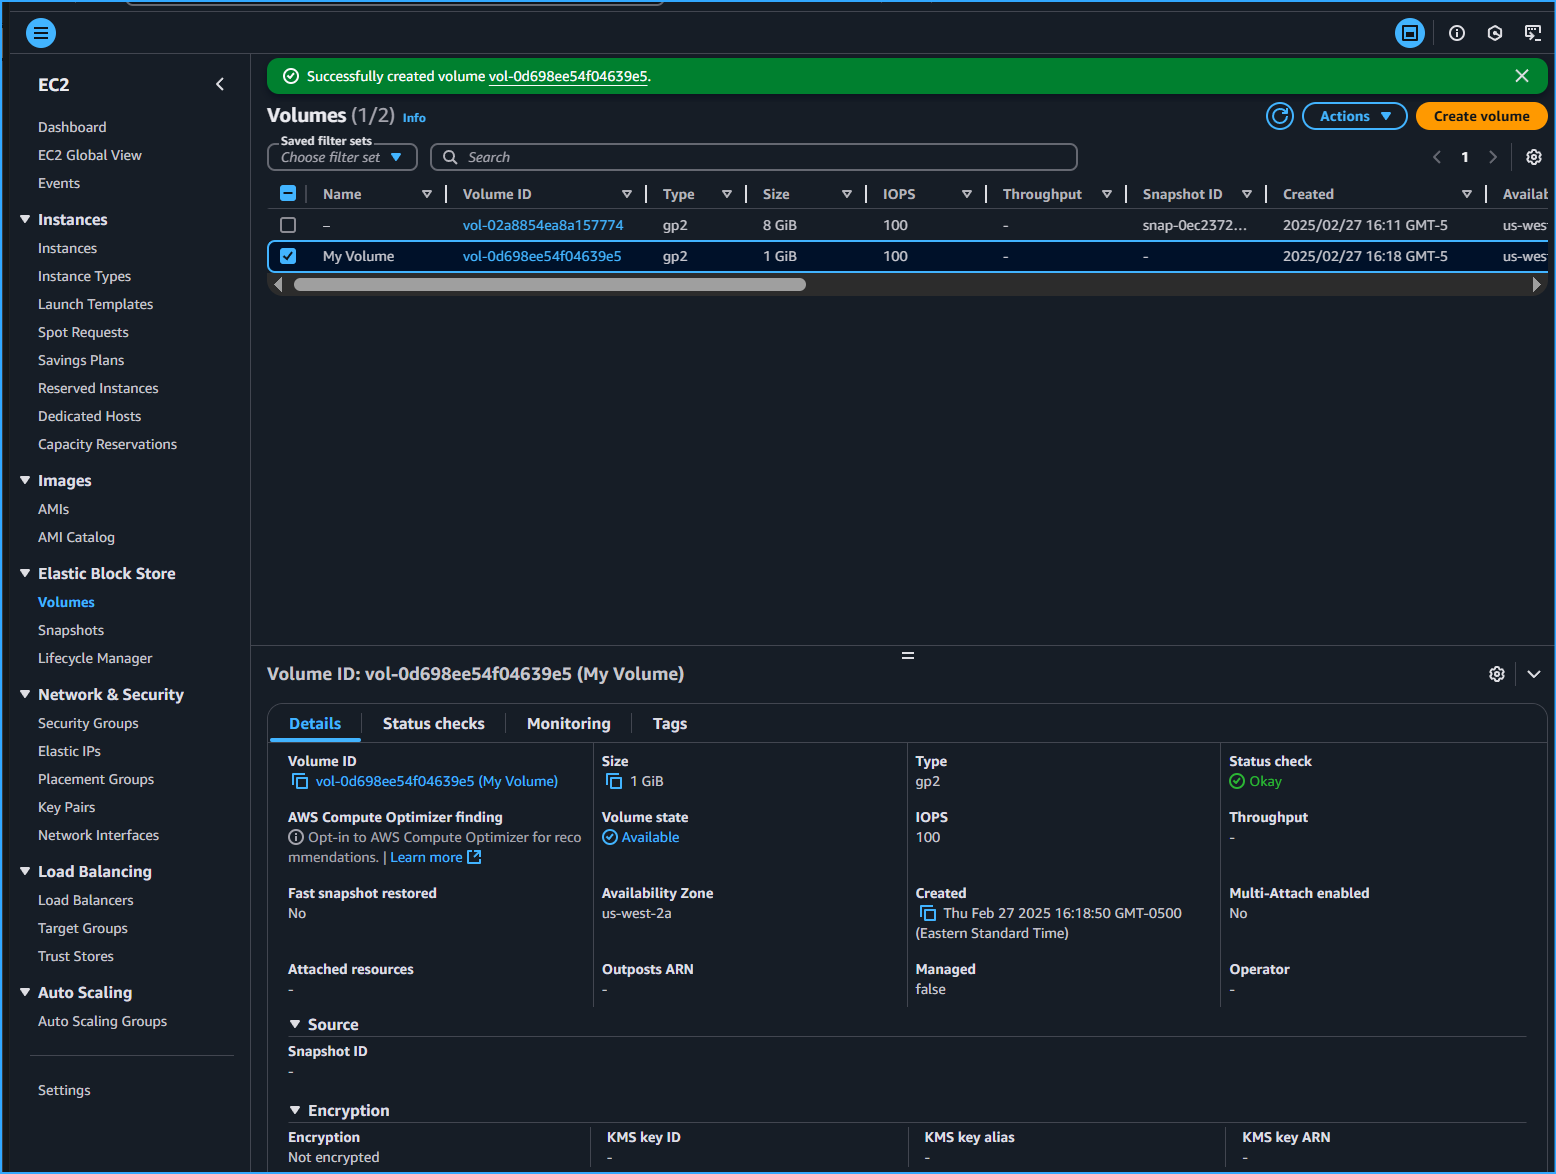 Created New EBS Volume
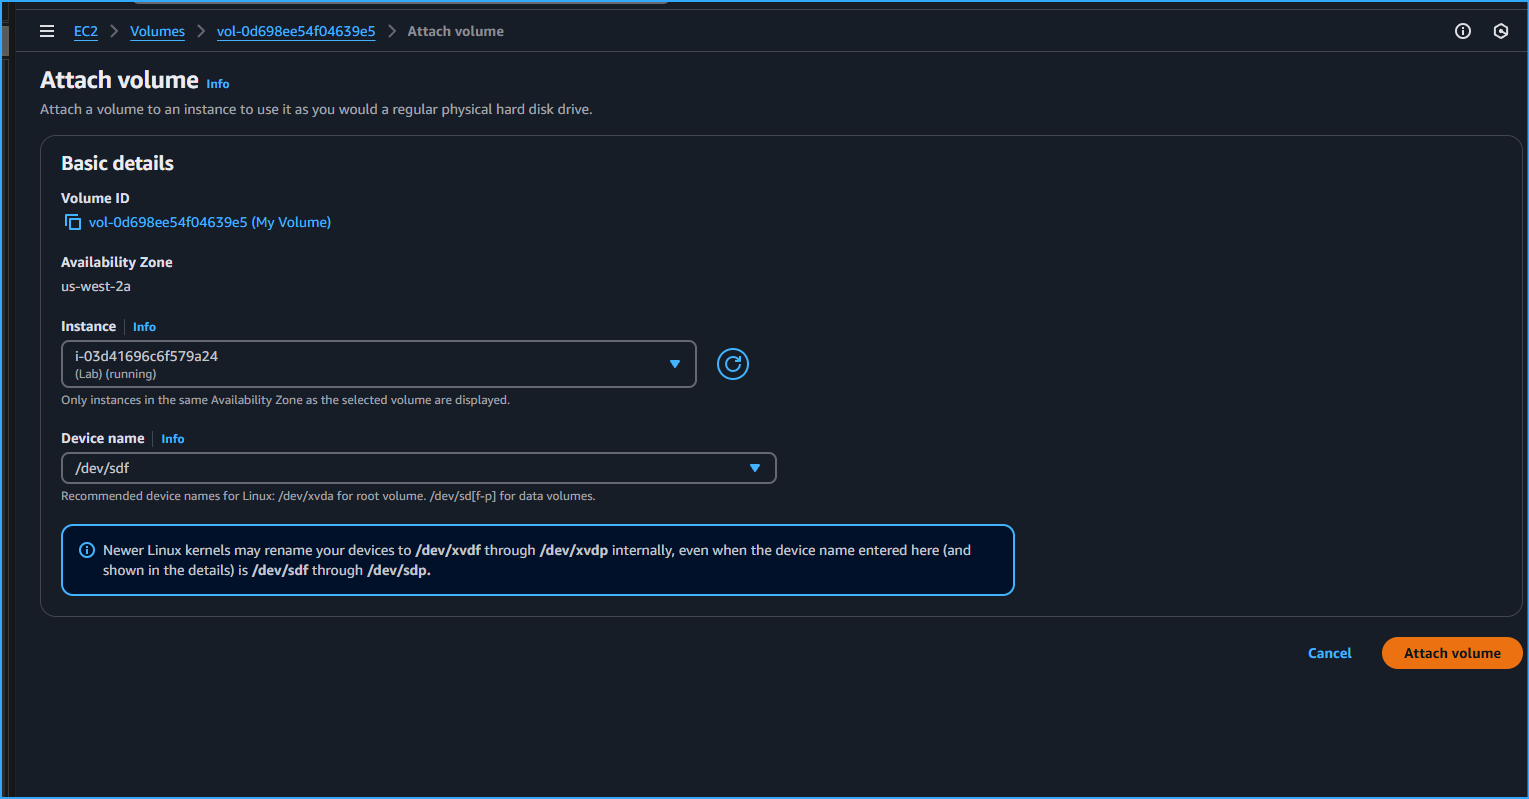 Attaching Newly Created EBS Volume To EC2 Instance
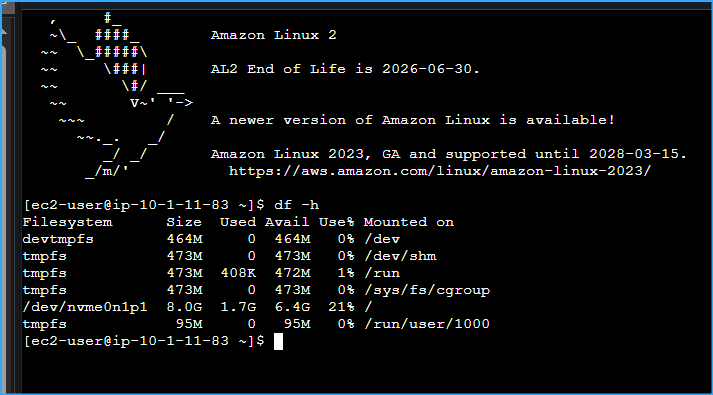 Viewed Storage Available On Instance In EC2 Connect Terminal With
This CMD
Viewed Storage Available On Instance In EC2 Connect Terminal With
This CMD
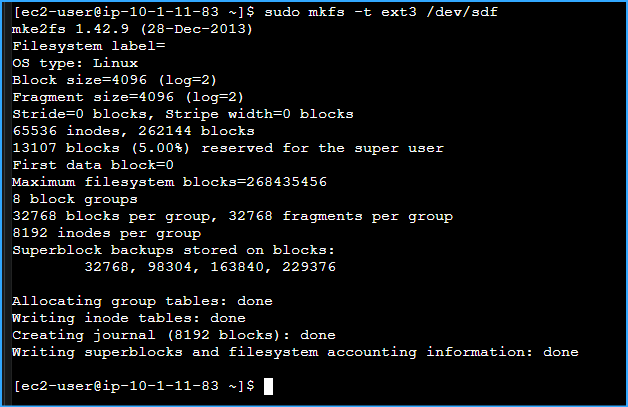 Created Ext3 File System On New Volume
 Created Dir To Mount On Storage Volume Mounted The Volume Viewed
Config File To See Setting
Created Dir To Mount On Storage Volume Mounted The Volume Viewed
Config File To See Setting
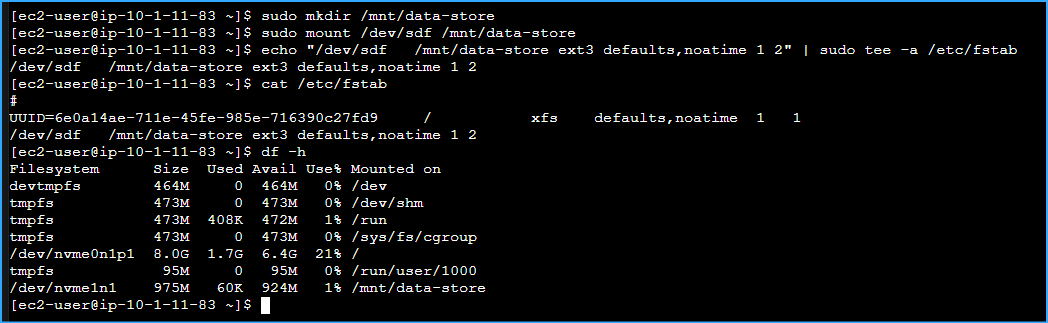 Ran CMD From Before To See Available Storage Again After
Implementing
Ran CMD From Before To See Available Storage Again After
Implementing
 Created File Added Text On Mounted Volume And Verified It Was
Written
Created File Added Text On Mounted Volume And Verified It Was
Written
 Creating Snapshot Of EBS Volume
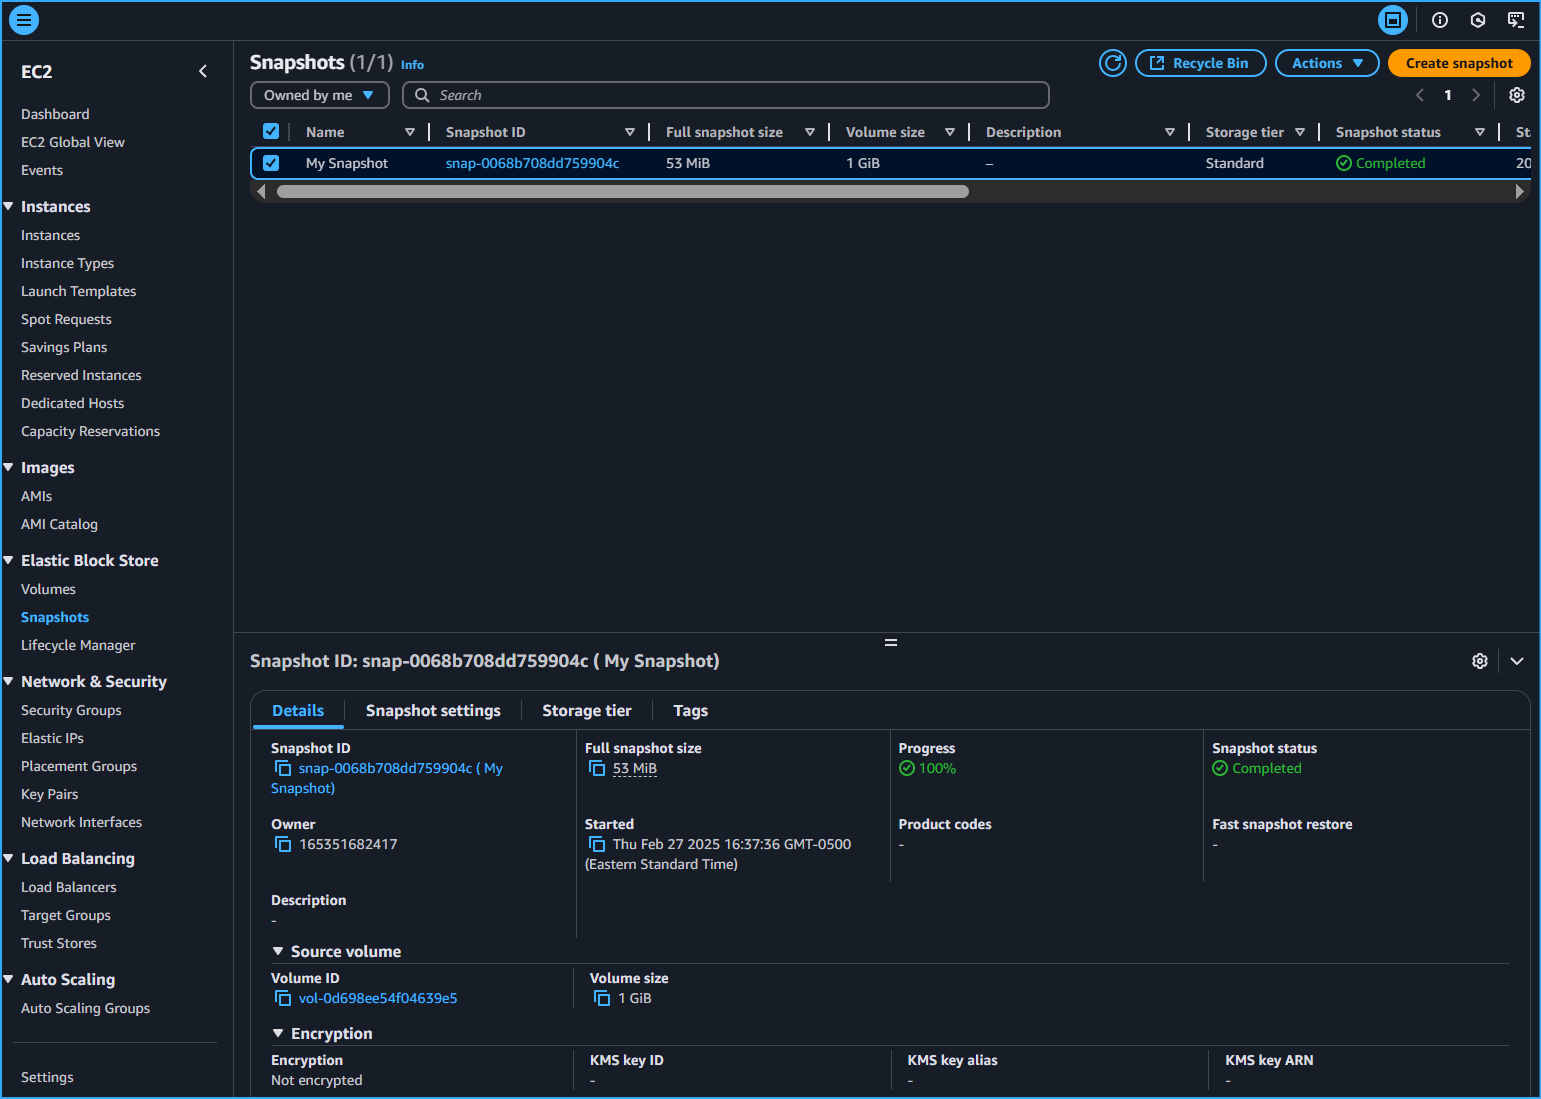 Snapshot Status Completed
 Deleted File Created On Volume And Verified Deletion