Install and Configure the AWS CLI
Overview
In this work I learned how to install and use the AWS Command Line
Interface (AWS CLI). The AWS CLI is a powerful command line tool that
provides an interface for interacting with various AWS products and
services.
I installed the AWS CLI on a Red Hat Linux instance, as this type of
instance doesn't come with the AWS CLI pre-installed (unlike Amazon
Linux instances which have it pre-installed). I established an SSH
connection to the instance, configured the installation with an access
key to connect to an AWS account, and practiced using the AWS CLI to
interact with AWS Identity and Access Management (IAM).
Objectives
By the end of this, I was able to:
- Install and configure the AWS CLI
- Connect the AWS CLI to an AWS account
- Access IAM using the AWS CLI
Task 1: Connecting to the Red Hat EC2 Instance using SSH
Since I was using Windows, I followed these specific steps:
-
I selected the Details drop-down menu above the instructions and
clicked Show. A Credentials window appeared.
-
I downloaded the PPK file by clicking the Download PPK button and
saved the labsuser.ppk file to my Downloads directory.
-
I made a note of the PublicIP address provided in the credentials
window.
- I closed the Details panel by clicking the X.
-
Since I didn't have PuTTY installed, I had to download it first from
the provided link.
-
I opened putty.exe and set up my connection to the EC2 instance using
the PublicIP and the PPK file.
Task 2: Installing the AWS CLI on the Red Hat Linux Instance
Once I was connected to the instance via SSH, I executed the following
steps to install the AWS CLI:
- I downloaded the AWS CLI installation package using curl:
curl "https://awscli.amazonaws.com/awscli-exe-linux-x86_64.zip" -o
"awscliv2.zip"
-
I unzipped the installer file with the -u option to skip the prompts
for overwriting existing files:
unzip -u awscliv2.zip
-
I ran the installation program using sudo to grant write permissions
to the directory:
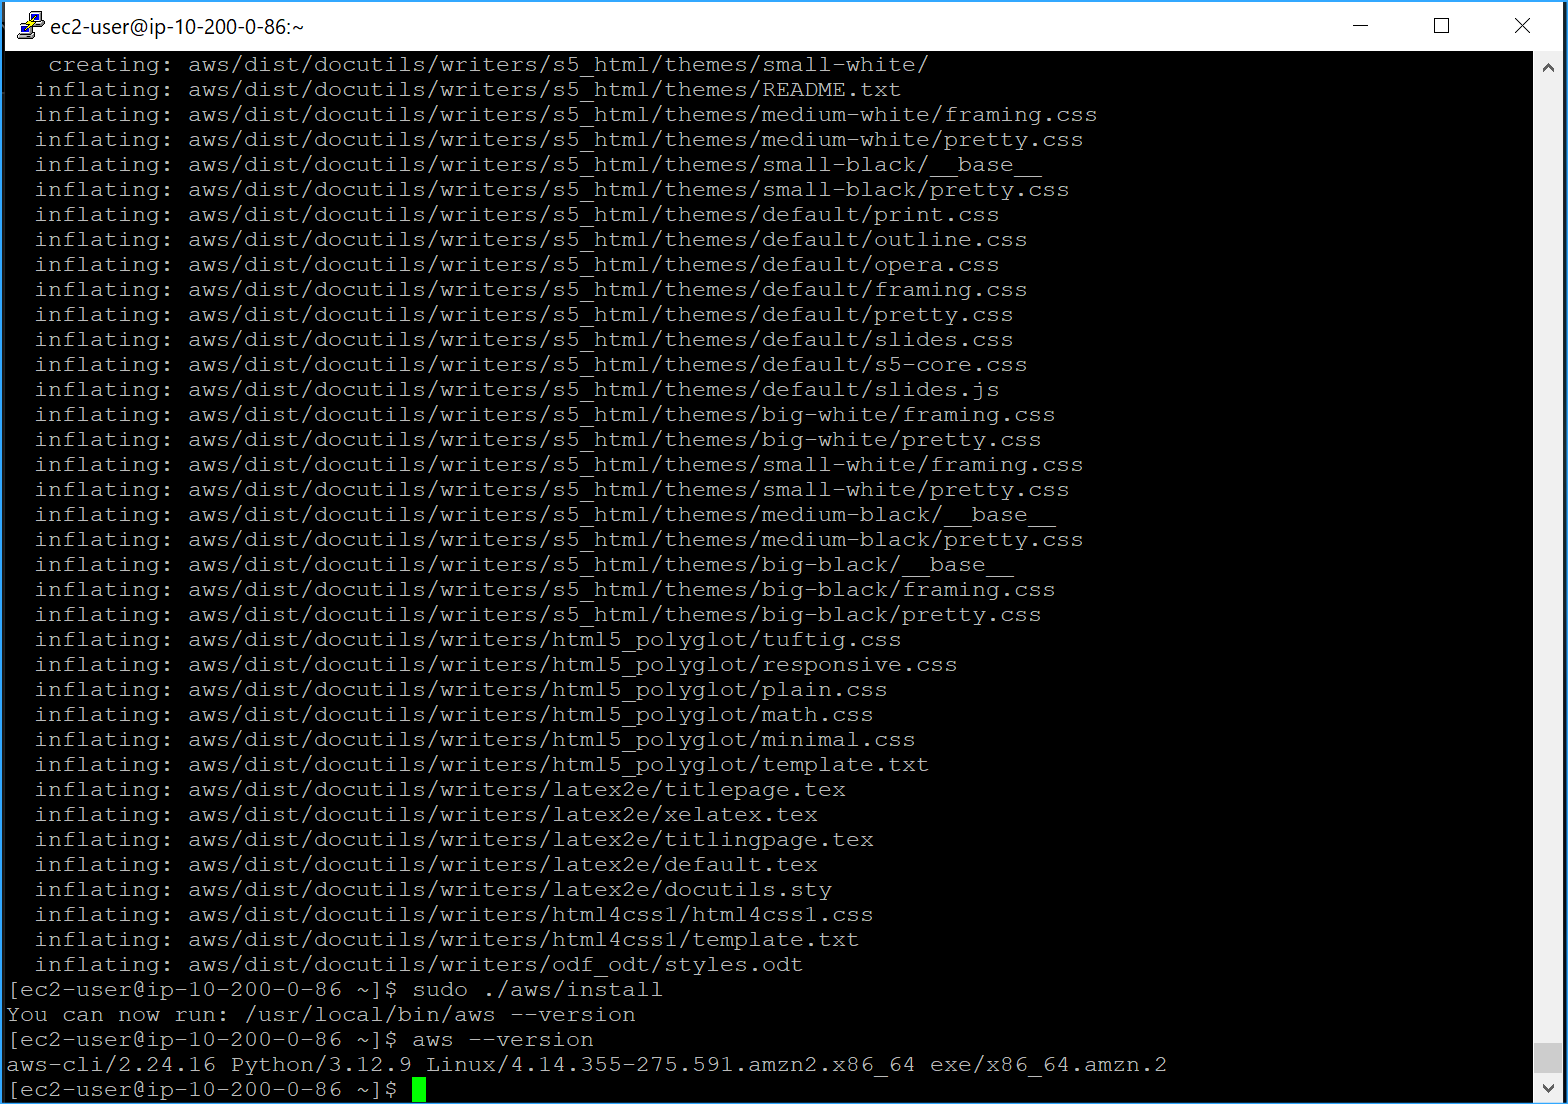
sudo ./aws/install
-
To verify that the installation was successful, I checked the version:
aws --version
The output showed something like
aws-cli/2.7.24 Python/3.8.8 Linux/4.14.133-113.105.amzn2.x86_64
botocore/2.4.5
The version numbers change over time and might be different.
-
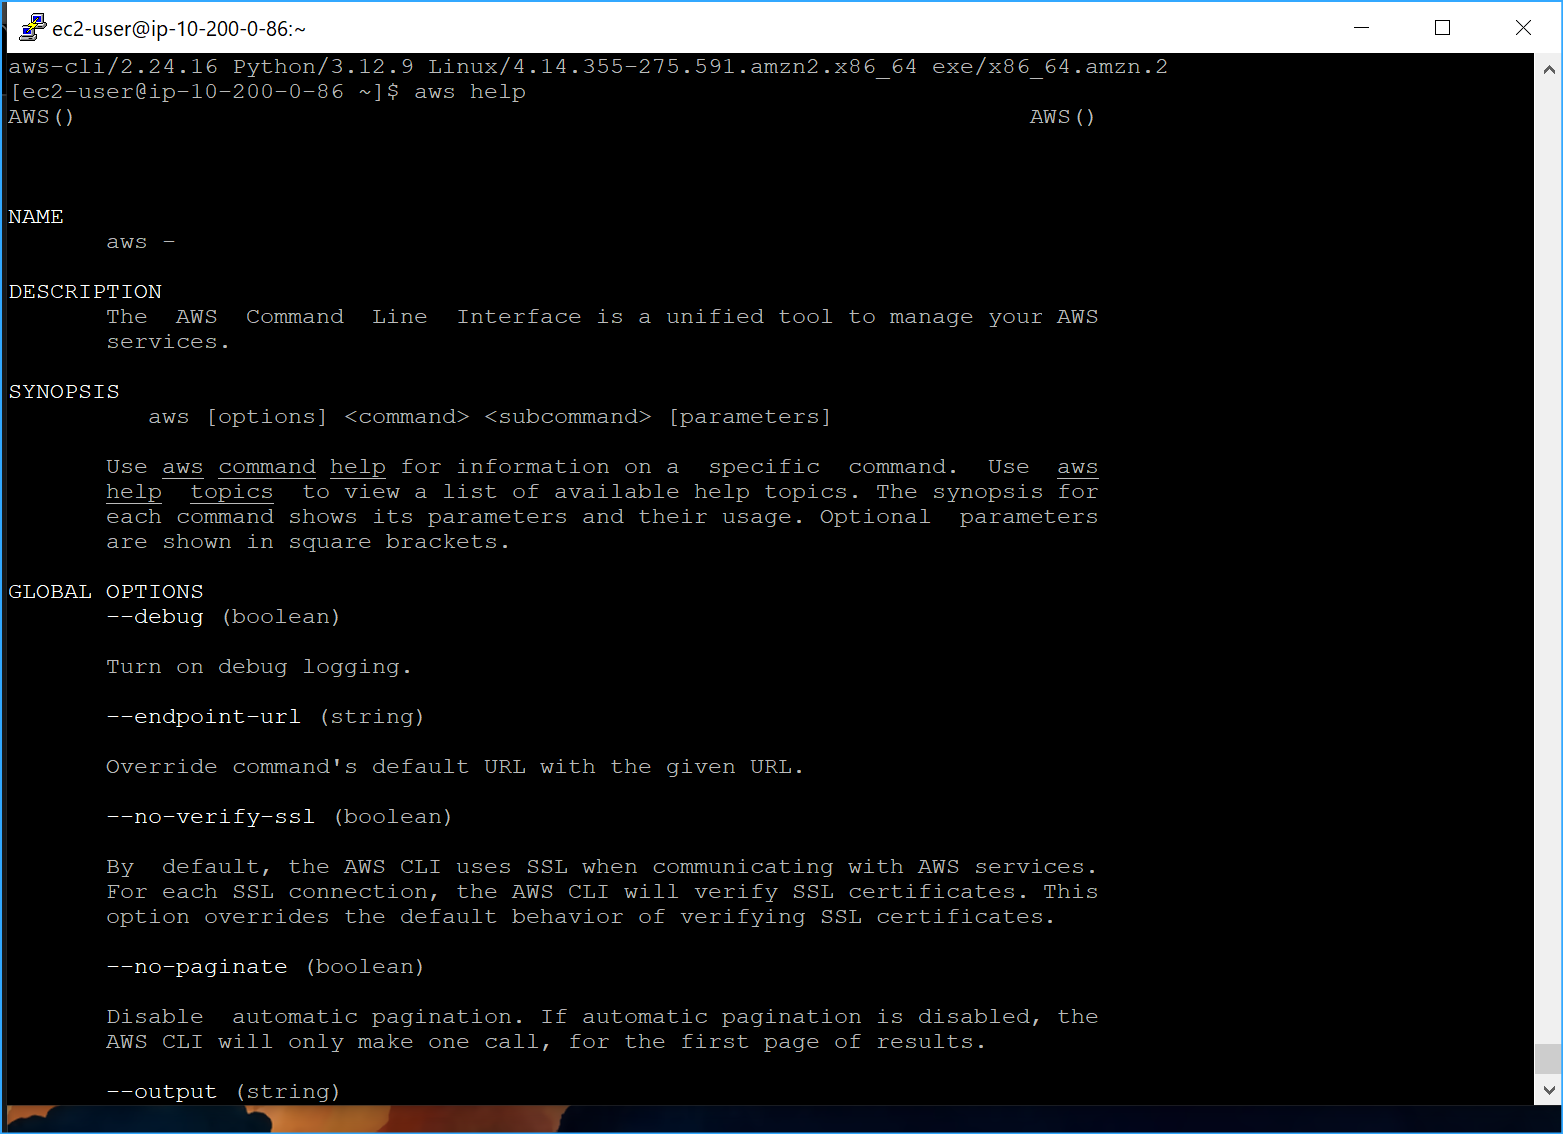
To further verify that the AWS CLI was working properly, I ran the
help command:
aws help
When the prompt showed :, I entered
q to exit.
Task 3: Observing IAM Configuration Details in the AWS Management
Console
Next, I switched to exploring the IAM configuration in the AWS
Management Console:
-
In the AWS Management Console, I typed "IAM" in the Search box and
selected IAM to navigate to the IAM console.
I noticed some messages indicating that I didn't have permission to
observe certain IAM service details, but I knew I could safely ignore
these.
-
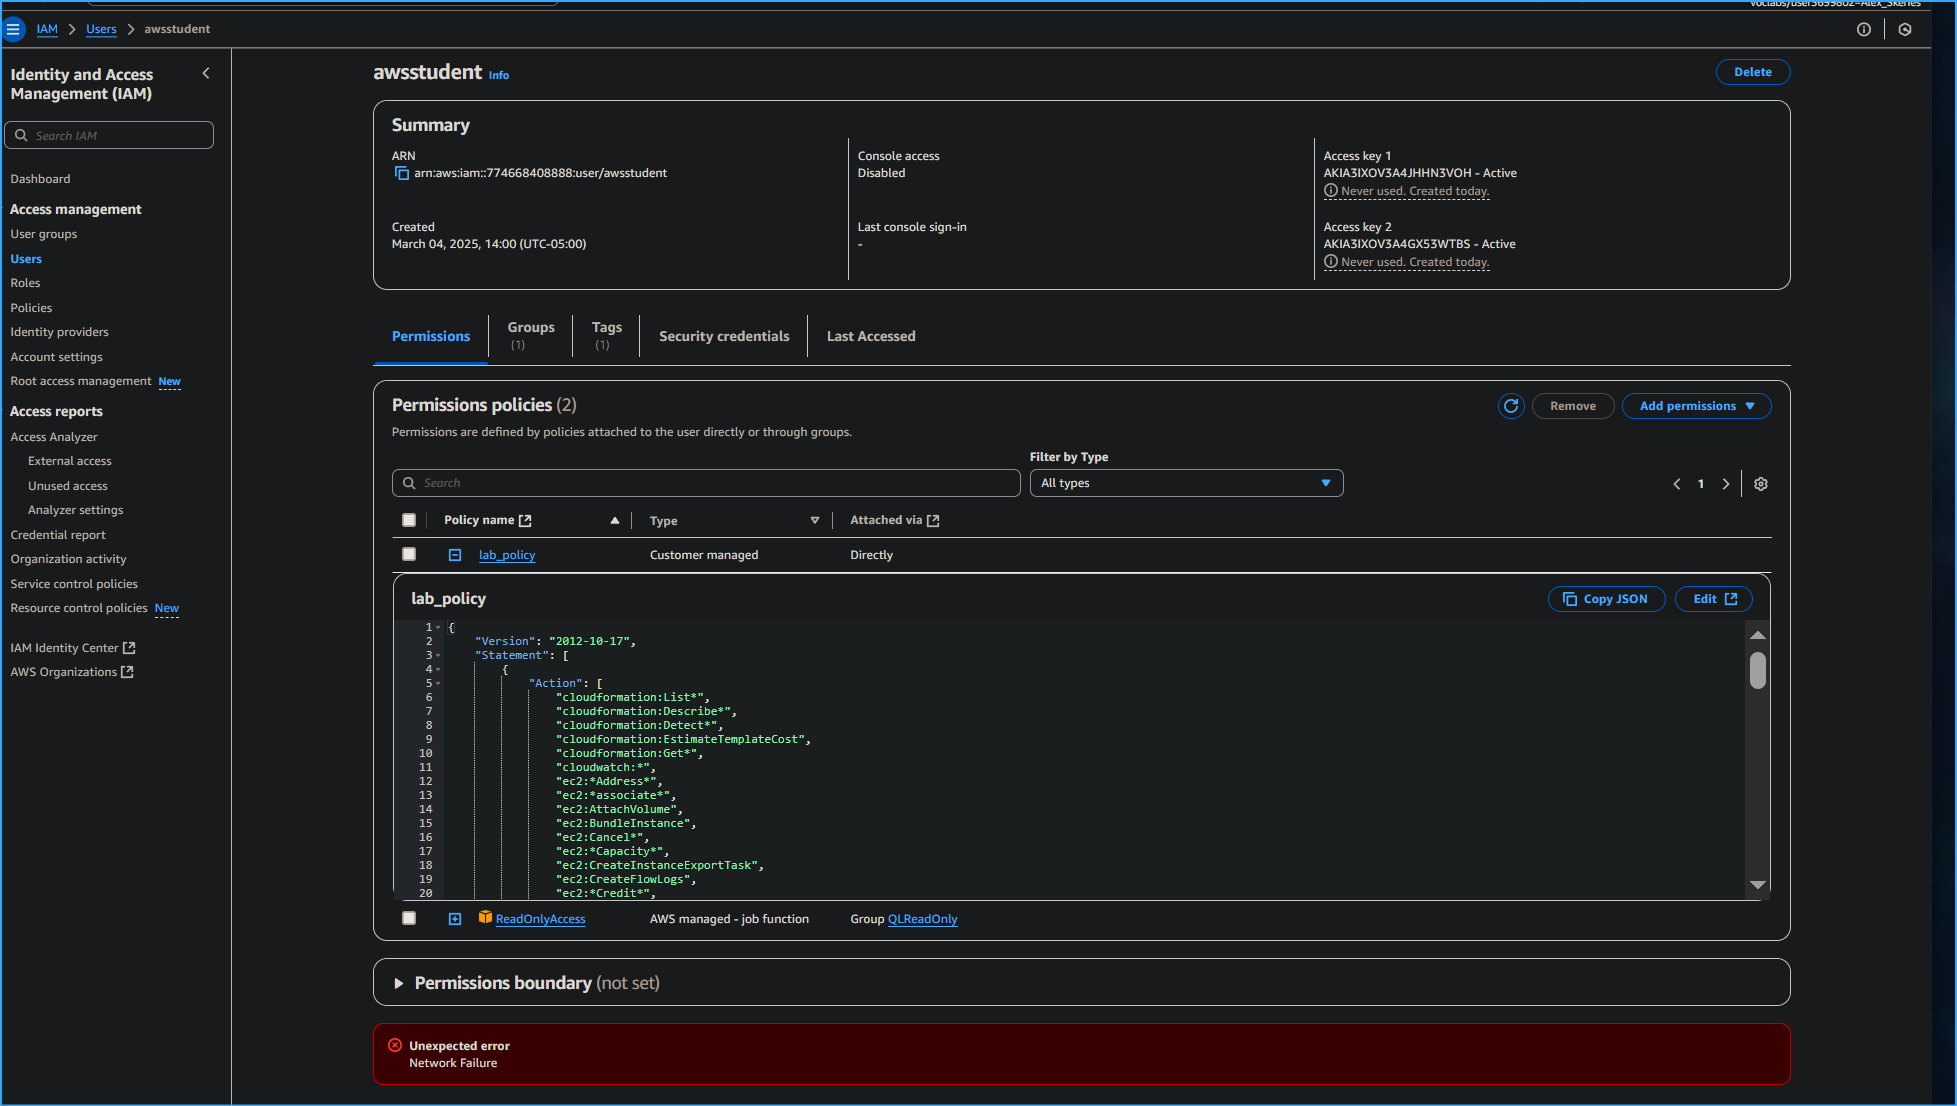
In the navigation pane, I clicked on Users, then selected awsstudent.
-
On the Permissions tab, I expanded the lab_policy by clicking the
arrow icon, and then clicked the {} JSON button.
I examined the lab_policy document, which was formatted in JSON. I
noticed that this IAM policy grants the awsstudent user access to
specific AWS services in the account.
-
I moved to the Security credentials tab and located the awsstudent
user's access key ID in the Access keys section.
I noted that once an access key is created, you must save the secret
access key locally at creation time. I found both the access key ID and
the secret access key in the Details dropdown list at the top of the
instructions.
Task 4: Configuring the AWS CLI to Connect to the AWS Account
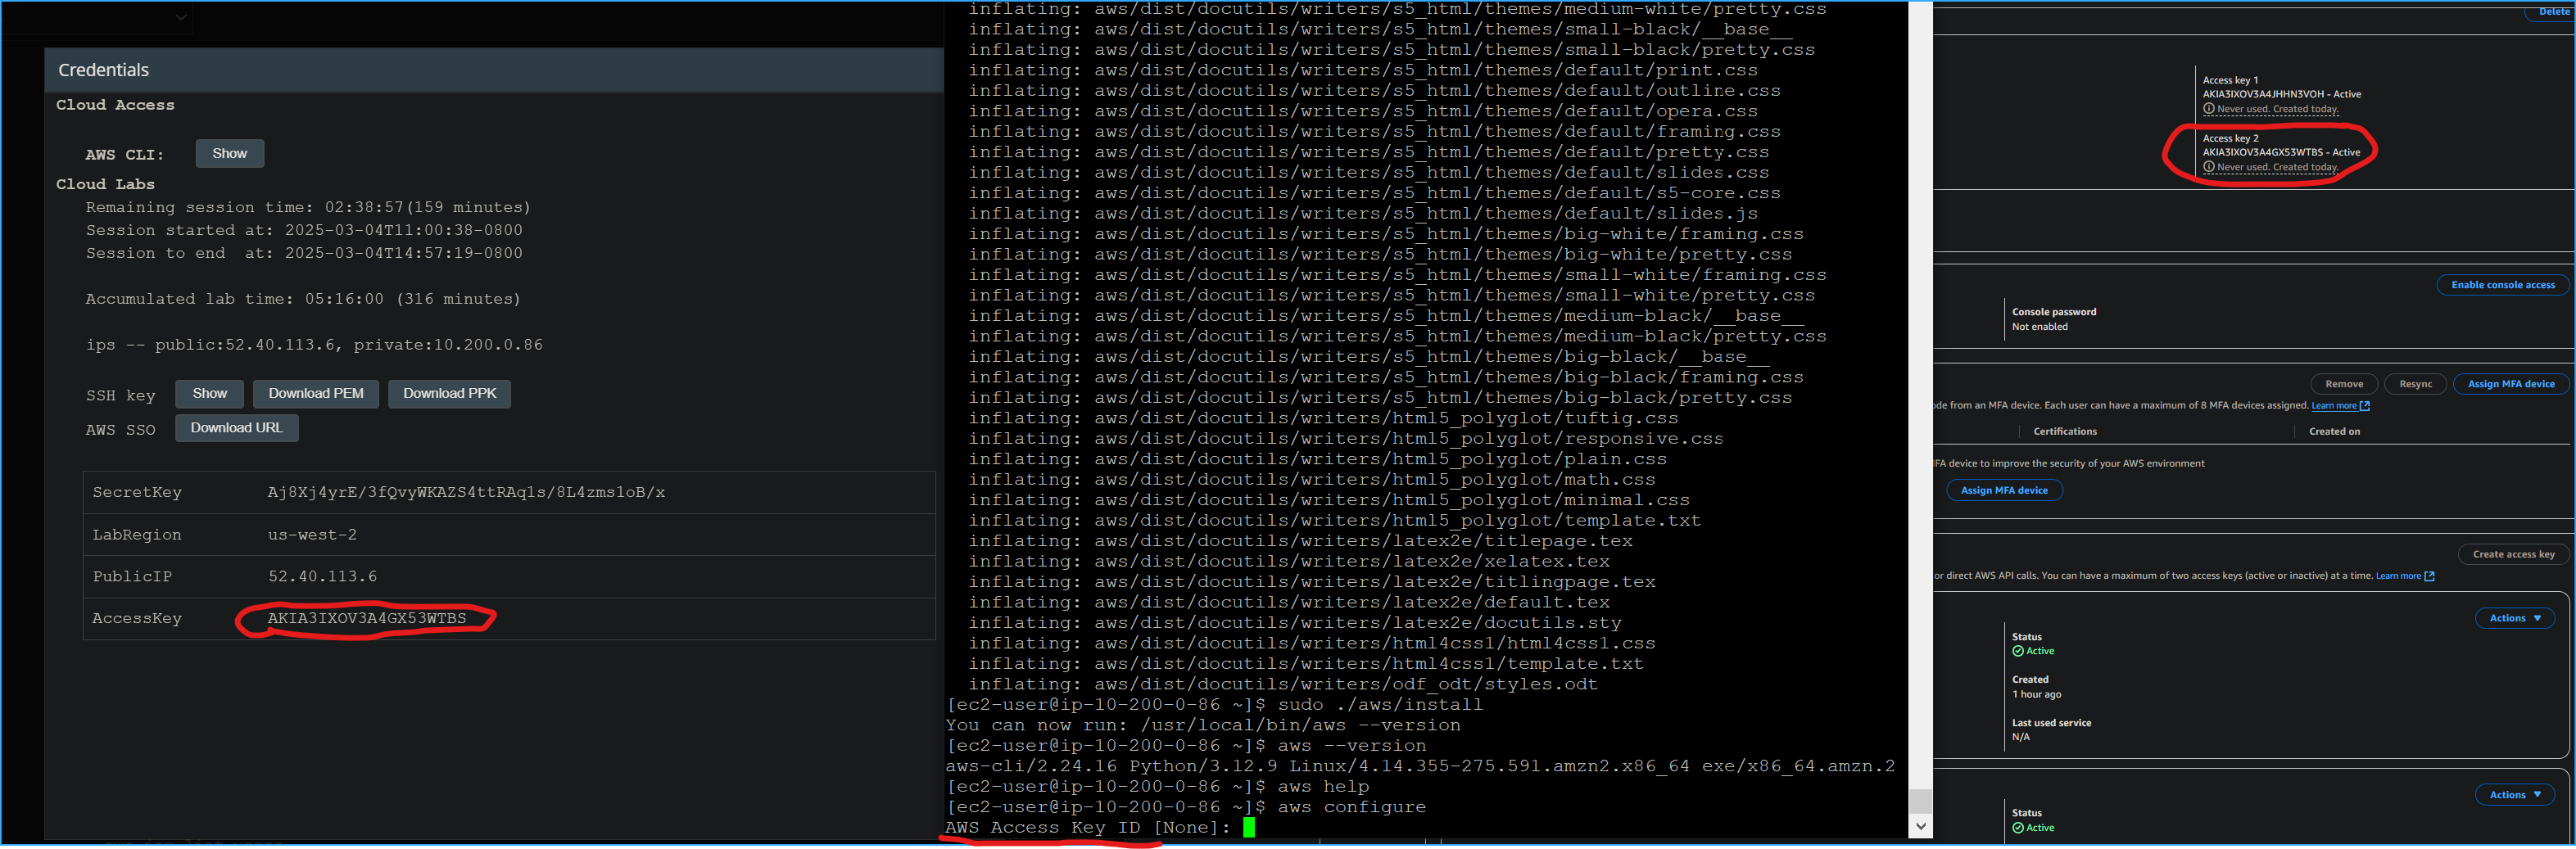
Back in my SSH session terminal window, I ran the configuration command:
aws configure
At the prompts, I entered the following information:
-
AWS Access Key ID: I copied and pasted the AccessKey
value from the Details dropdown.
-
AWS Secret Access Key: I copied and pasted the
SecretKey value from the Details dropdown.
-
Default region name: I entered
us-west-2
-
Default output format: I entered
json
Task 5: Observing IAM Configuration Details using the AWS CLI
To test if my configuration was working properly, I ran this command:
aws iam list-users
I was pleased to see that the test was successful—I received a JSON
response that included a list of IAM users in the account.
Activity 1 Challenge: Downloading the lab_policy Document
For this challenge, I needed to use the AWS CLI Command Reference
documentation and the AWS CLI to download the lab_policy document in a
JSON-formatted IAM policy document—the same document I had previously
seen in the AWS Management Console.
I approached this methodically:
-
First, I consulted the IAM AWS CLI Command Reference documentation to
understand what commands I would need. I found that clicking on the
hyperlinks for commands provided detailed information about what they
would return and how to use them.
-
I needed to list policies, but I had to filter for customer-managed
policies (local scope) since the lab_policy was a customer-managed
policy:
aws iam list-policies --scope Local
From the output, I identified the policy ARN for lab_policy:
arn:aws:iam::774668408888:policy/lab_policy
-
Next, I needed to find a command to get a specific policy version. I
discovered I would need the version number of the lab_policy document
to retrieve its JSON representation:
aws iam list-policy-versions --policy-arn
arn:aws:iam::774668408888:policy/lab_policy
This showed me that the default version was v1.
-
With the ARN and version ID in hand, I retrieved the specific JSON
representation:
aws iam get-policy-version --policy-arn
arn:aws:iam::774668408888:policy/lab_policy --version-id v1
This command displayed the full JSON document of the policy version.
-
Finally, I needed to save the output to a file. I used the > command
to pipe the output to a file:
aws iam get-policy-version --policy-arn
arn:aws:iam::774668408888:policy/lab_policy --version-id v1 >
lab_policy.json
This saved the JSON policy document to a file named lab_policy.json in
my current directory.
Throughout this process, I made sure to:
- Double-check the ARN and version ID to avoid errors
-
Review the saved JSON document to ensure it was complete and accurate
- Keep my commands organized for easy reference
Summary
I successfully installed the AWS CLI on a Red Hat Linux instance and
connected it to an AWS account. I also used the AWS CLI to retrieve
policy information by referencing AWS documentation.
Key Takeaways:
-
The AWS CLI allows me to manage and control multiple AWS services
through the command line, just as I could through the AWS Management
Console.
-
Different authentication methods are required for different access
points: the AWS CLI needs an access key ID and secret access key,
while the AWS Management Console requires a user name and password.
Looking back, I found it valuable to work through these tasks
step-by-step. Each command served a specific purpose, and by tracking
the output at each step, I was able to ensure I stayed on course
throughout the challenge.
×
![]()
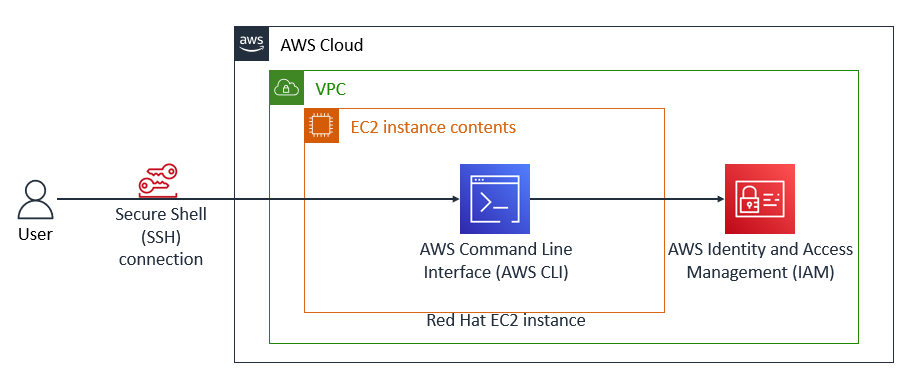 Final Architecture
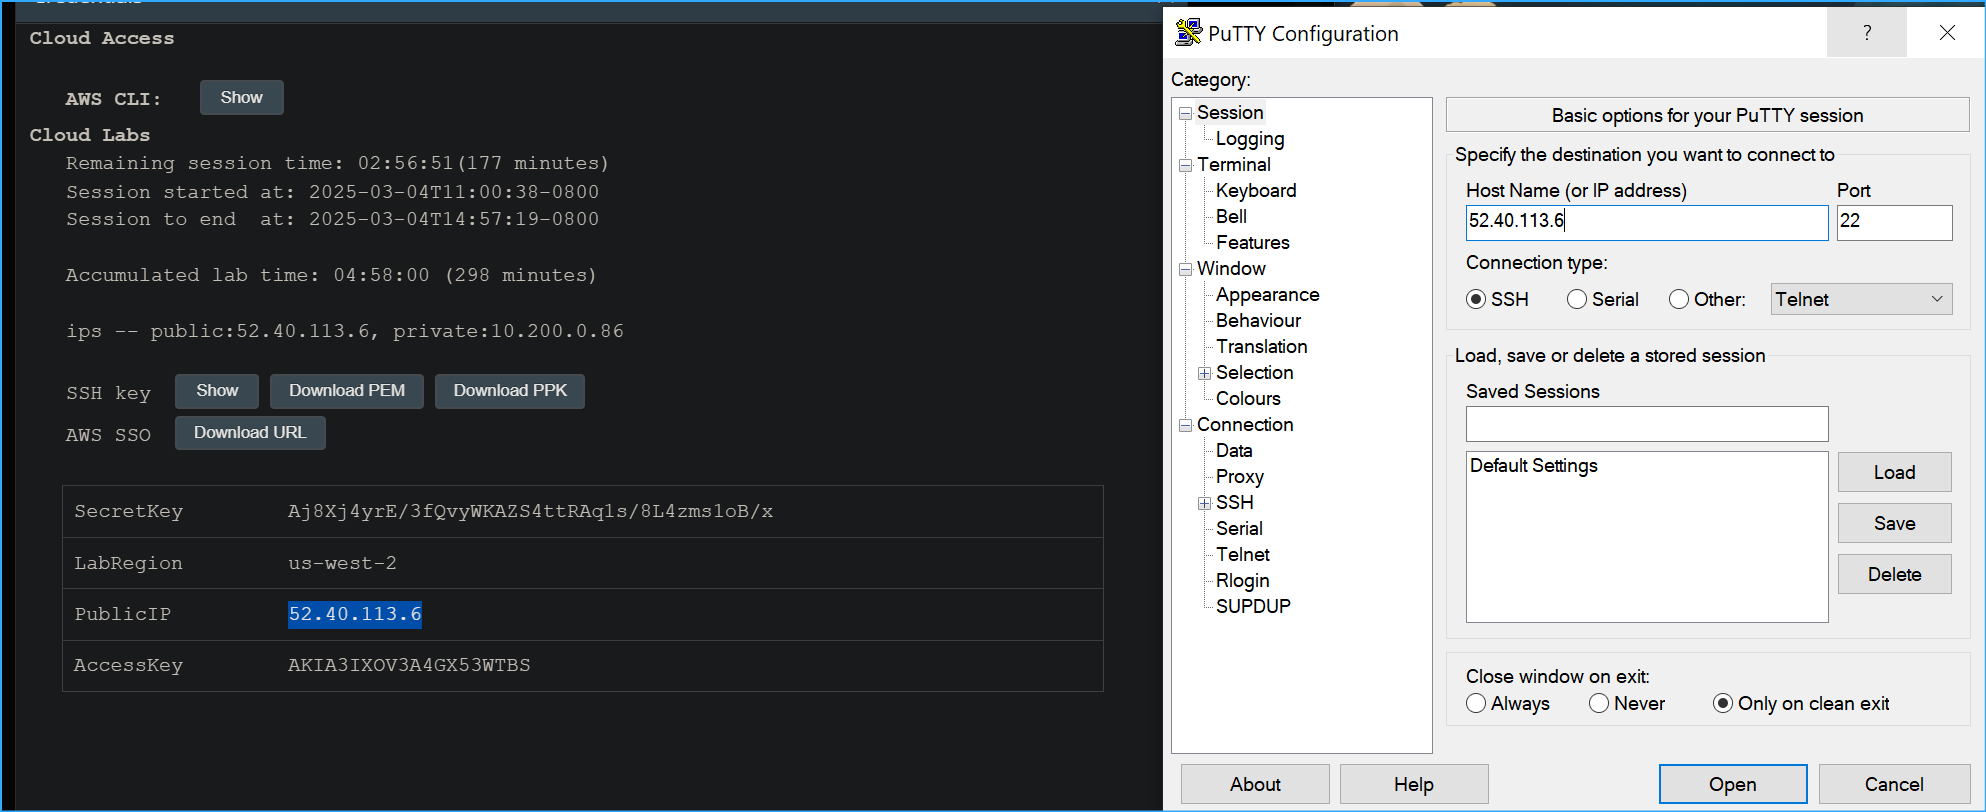 Configuring Putty One
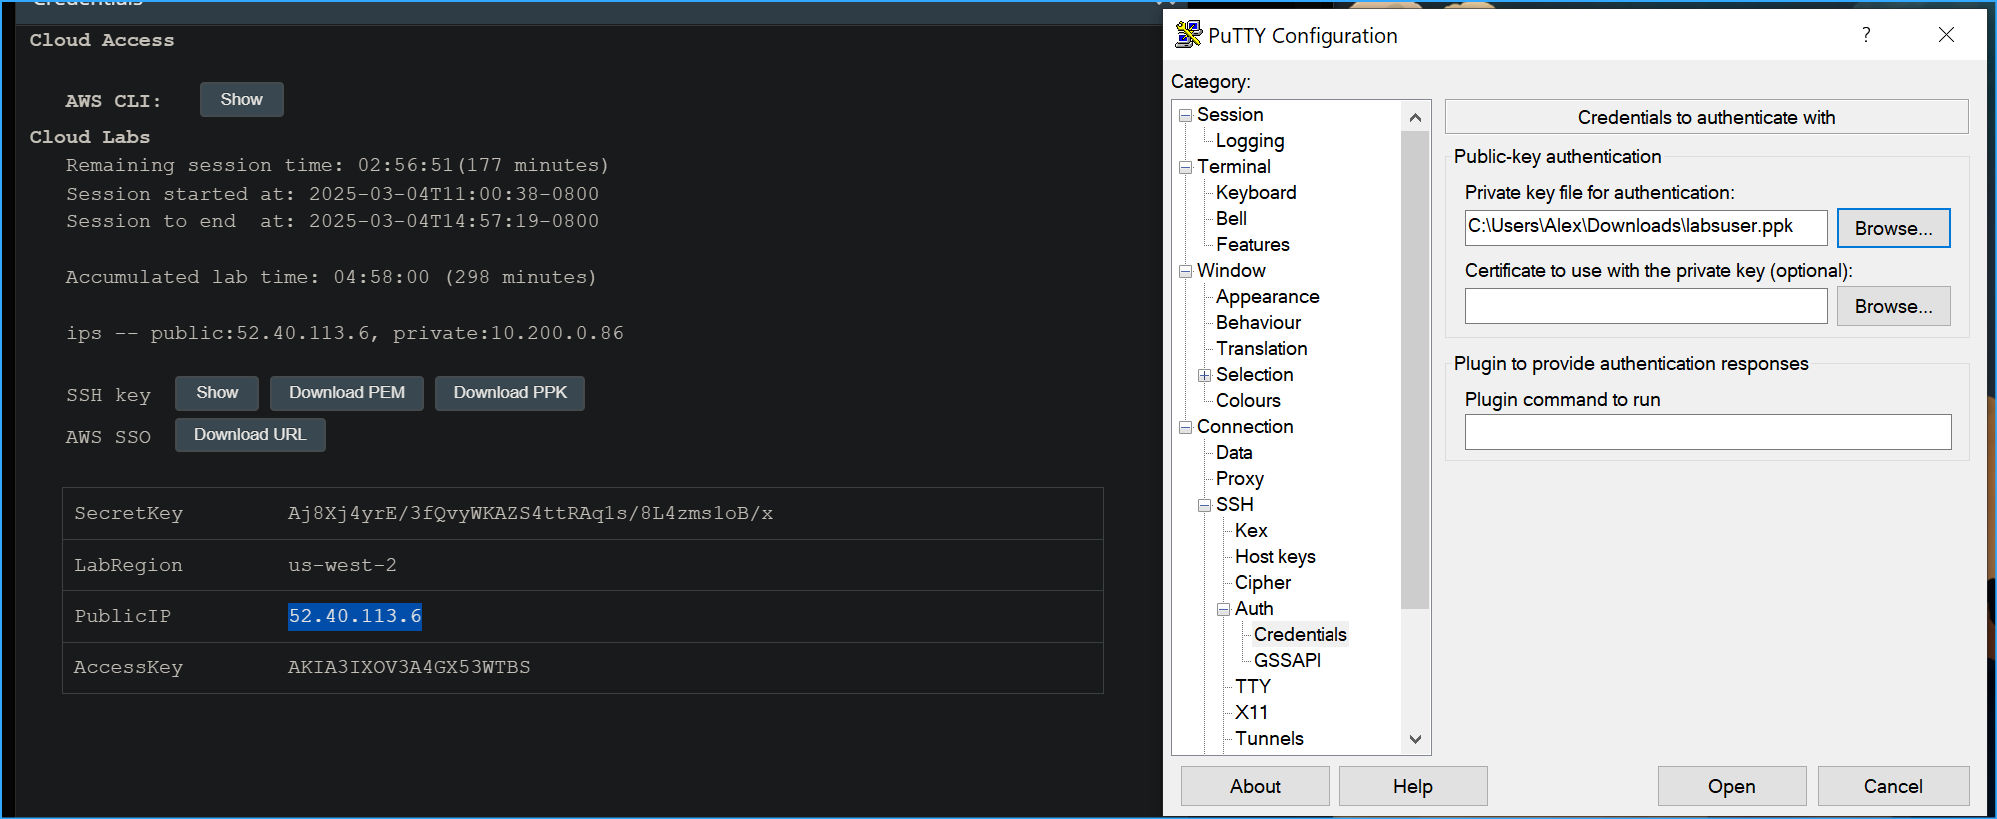 Configuring Putty Two
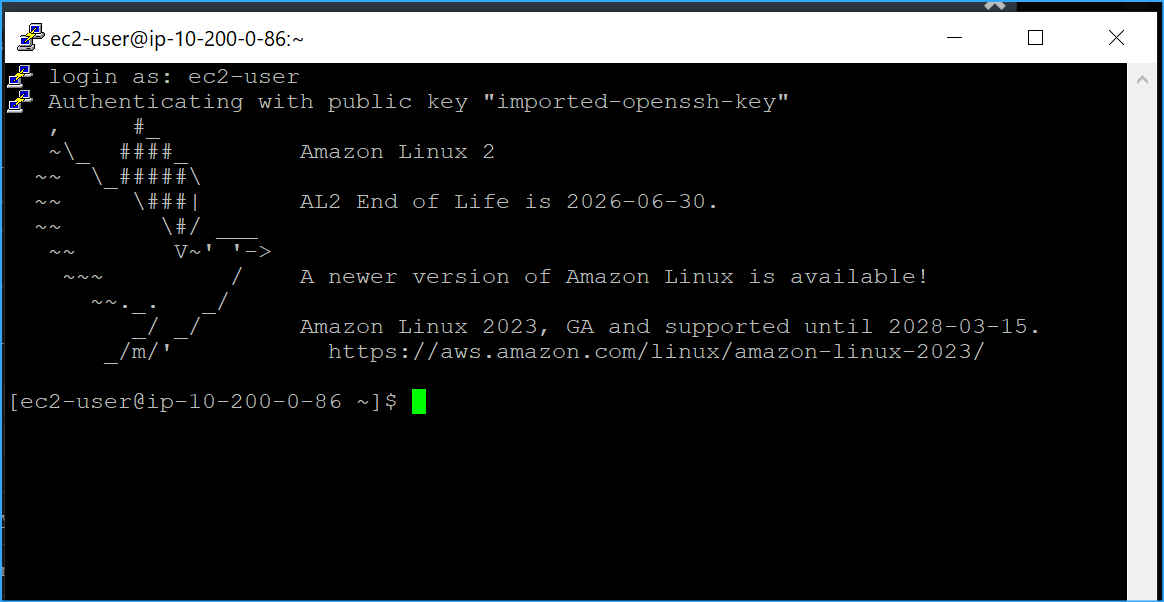 Connected To Putty
 First Wrote File To Current Dir Then Unzipped Then Ran Install
Program And Confirmed Install
First Wrote File To Current Dir Then Unzipped Then Ran Install
Program And Confirmed Install
 AWS Help CMD
 Lab Policy In JSON Granted To AWS Student
 AWS Student User Access Key
 Access Key ID
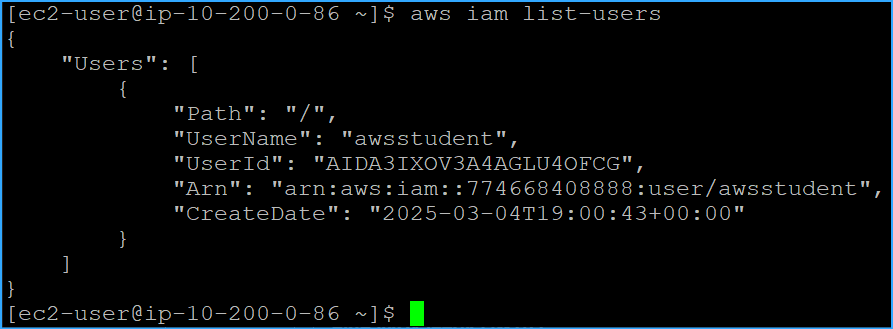 Ran IAM List Users CMD
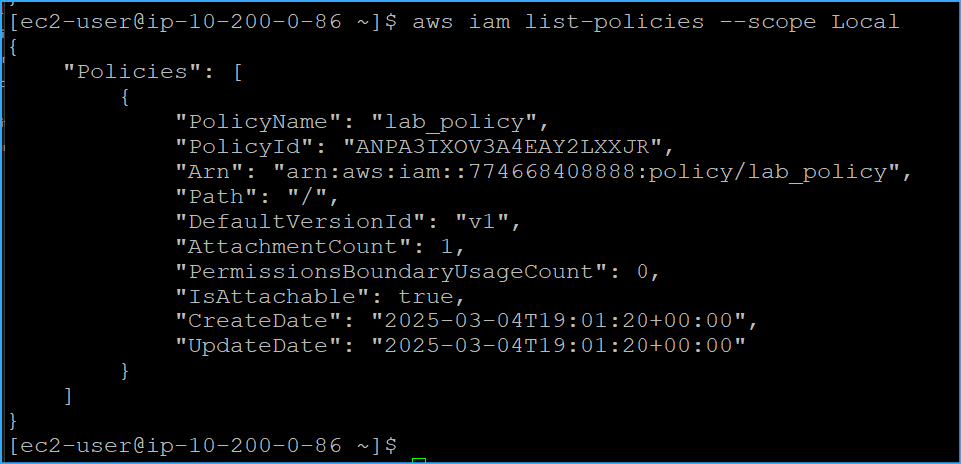 Ran IAM List Policies With Scope Local Parameter
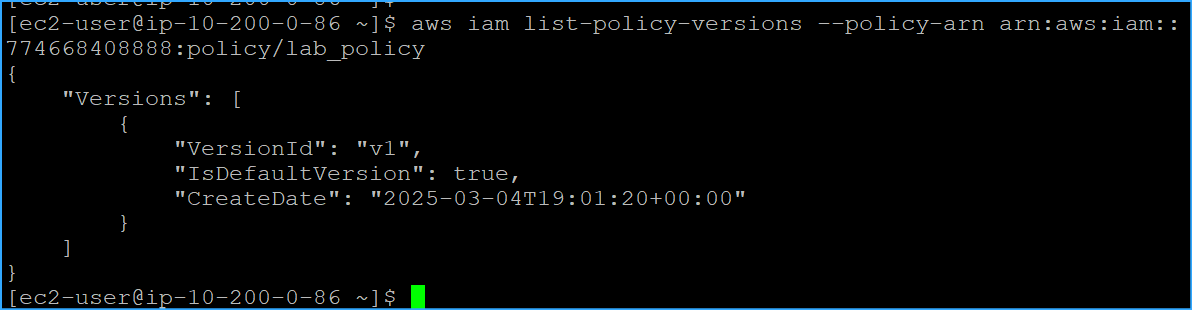 CMD To List All Versions Of Lab Policy With ARN
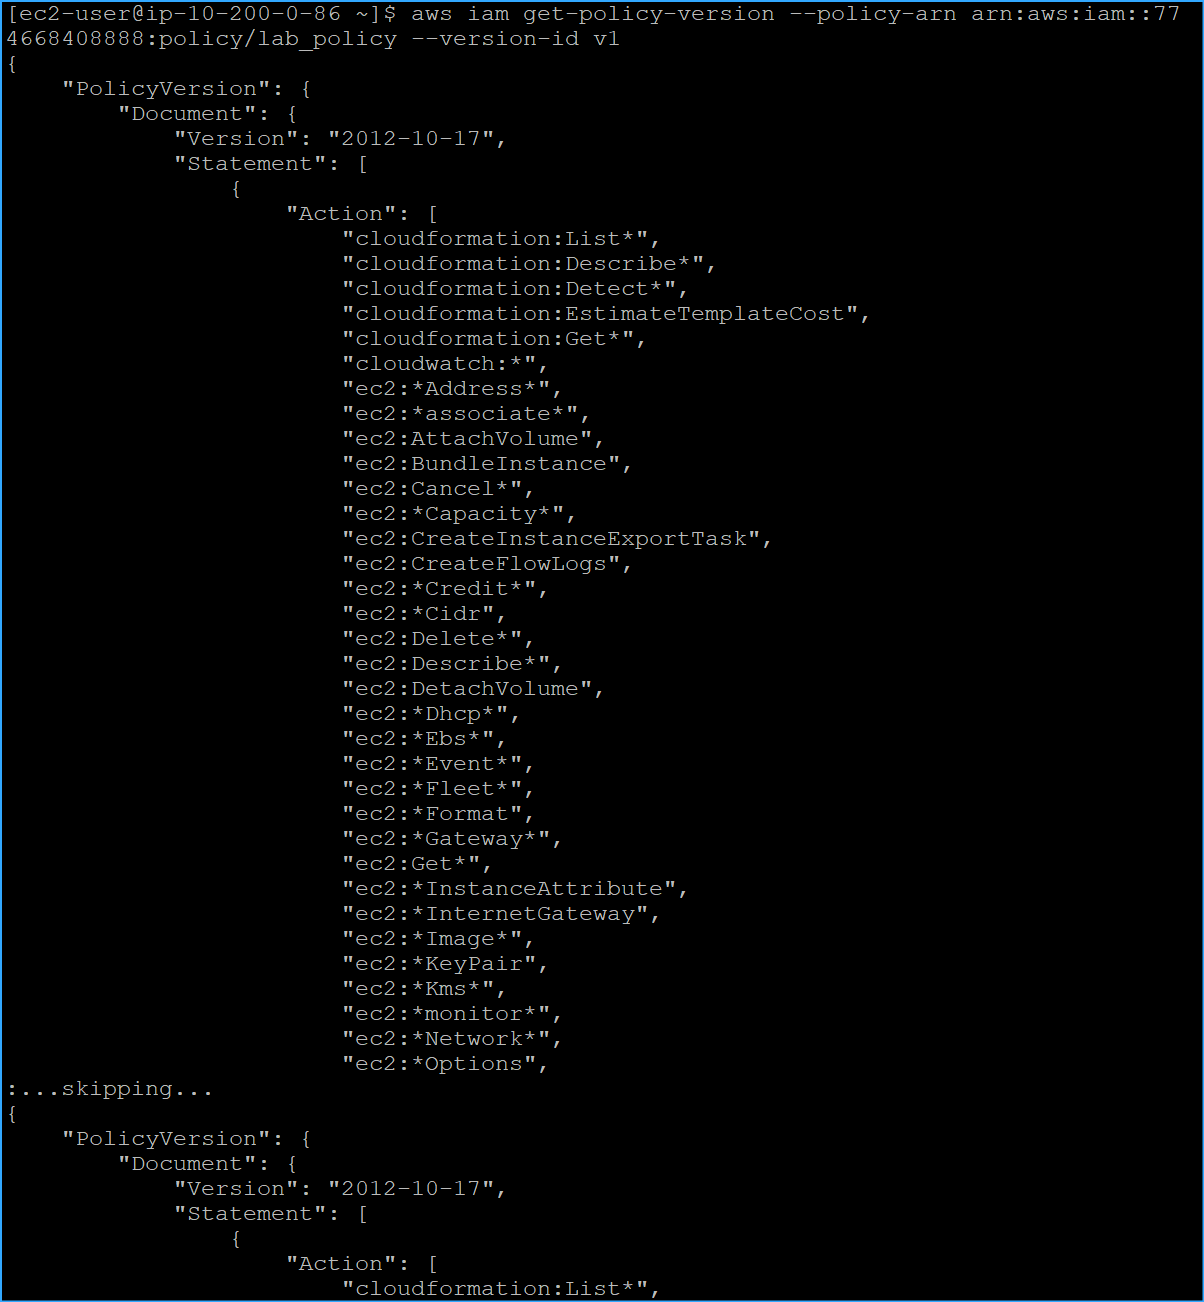 CMD Retrieved JSON Representation Of Specific Policy Version
One
CMD Retrieved JSON Representation Of Specific Policy Version
One
 CMD Retrieved JSON Representation Of Specific Policy Version
Two
CMD Retrieved JSON Representation Of Specific Policy Version
Two
 Saved JSON Policy Document To A File